 Home > SSW Standards > Developer Access > SSW How to do a Mail Merge in Microsoft Word using Access Data
How to do a Mail Merge in Word Using Access Data
|
This
document assumes the use of "Select Clients" which is on the Reports
Tab of SSW Time PRO!
If you are not a Time PRO! user please read on as the instructions
are still usable.
|
Mail merging
is a process whereby merge fields interspersed through your standard
or boilerplate text are replaced from a data source when printed.
This feature allows you to send a one document to many recipients, with
the correct details for each.
How is this
done using Microsoft Word and Access?
It's easy!
Just start Word. Select Tools/Mail Merge
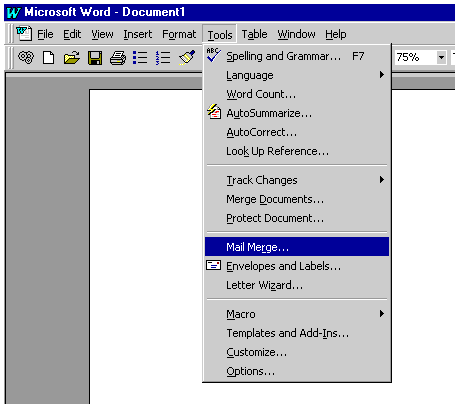
Figure
1: Invoking the Mail Merge Menu
A Wizard
called the Mail Merge Helper will appear. The first step is to tell it
which document will contain the merge fields.
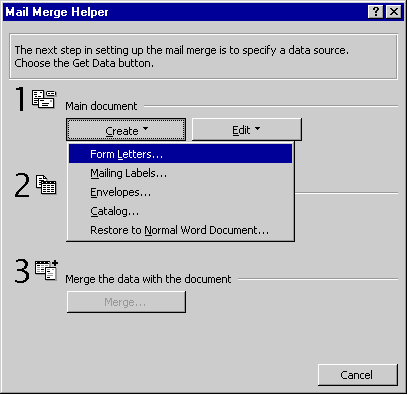
Figure
2: The Mail Merge Helper
You can choose
to use the currently open Word document or to open another.
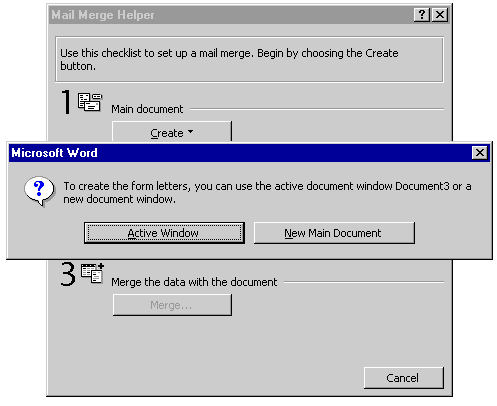
Figure
3: Choosing a document to merge to
If you want
to use Access as the source of data for your merge fields, choose the
"Open Data Source " option, under the "Get Data" item.

Figure
4: Opening a Link to Access
This will
open up a file navigation dialog box, such as shown below. Use this
dialog box to point to the correct Access database file which contains
the merge field information. For example, if you are using Time PRO! then
select C:\Timepro\Ssw97.mdb.
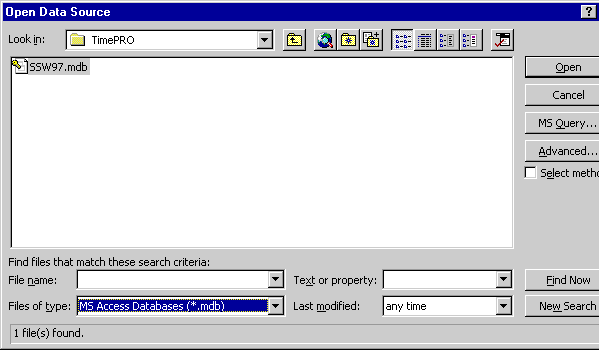
Figure
5: Selecting the right Access database
Since a single
database can contain more than one table, a further dialog box appears
enabling you to choose which table (or query) you wish to use a source
for your merge fields. In this case, the "SelectClient" table is selected.
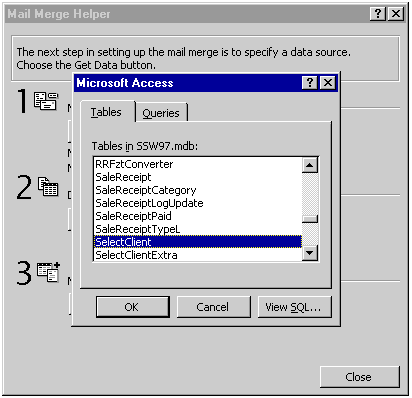
Figure
6: Choosing a table from a large database
The merge
fields will appear in a temporary toolbar in Word, corresponding to
the field names in the "SelectClient" table. click it, and a drop-down
selection of merge fields appears. Just select a field and it is inserted
into the document.
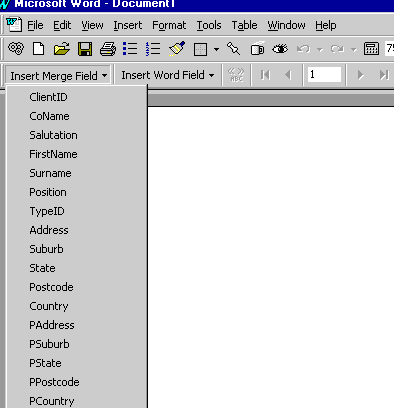
Figure
7: A drop down selection of merge fields to choose from
In this example,
the merge fields from "SelectClient" table have been inserted in between
the standard text. Once merged, the correct value of each record will
be substituted where the merge fields are located.

Figure
8: Mixing your boilerplate text with the merge fields
Now that
the document is done, are you ready for the merge? If you don't want to
use all the records in the "SelectClient" table then you can either delete
unwanted records through the SelectClient form (in Time PRO!) Or you can
use the "Query Options" in the Mail Merge Helper.
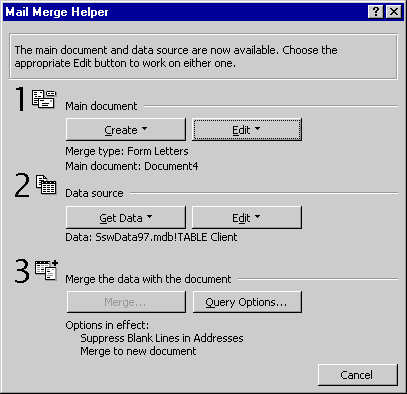
Figure
9: Mail Merge Helper Query Options
Clicking
on "Query Options" brings up a control which lets you choose a part of
your table. In this example, the user is limiting the mail merge only
to those whose suburb is "Chatswood".
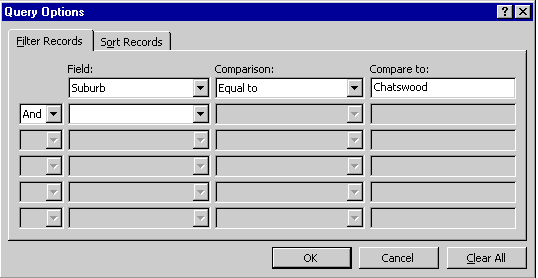
Figure
10: Refining the records which will be merged into the document
The Mail
Merge helper will now let you output the result in a variety of ways.
You might want to examine the mail merge before you print it. Select "Merge
to: New document". This will create a single document containing all the
letters that would have been printed had you chosen to. You can look through
it to see that no awkward substitutions have taken place.
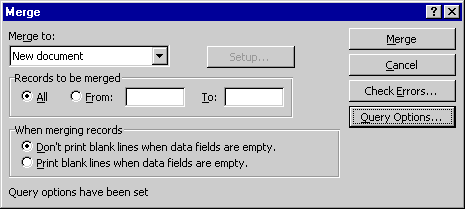
Figure
11: This creates one document containing each merge instance
When you
are satisfied, select "Merge to Printer" or "Merge to Email". This will
create one document for each instance, using the boilerplate text
and subsitituting the correct details in each case.
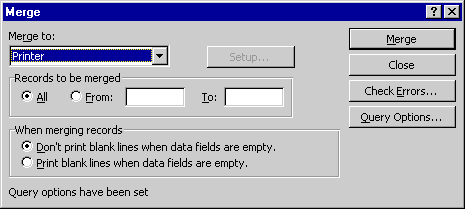
Figure
12: Selecting "Merge to Printer" means the printing will print each merge
instance as a separate document