Home
>
Archive
>
Standards
>
DeveloperDotNet
>
Using TFS to Edit Website
Editing XML Web Pages
- Open Team Explorer Window
-
- Figure: Open Team Explorer Window
- Checkout and Edit file
- If failed, Stop working and asking for help
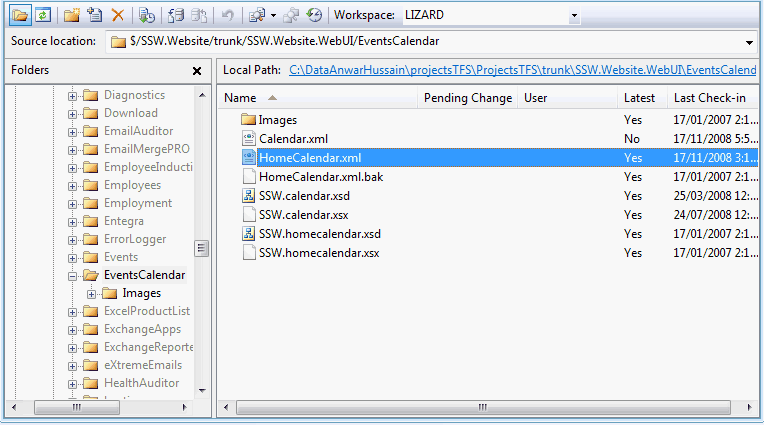
- Get Latest Version of File From ANT Server
-
- Figure: Getting Update file from ANT Server
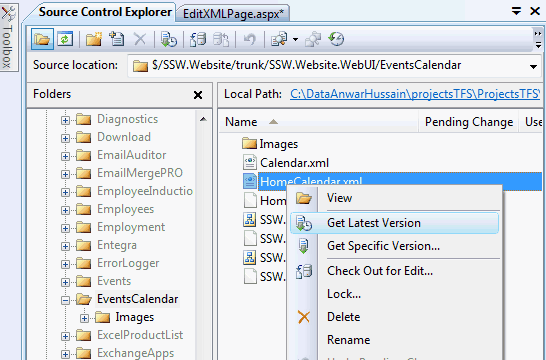
- Check Out for Editing
-
Open "HomeCalender.xml" from Source Control Explorer Window for
Editing
- Update "HomeCalender.xml" for an upcoming events
-
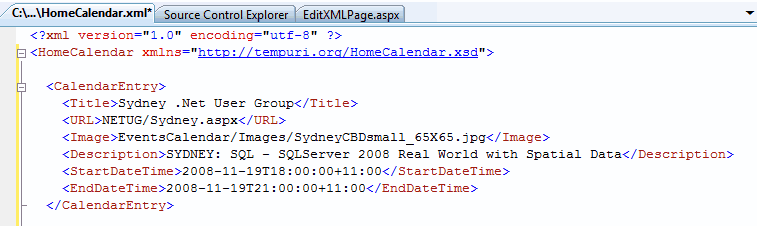
- Figure: Updating XML Page for an Upcoming Events
- For New Event follow the same syntax from Calender Entry
- Insert New Title
- Give URL of the page for link.
- Give correct path of the image
- Description of the Event
- Start and Ending Date of the Event
Adding a new folder to the TFS
-
Go into Explorer (tip: hold click the windows button and the e key
). Navigate to your
ProjectsTFS\trunk\SSW.Website.WebUI\StandardsInternal\_EmployeeTestArea\.
You will see the folder name you created in the previous step.
- Copy this folder and rename it to your name.
-
Go back into Visual Studio. Select the _EmployeeTestArea folder name
and then click the Add Files Icon
-
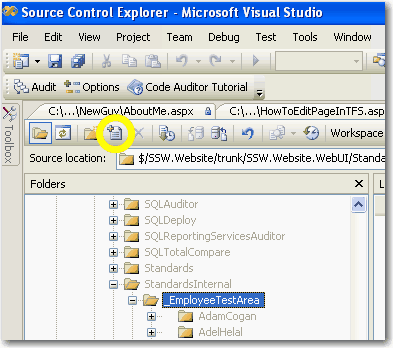
- Figure: Add Files Icon
-
The "Add to Source Control" window appears. Click "Add Folder.."
button. The "Browse Folder" window appears.
-
Navigate in this window to the _EmployeeTestArea and then to the
folder that you just created in Explorer. Select it and click the
"OK" button. The "Browse Folder" window disappears.
-
Click the "OK" button in the "Add to Source Window". It disappears.
- Your new folder appears with a "plus" icon on left hand side.
- Open "aboutme.aspx" which is inside your newly created folder
-
Update "aboutme.aspx" with your own details. Don't forget to change
the Title of the window as well. In order to reduce spam the
"@ssw.com.au" of the email address is depicted as an image so
write only your username between the tags.
-
Right Click your folder name and select "Check in Pending
Changes". Your folder now exists on the TFS as well as your local
machine.
Use FTPSync to Copy from Ant to the Web
**NOW MOVED TO USING BEYOND COMPARE**
(see
below
)
-
Start FTPSync.
-
Click the AU server and press the "connect" button.
-
Browse to the correct file location on both your local computer
and the remote server.
-
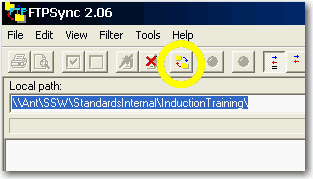
- Figure: Compare Files Icon
-
Press the compare files icon.
-
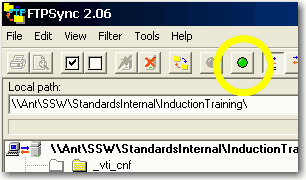
- Figure: Synchronise Icon
-
Press the green circle button on the right.
-
The program asks you to confirm the transfer. Check the
timestamp checkbox.
-
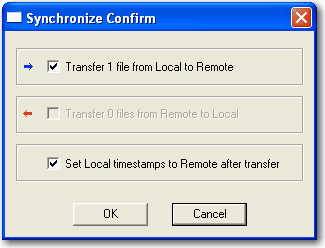
-
Figure: Always tick Checkbox for "Set Local timestamps to Remote
after transfer"
-
Click the "OK" button.
Note
: Sync files to US server first and then to AU server.
Reason
: Make sure always have synchronized timestamps on AU server and
local server.
We only care about Timestamps on AU server because the local
server recalls last timestamp. This way the colour of the file
names becomes black not red or blue.
Note: Did you follow the
synchronization standards
?
Use "Beyond Compare" to Copy from local (e.g. ant) to the Web
- Start Beyond Compare.
-
Choose local computer to one side and Web server to the other side
then press the "OK" button.
-
- Figure: Choose the server
-
Browse to the correct file location on both your local computer
and the remote server.
-
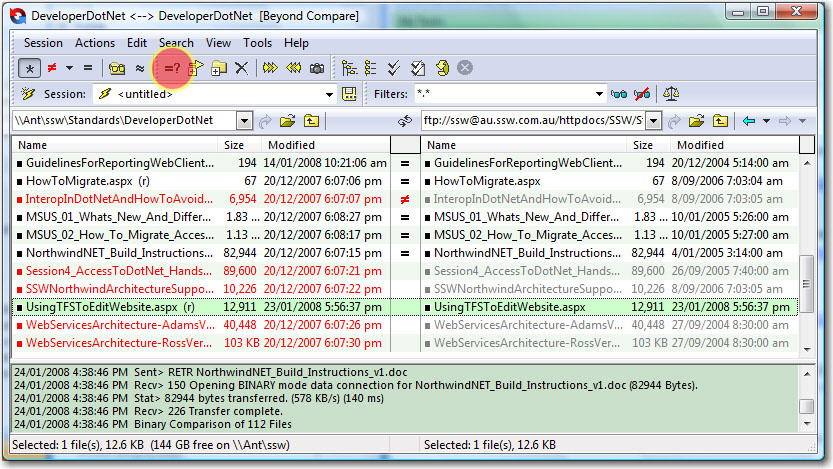
- Figure: Compare Files Icon
- Press the compare files icon.
-
Select the file on your local computer side then press the copy
button
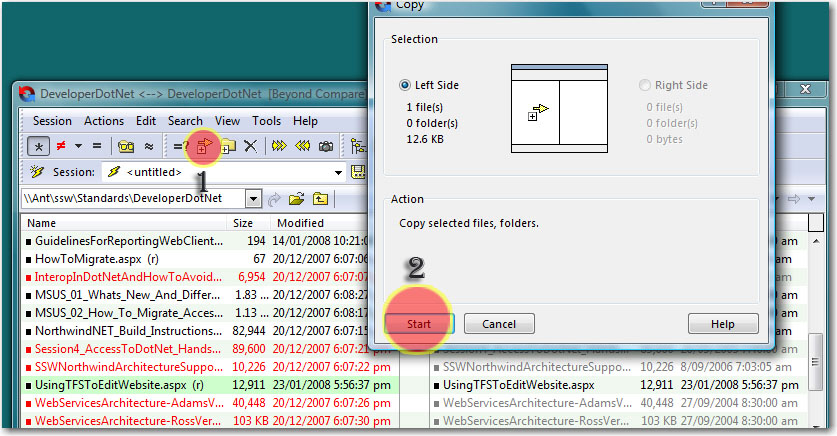
- The program asks you to confirm the transfer. Press OK
-
-
Figure: Always tick Checkbox for "Set Local timestamps to Remote
after transfer"
- Click the "OK" button.
Note
: Sync files to US server first and then to AU server.
Reason
: Make sure always have synchronized timestamps on AU server and
local server.
We only care about Timestamps on AU server because the local
server recalls last timestamp. This way the colour of the file
names becomes black not red or blue.
Note: Did you follow the
synchronization standards
?
Acknowledgements
Adam Cogan
Alvin Shen