This rule has been archived
SharePoint - Do you know how to create a rule? (internal only)
Loading last updated info...
This is how you created a rule in SharePoint.
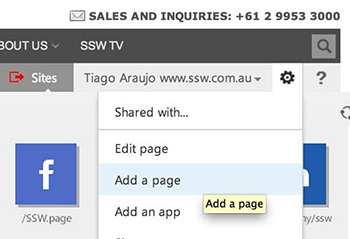
- Log in to /admin
- Click on “Add a page”
Note: Each rule will be a “page” on SharePoint – with its own URL - differently from old aspx, where rules were sections on a single page.
- Add the URL

Note: We use only the most important words of a rule title.
Note: Friendly URL should be automatically generated like:
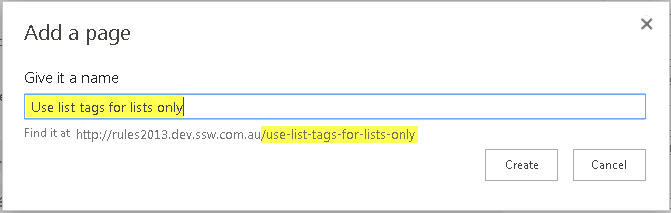
- Add the rule title

- Add the rule category (so that it will be shown on the summary page):

- IMPORTANT – Adding rule intro + contentYou have 3 options:
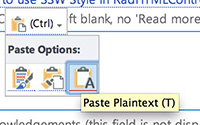
Option 1 – Start from scratch - Write content down on the fields Option 2 - Paste the content from another place - a HTML page on the browser or a Word document Warning: Select the “ Paste Plaintext ” when pasting or you will have a lot of work later

❌ Figure: Bad example - Terrible example - A HTML generated by pasting normally – not plaintext. All the margins, font family, external images aren’t necessary
✅ Figure: Good example - If you don’t select this, SharePoint will generate a lot of inline styling, which will cause triple work to fix
Since you have pasted the plain text, you’ll need to manually add the styling - headings, links, captions etc.

Figure: Add the styles. In SharePoint is very similar to Microsoft Word. The custom styles will have pretty much everything you'll need without having to touch the HTML code
Option 3 - Paste the HTML code (recommended if you already have the content in the internet and the HTML is neat enough)
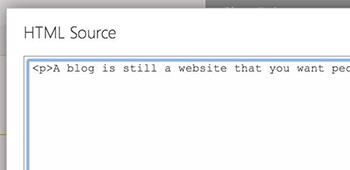
- Open up and copy the HTML code (from “view source” on a browser)
- Go back to SharePoint (where you are adding the rule)
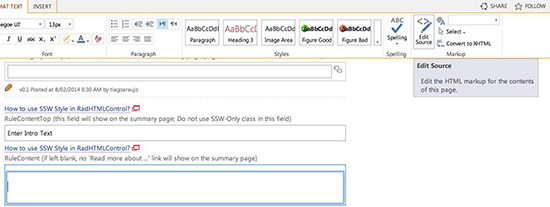
- Click in the field you are going to edit
- In the “Format Text” ribbon, click “Edit Source”
- Paste the HTML there
- Now fix up the images – This part is a bit painful
- Firstly you will need to save all the images to your local drive
- We don’t use the "Insert > Picture" on the ribbon because it doesn’t generate the HTML code we use as default as per Do you use the right HTML/CSS code to add the useful figure/caption?
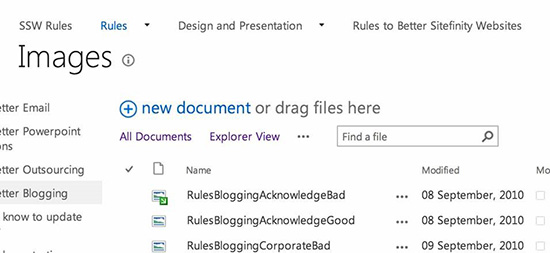
- Instead, upload them to the Images folder - /PublishingImages/
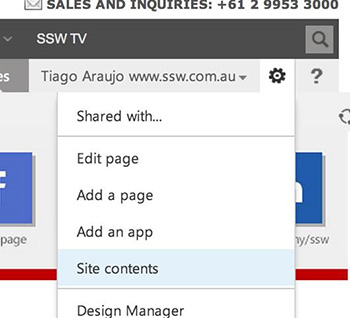
- Go to “Site Contents”
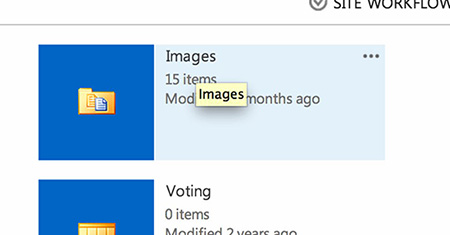
- Click on “Images”
- Drag the images from your local drive to the Images folder in SharePoint:
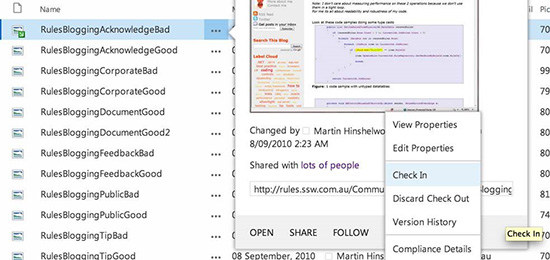
- Make sure you “Check In” all the images (otherwise they won’t be visible for anonymous users)
- On the screen above you can see the path for each image. Copy it so you can paste into the HTML.
- Double check the links – you might have got a relative link E.g. <a href=”../company/Offices.aspx”> which will not work because it’s now on a different site. So you will need to make it absolute E.g. <a href=” http://www.ssw.com.au/ssw/company/Offices.aspx ”>
- Add the rule intro
Try to have a catch at the end so the user will want to read the rest of the rule. E.g. “ To reply to a bug effectively and efficiently in your emails, you need to include:”
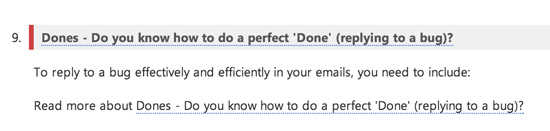
Figure: The “Brief Blurb” should clearly explain what the rule is about and have a catch at the end
- Add the rule content

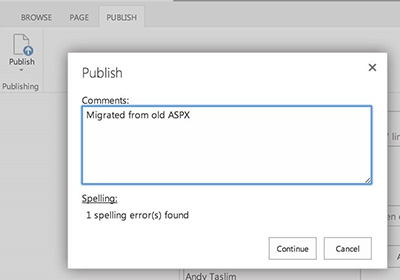
- Hit “Publish”, add your comments and “Continue”
 Note: "Check in a major version" equals "Publish", so you can choose to "Check in a major version" instead of "Publish".
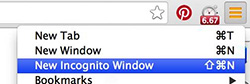
 - Test on a browser you aren’t logged in. Tip: In Chrome, select “New Incognito Window”
- Check on the summary page (e.g. RulesToBetterSomething/ ) if the order is correct
If not it’s not correct, you can change the order of rules by following the instructions as per the section below:
 Tip: You might need to refresh the cache – See “Rule Cache Management” also on the section above.
Congratulations, you’ve just added a rule!
To increase traction in the community you should tweet it:
E.g. “I just added a rule on [link] #SSWRules”