Do you know when to mockup your API?
Loading last updated info...
Designing your API up front can be very useful where you have a significant amount of backend development to complete before there is sufficient functionality for front end development to easily commence.
Rather than waiting for the backend to be complete, the APIs can be agreed on up front. Tools like Azure API Management then allow you to mock up the APIs with sample data, allowing the front end development to commence much sooner.
The key benefit of using mocked APIs is being able to present the frontend to stakeholders for feedback really early.
First, watch the first 5 minutes of this video for a general introduction:
Watch Adam Cogan and William Liebenberg discuss the benefits:
Steps to create and test a mocked API endpoint
To complete the following steps, you need to create an instance of Azure API Management in your subscription.
TIP: If you have Azure Credits, the Developer (NO SLA) edition is the cheapest option to test most of the features offered by API Management.
Step 1 - Create Blank API
- Select Blank API

Figure: Create a blank API
Step 2 - Describe your API
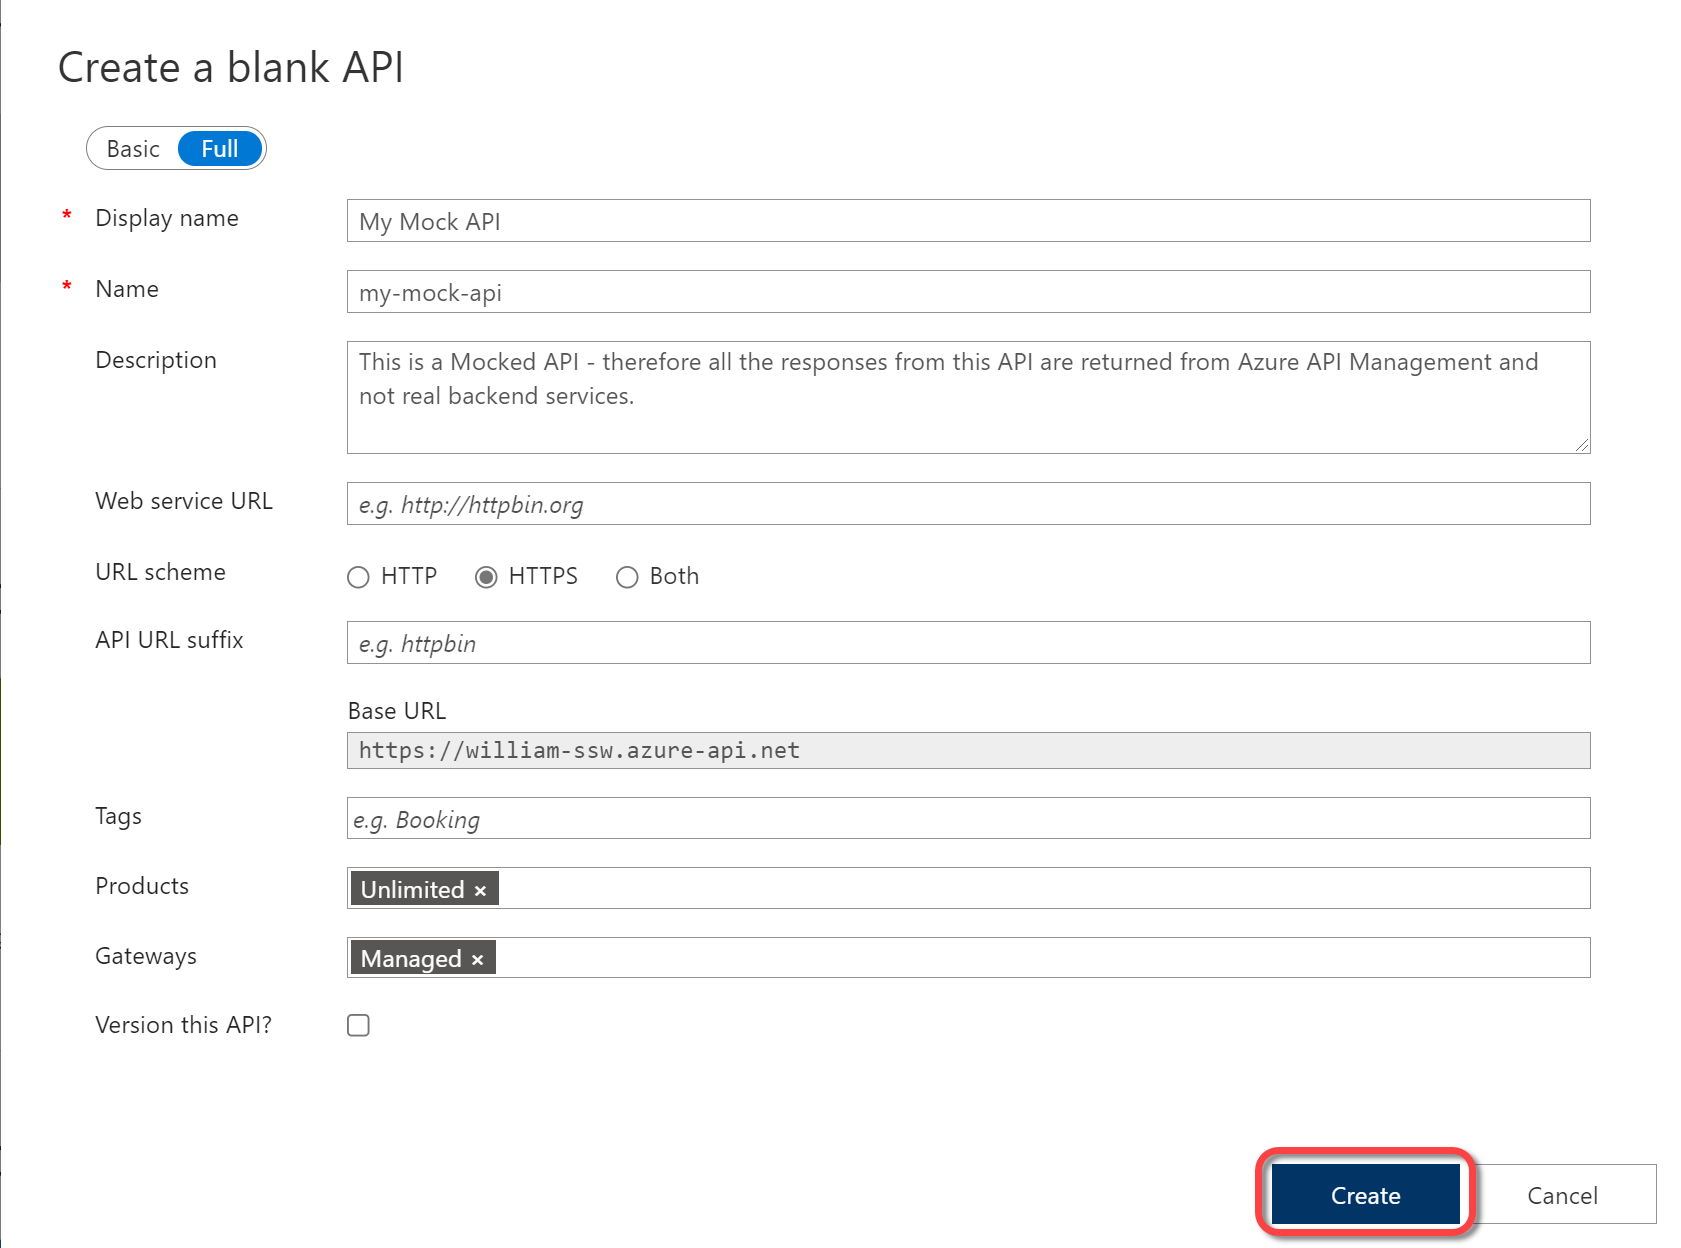
Figure: Describe your API
- Click Create
Step 3 - Add an Operation
- Select your API from the API list
- Click Add operation
- Specify the Display name, Name and URL of your operation
- Display name is a UI friendly display name that shows up in the Operations list
- Name is the programatic name of the operation that can be referenced programatically in policies

Figure: Adding a new Operation
Step 4 - Add response
- Click Add response
- Select the appropriate response code (e.g 200 OK)
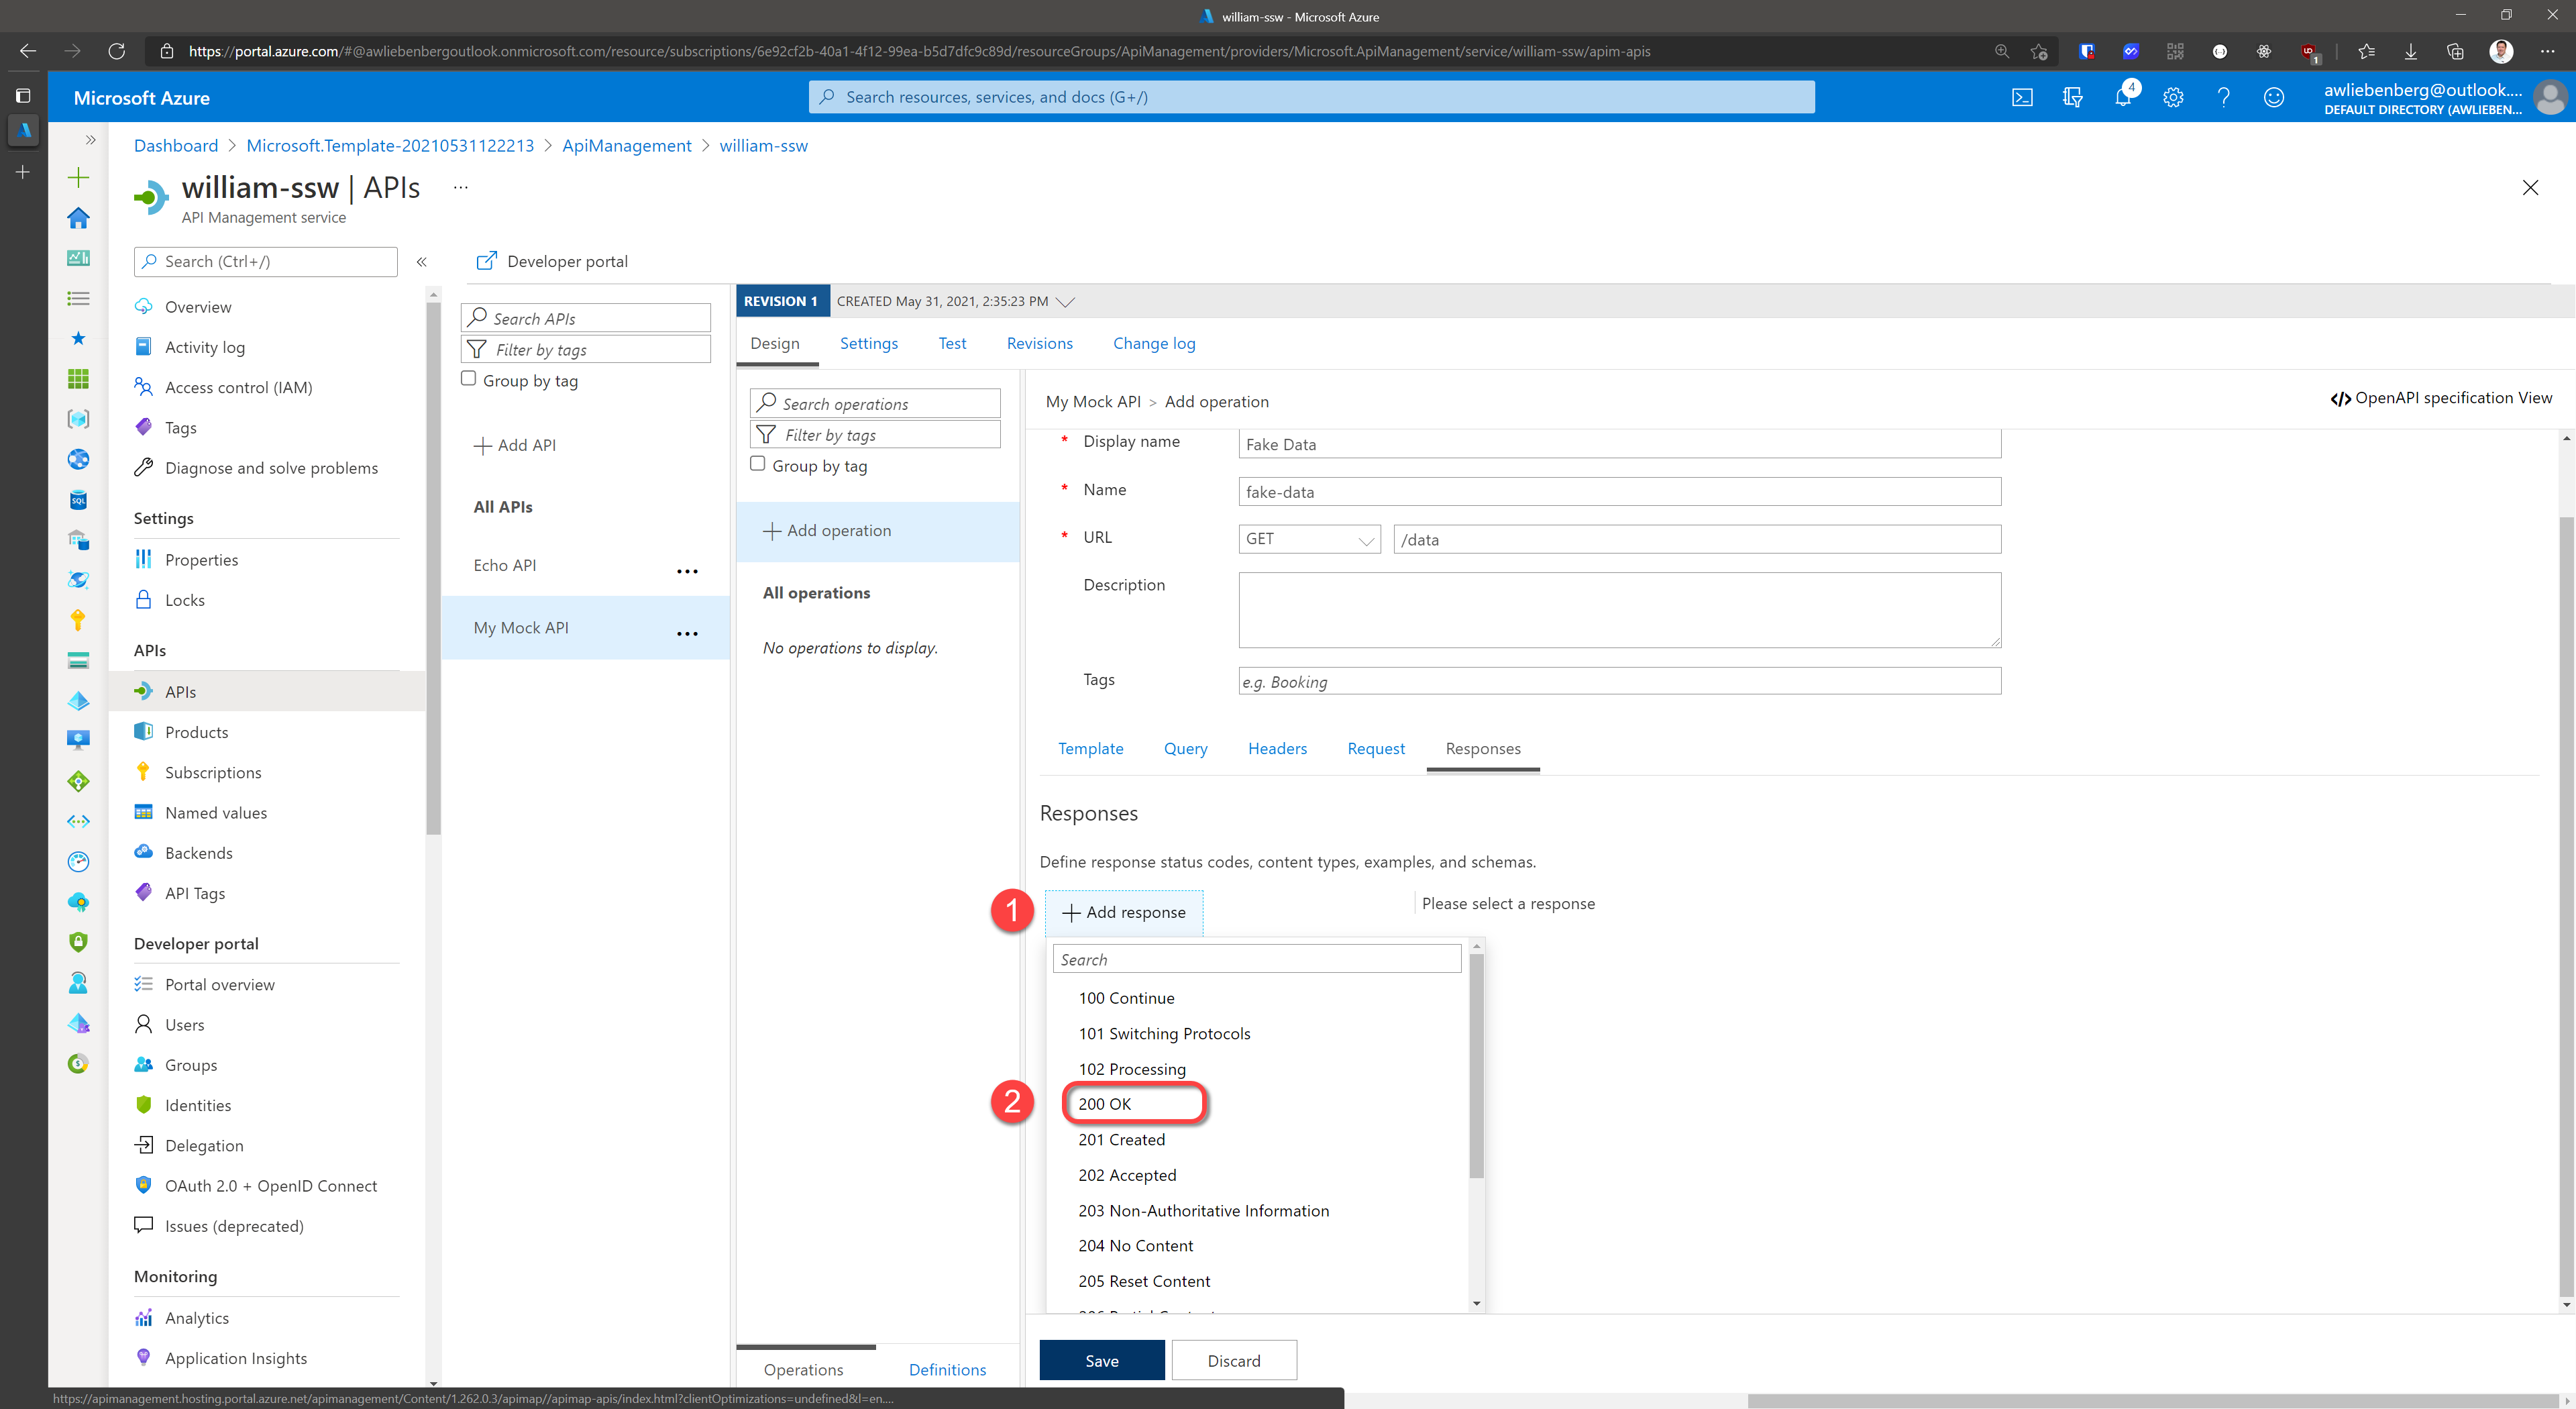
Figure: Add a response
Step 5 - Add representation
- Specify the Content Type as
application/json - Specify the Sample as
{ "data": "fake" } - Click Save
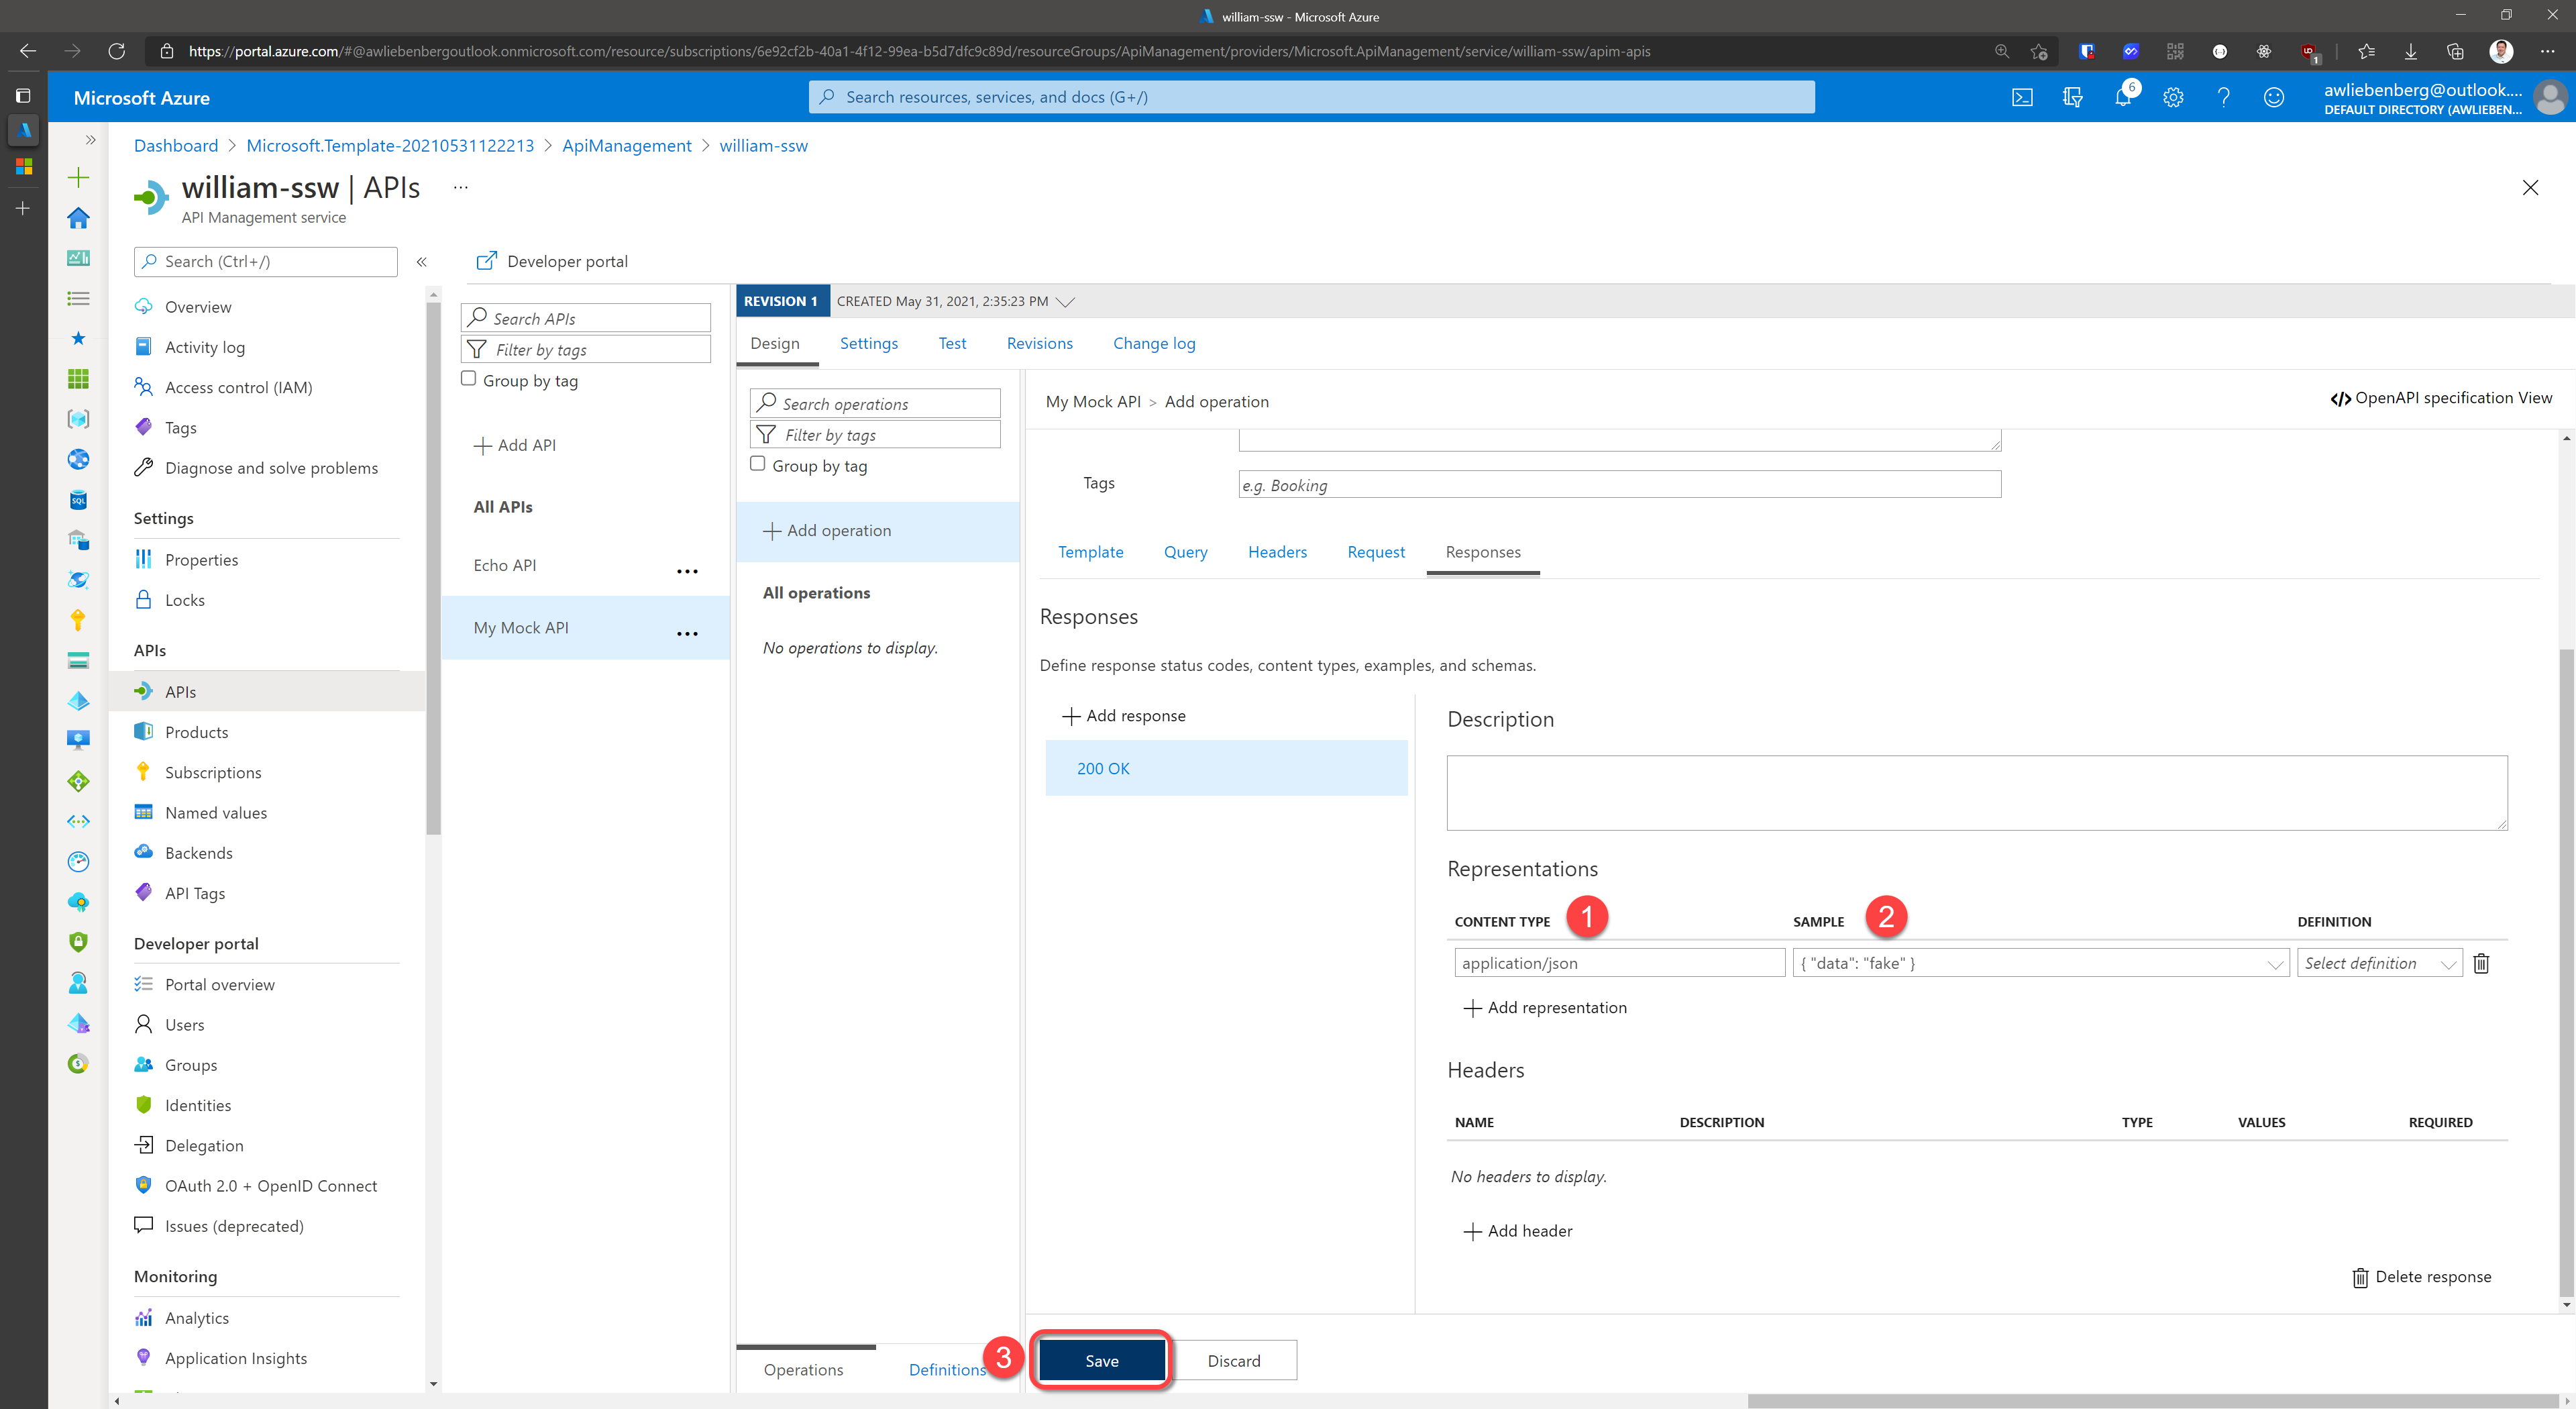
Figure: Add a representation for your response with fake data

Figure: Operation added successfully
Step 6 - Add Mock Response Policy
- Click Add policy
- Select Mock responses
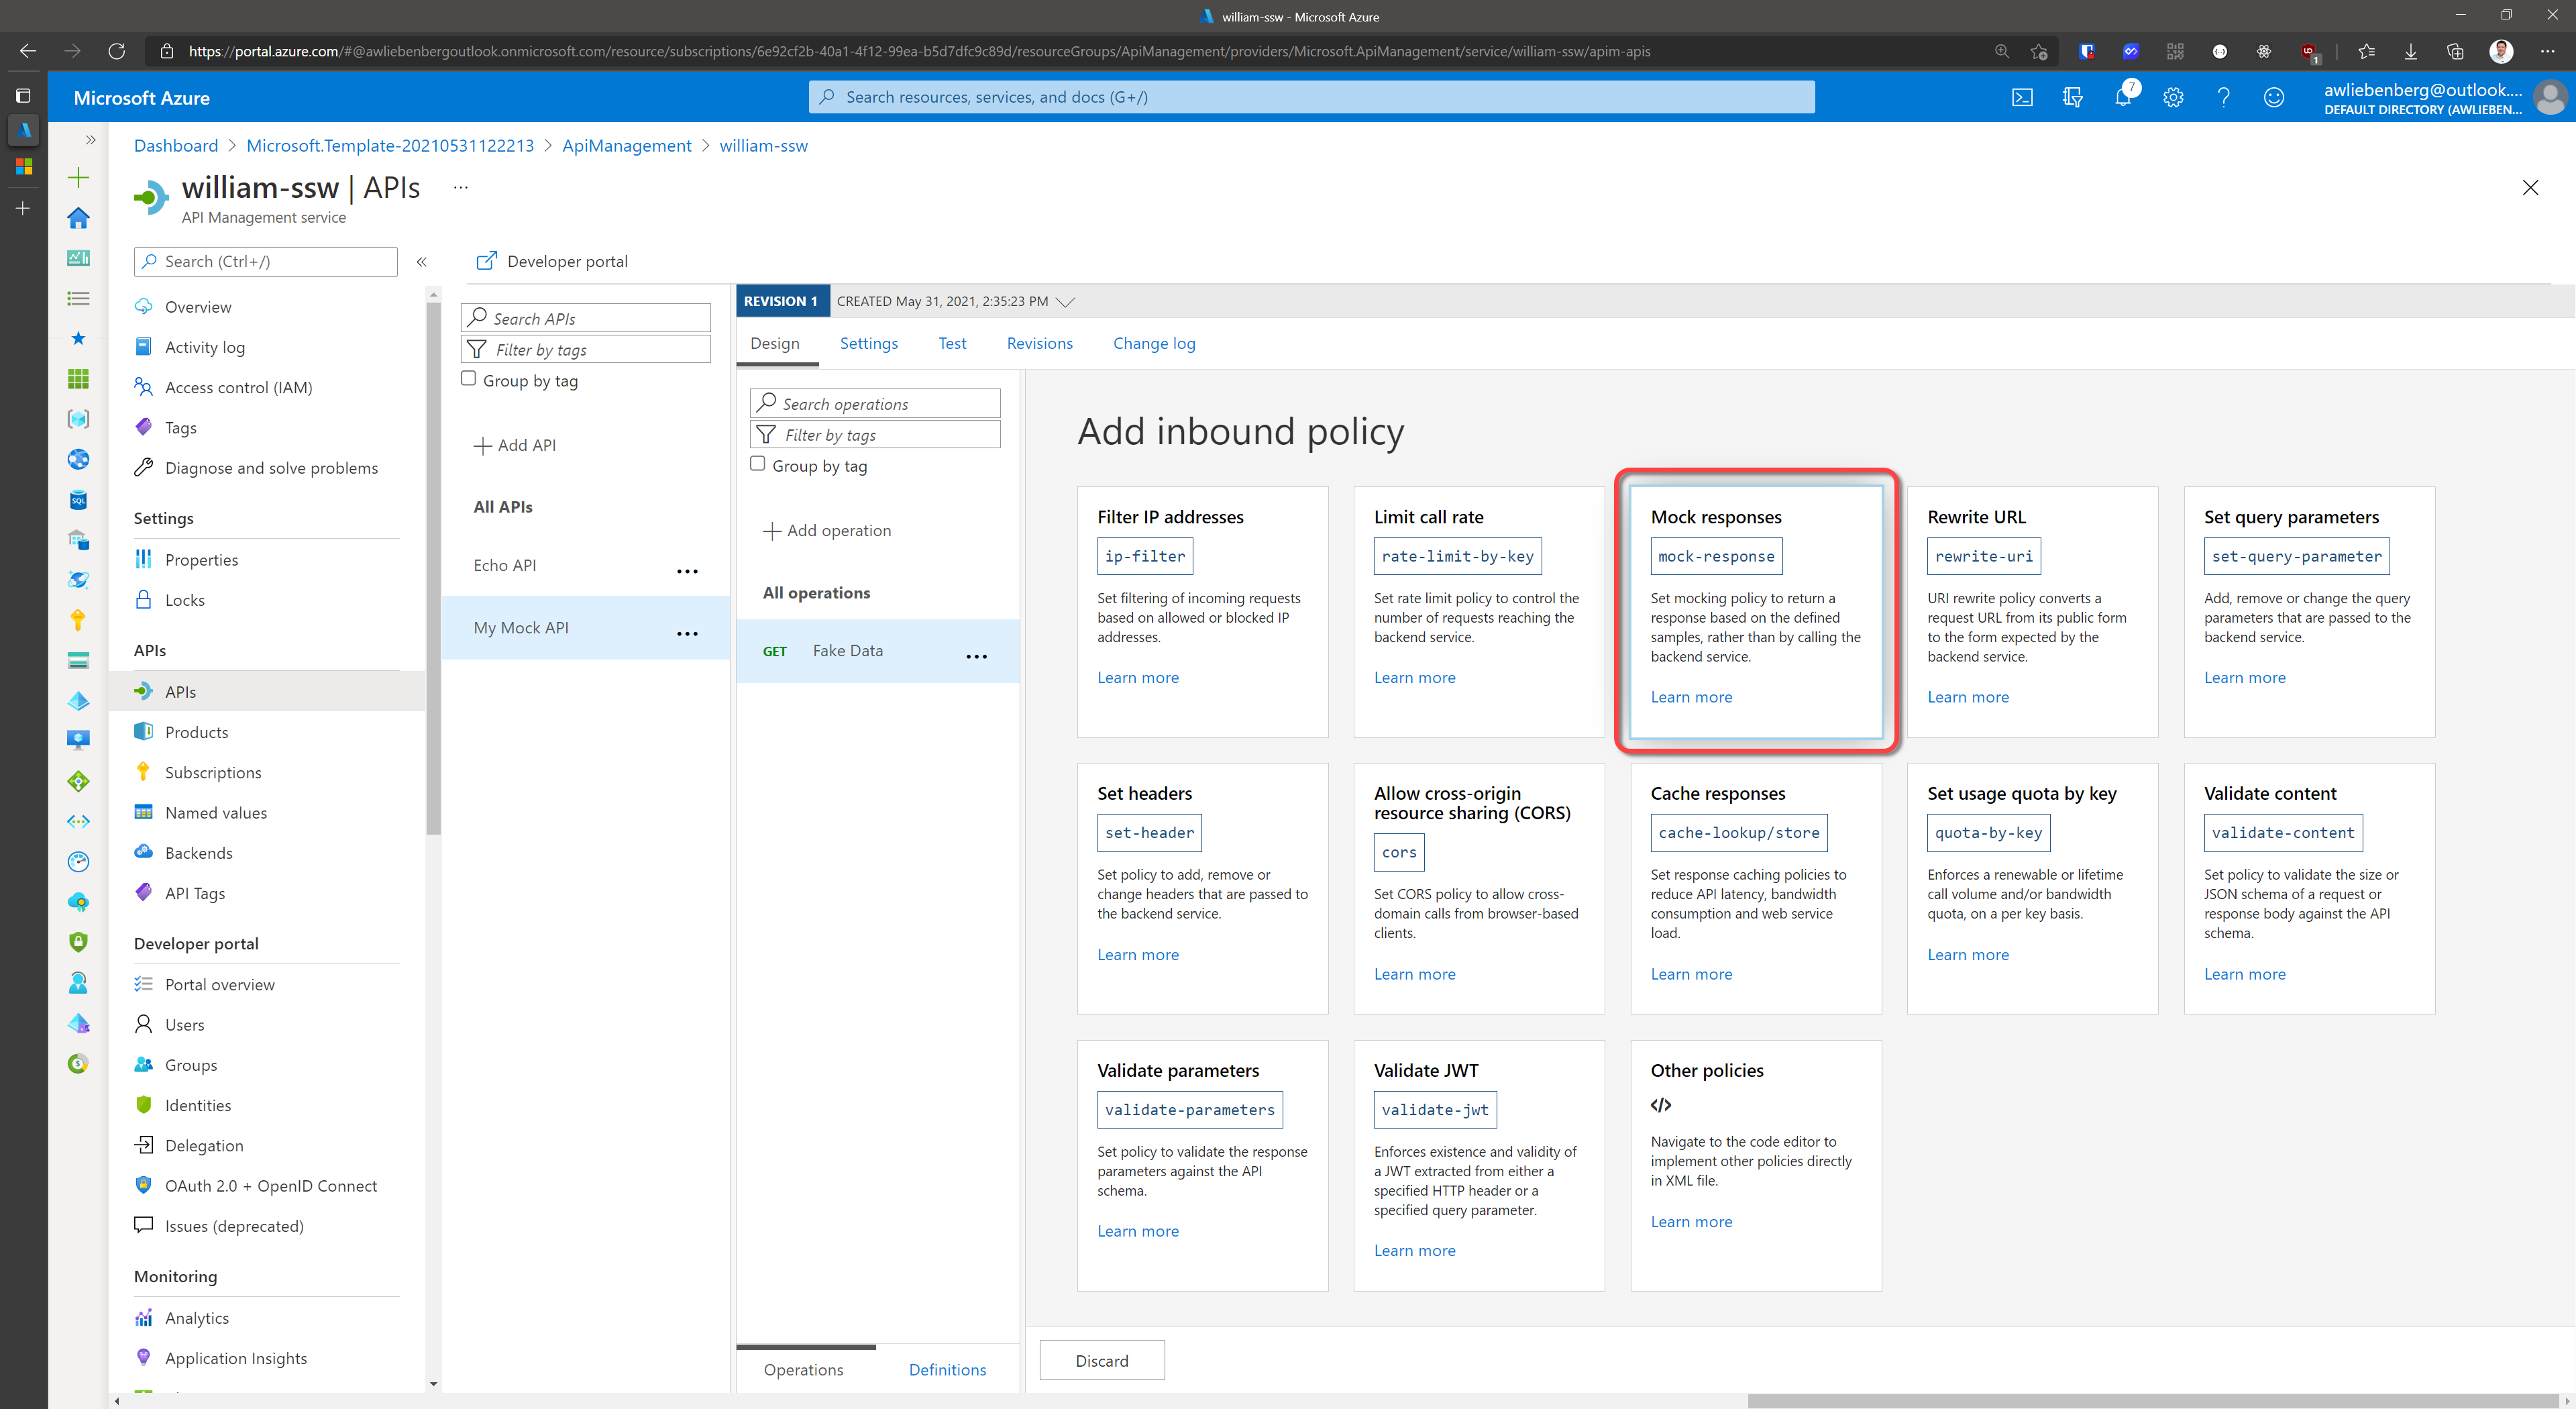
Figure: Add the Mock Response policy
Step 7 - Choose response
- Choose the response representation to return as a Mock (e.g.
200 OK, application/json) - Click Save
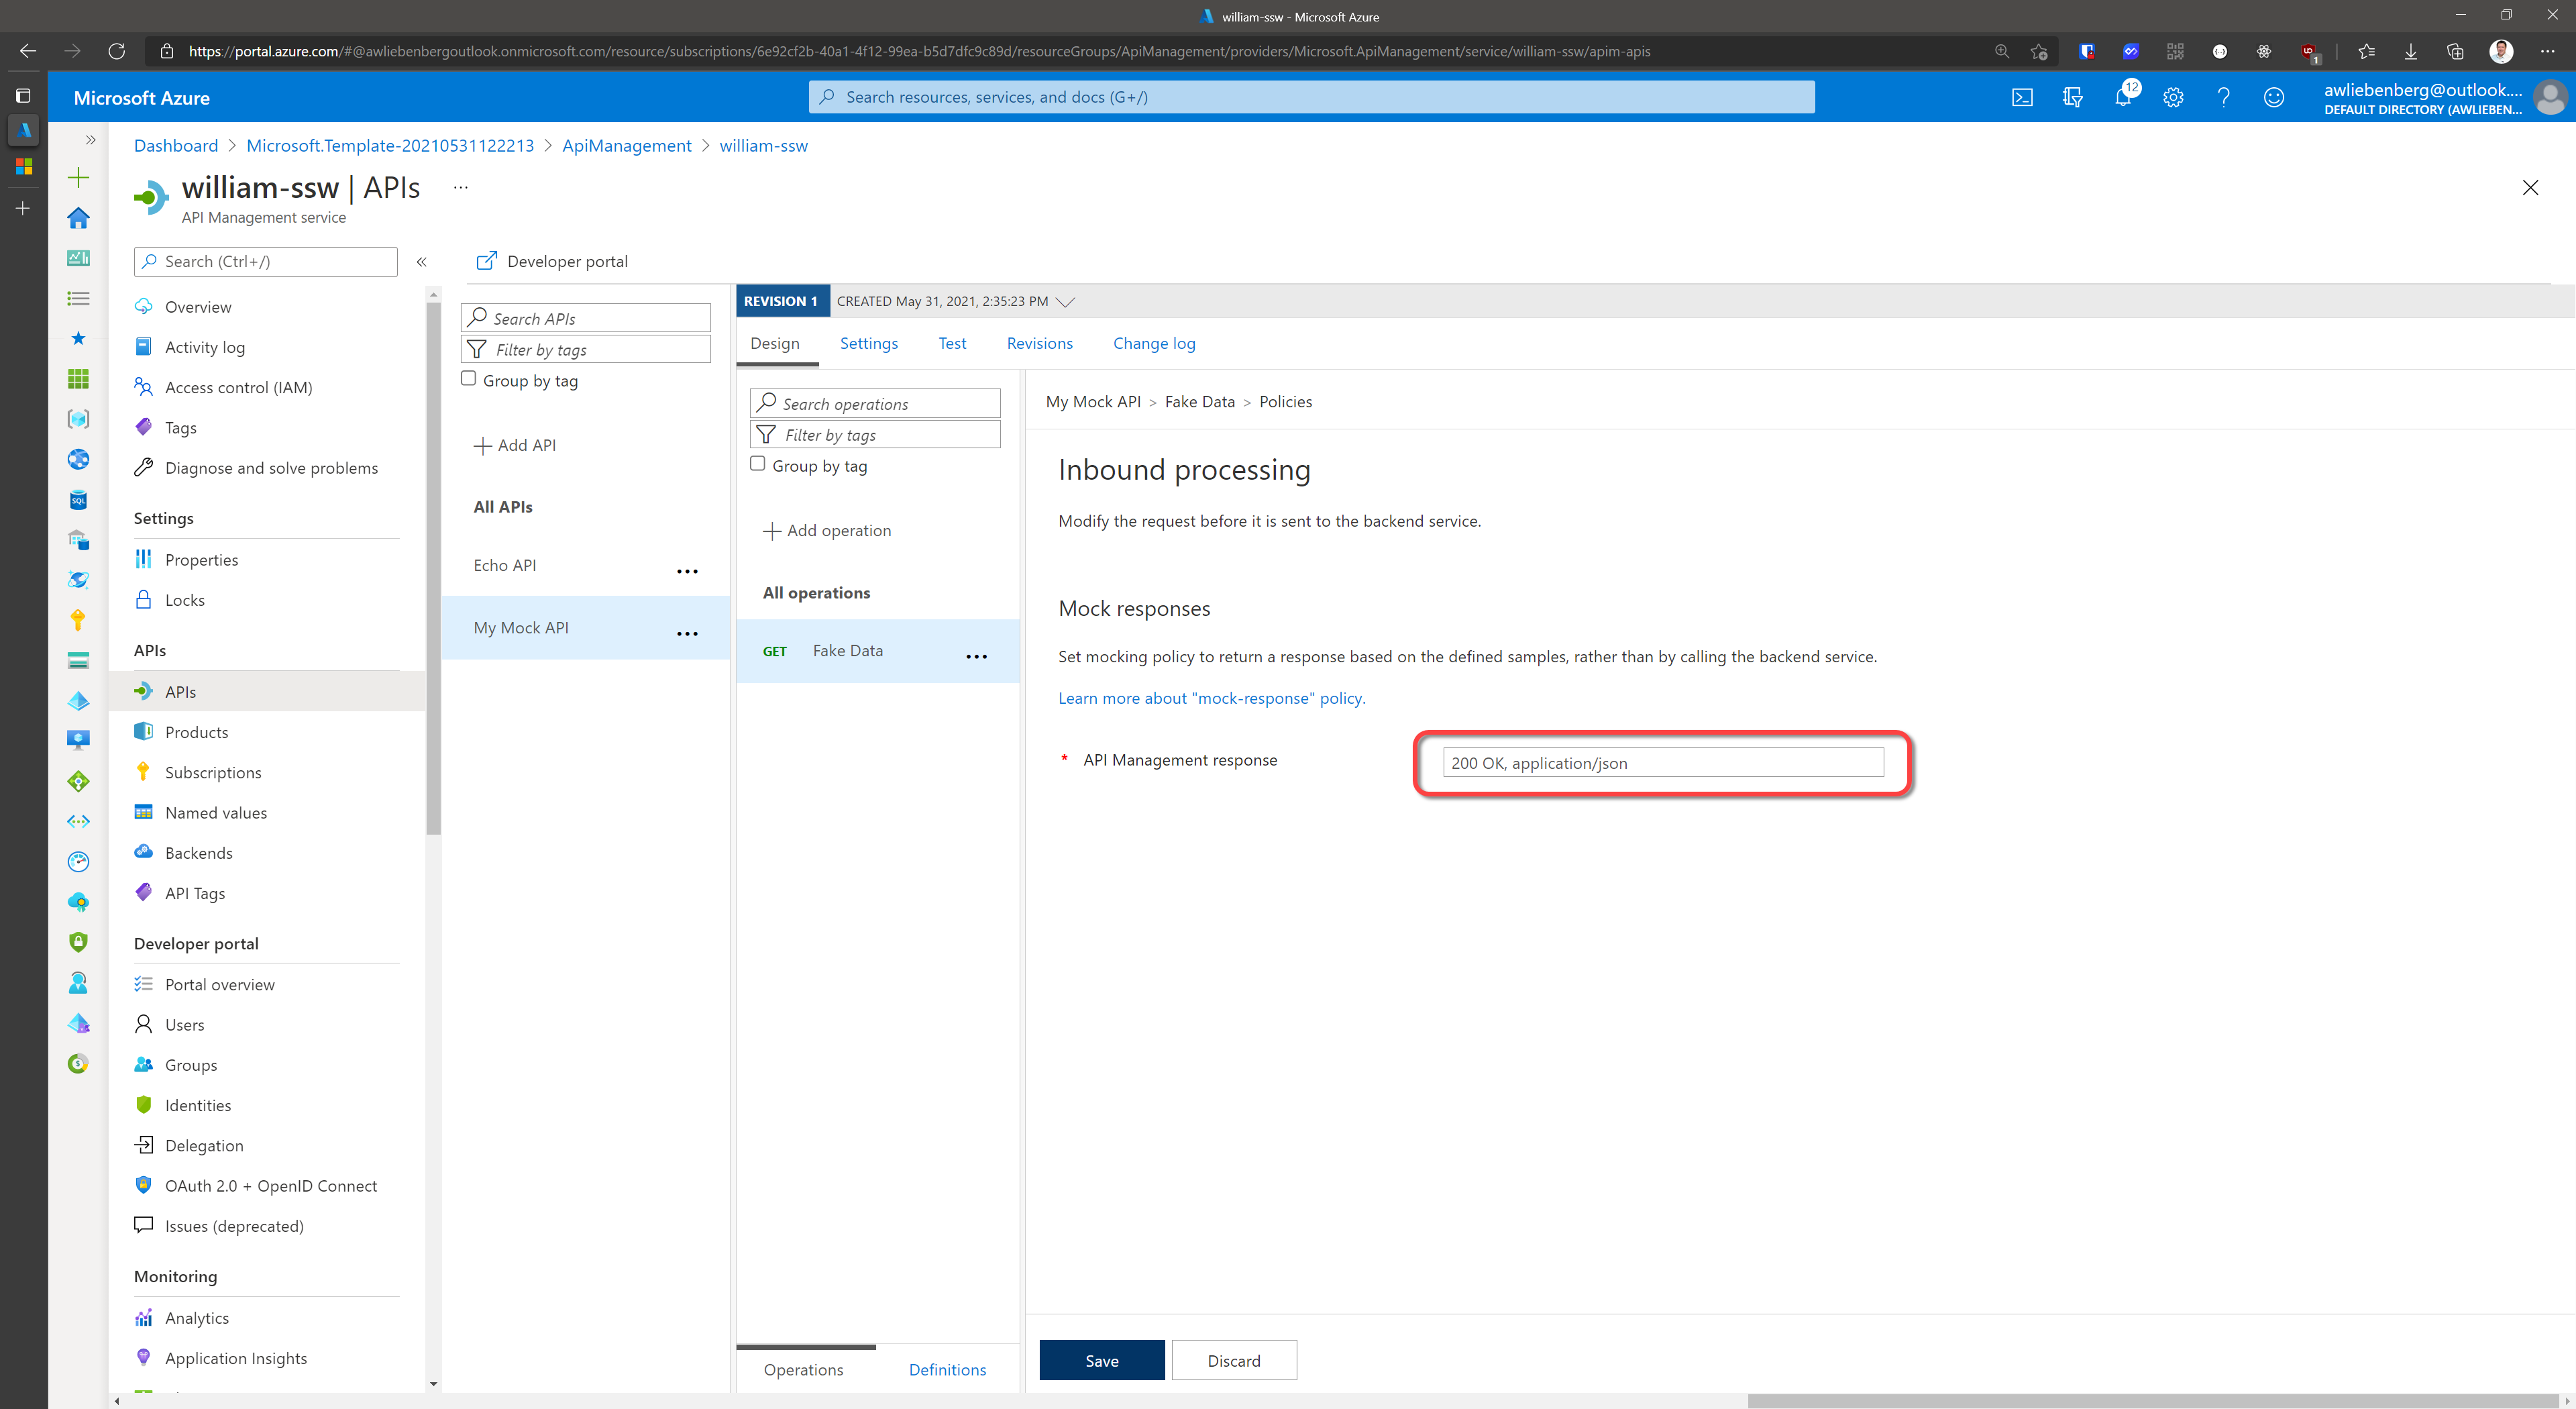
Figure: Choose the response representation
Step 8 - Test your Mocked API
- Make sure your API is selected
- Click the Test tab
- Click the FakeData operation
- Note the "Mocking is enabled" notice
- Click Send
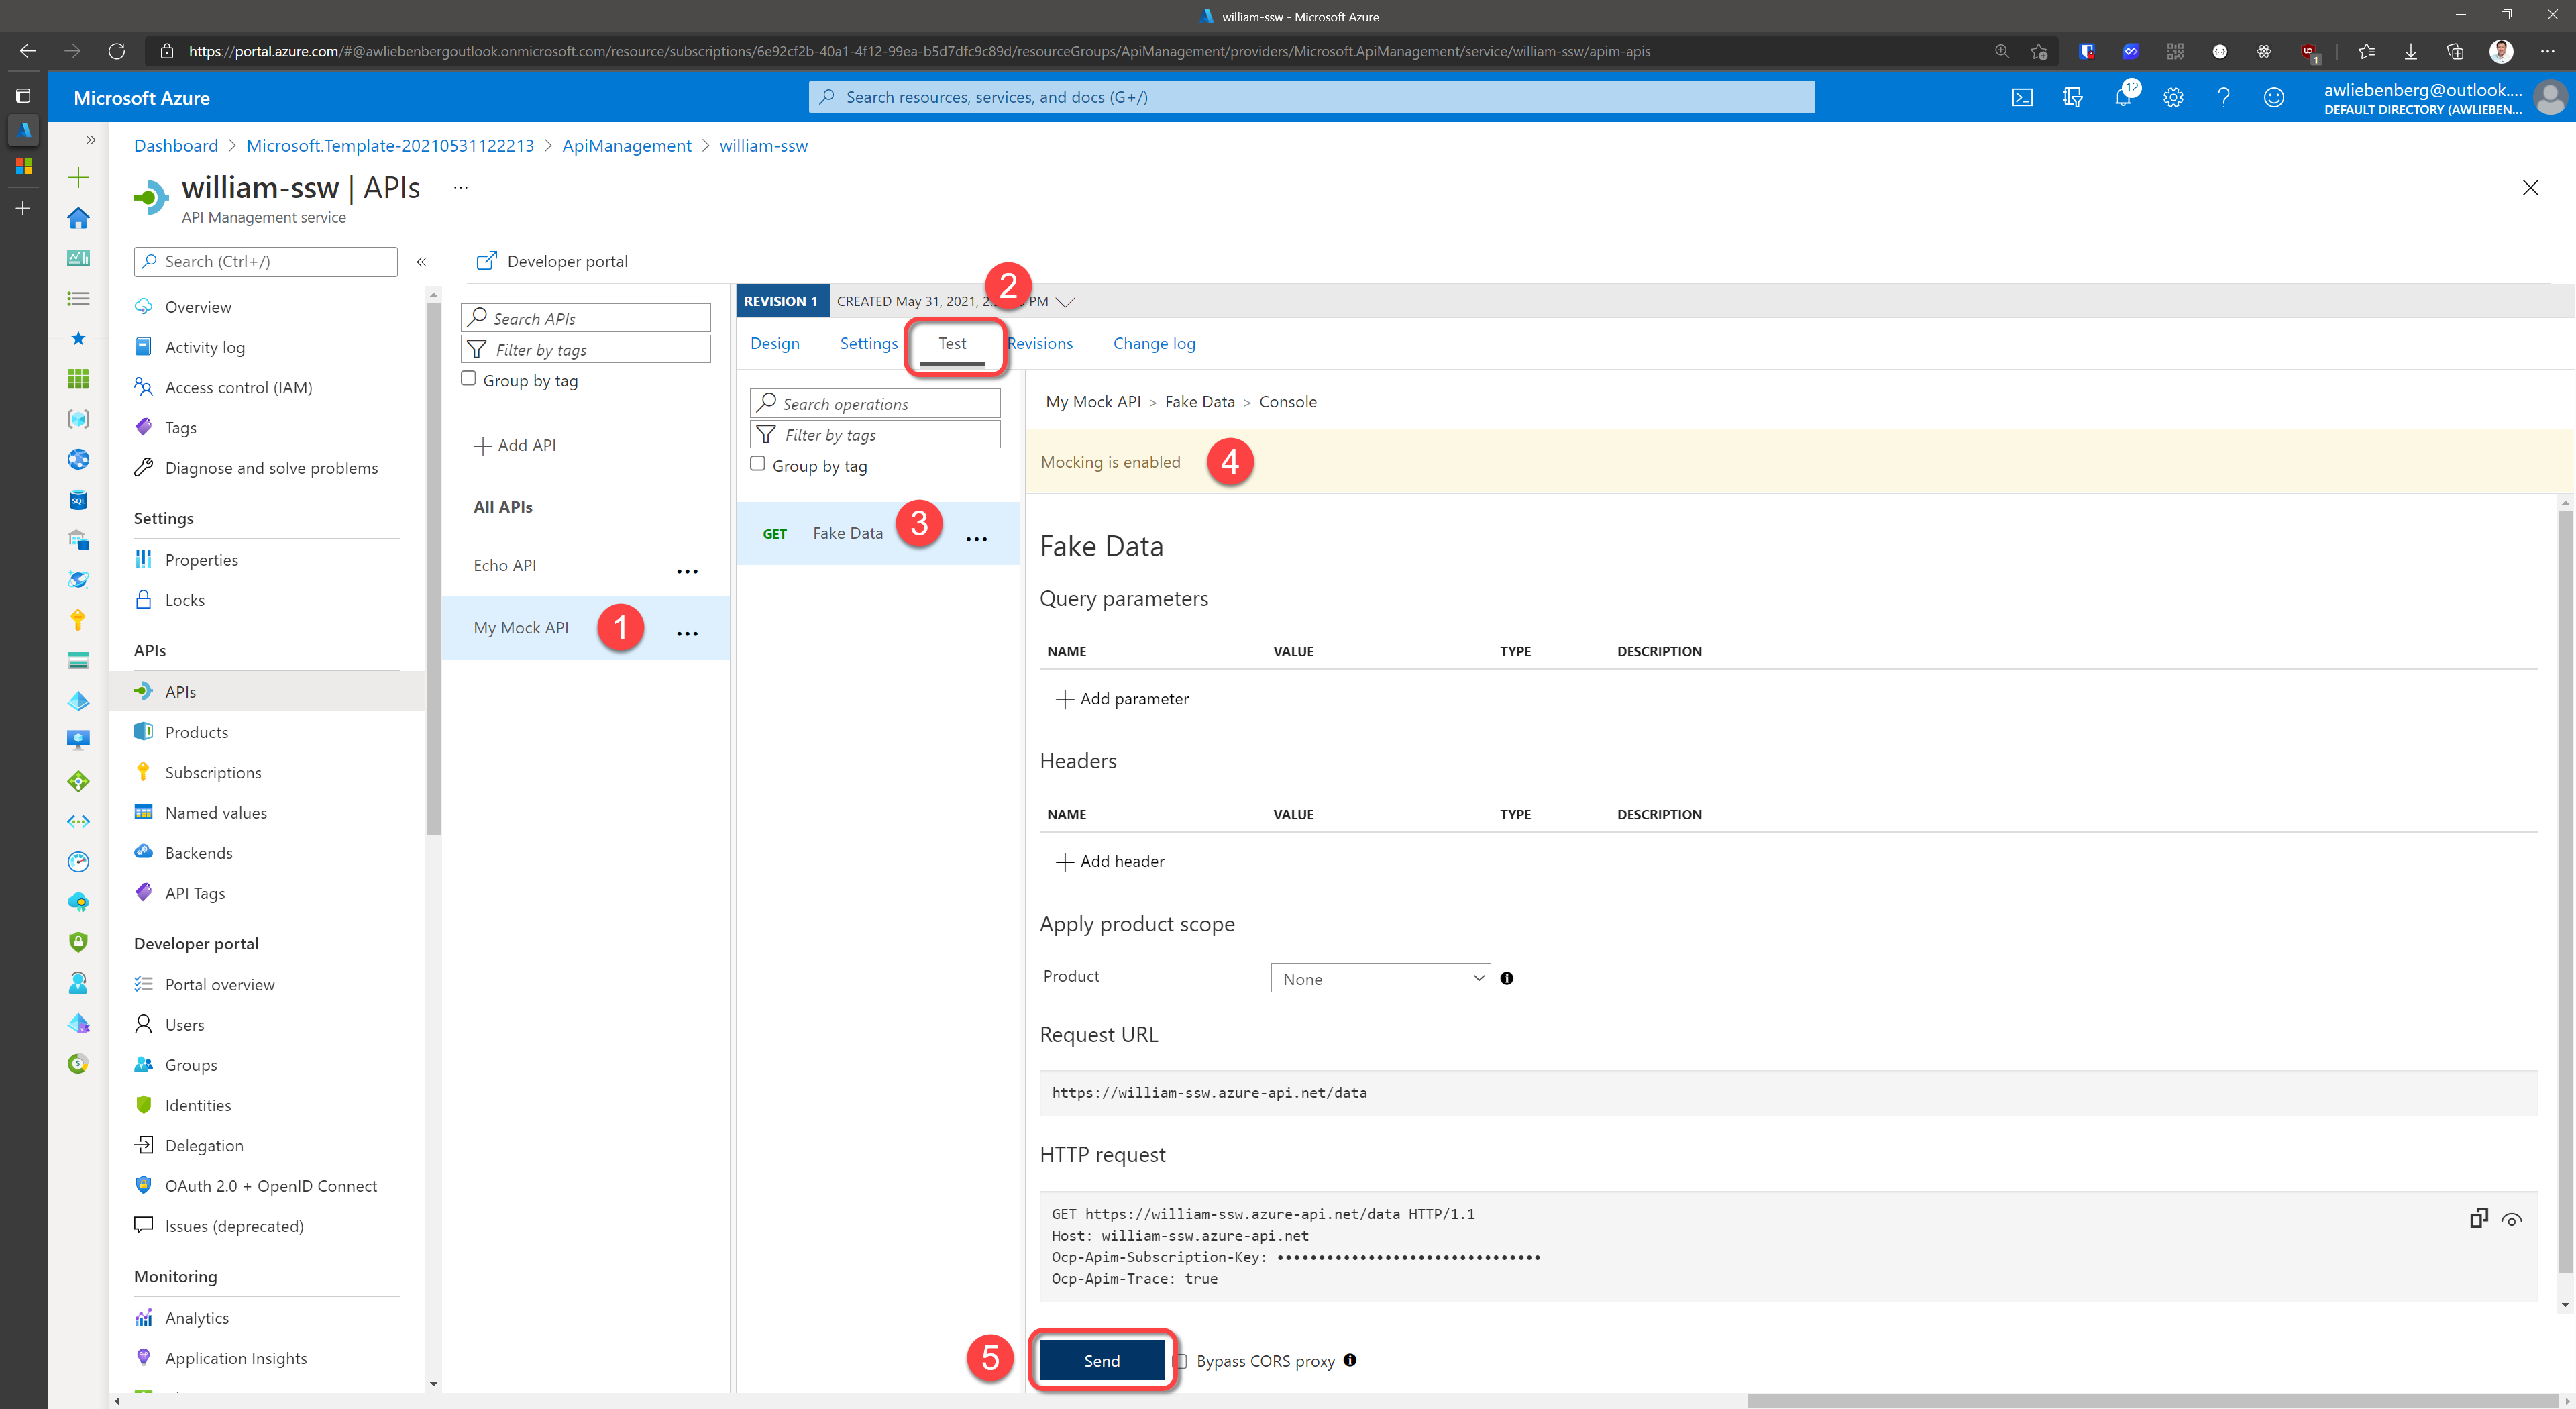
Figure: Testing the mocked api operation
Step 9 - Inspect Mocked API response
- Notice the 200 OK status code
- Notice the fake data response in the message body
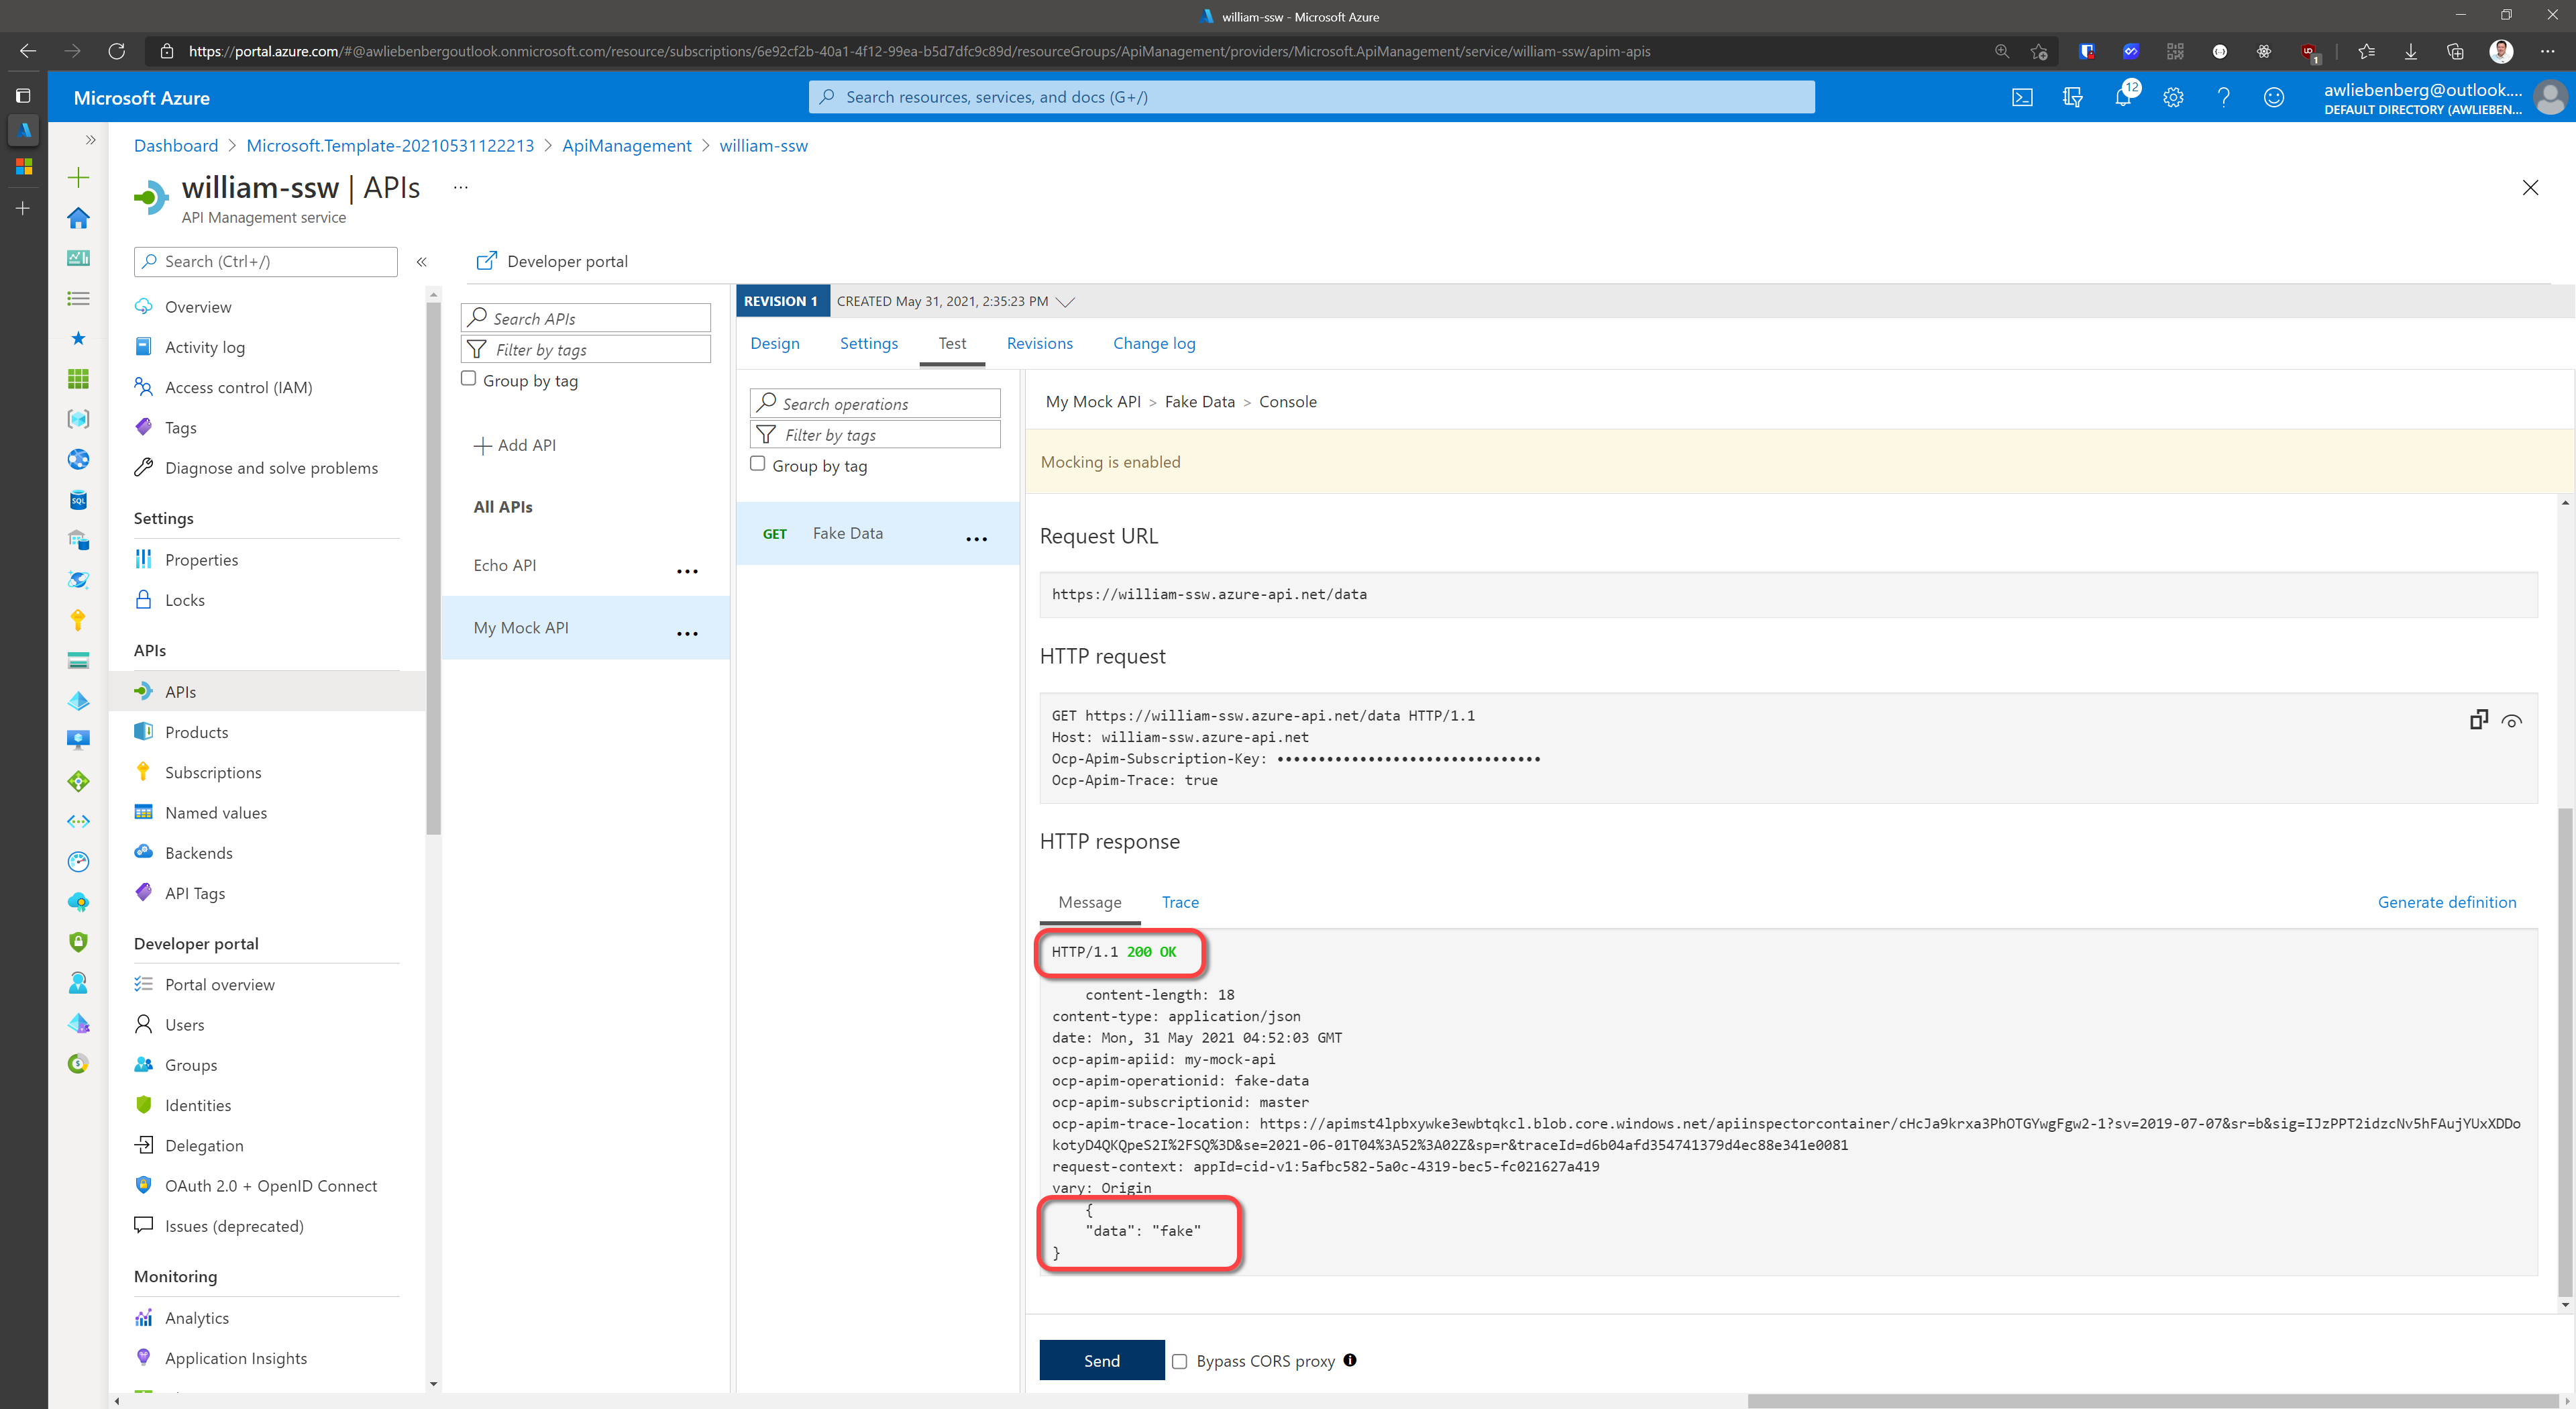
Figure: Response from the mocked operation
Step 10 - Call your API using a REST Client
- Add a new
GETrequest to your REST Client - Specify the API Uri such as
https://william-ssw.azure-api.net/data - Add the subscription header
Ocp-Apim-Subscription-Keyand value- you can copy the value directly from the operation HTTP Request section
- or, from the API Management service | Subscriptions blade
- SEND your request
- Verify the
200 OKresponse and the mocked data
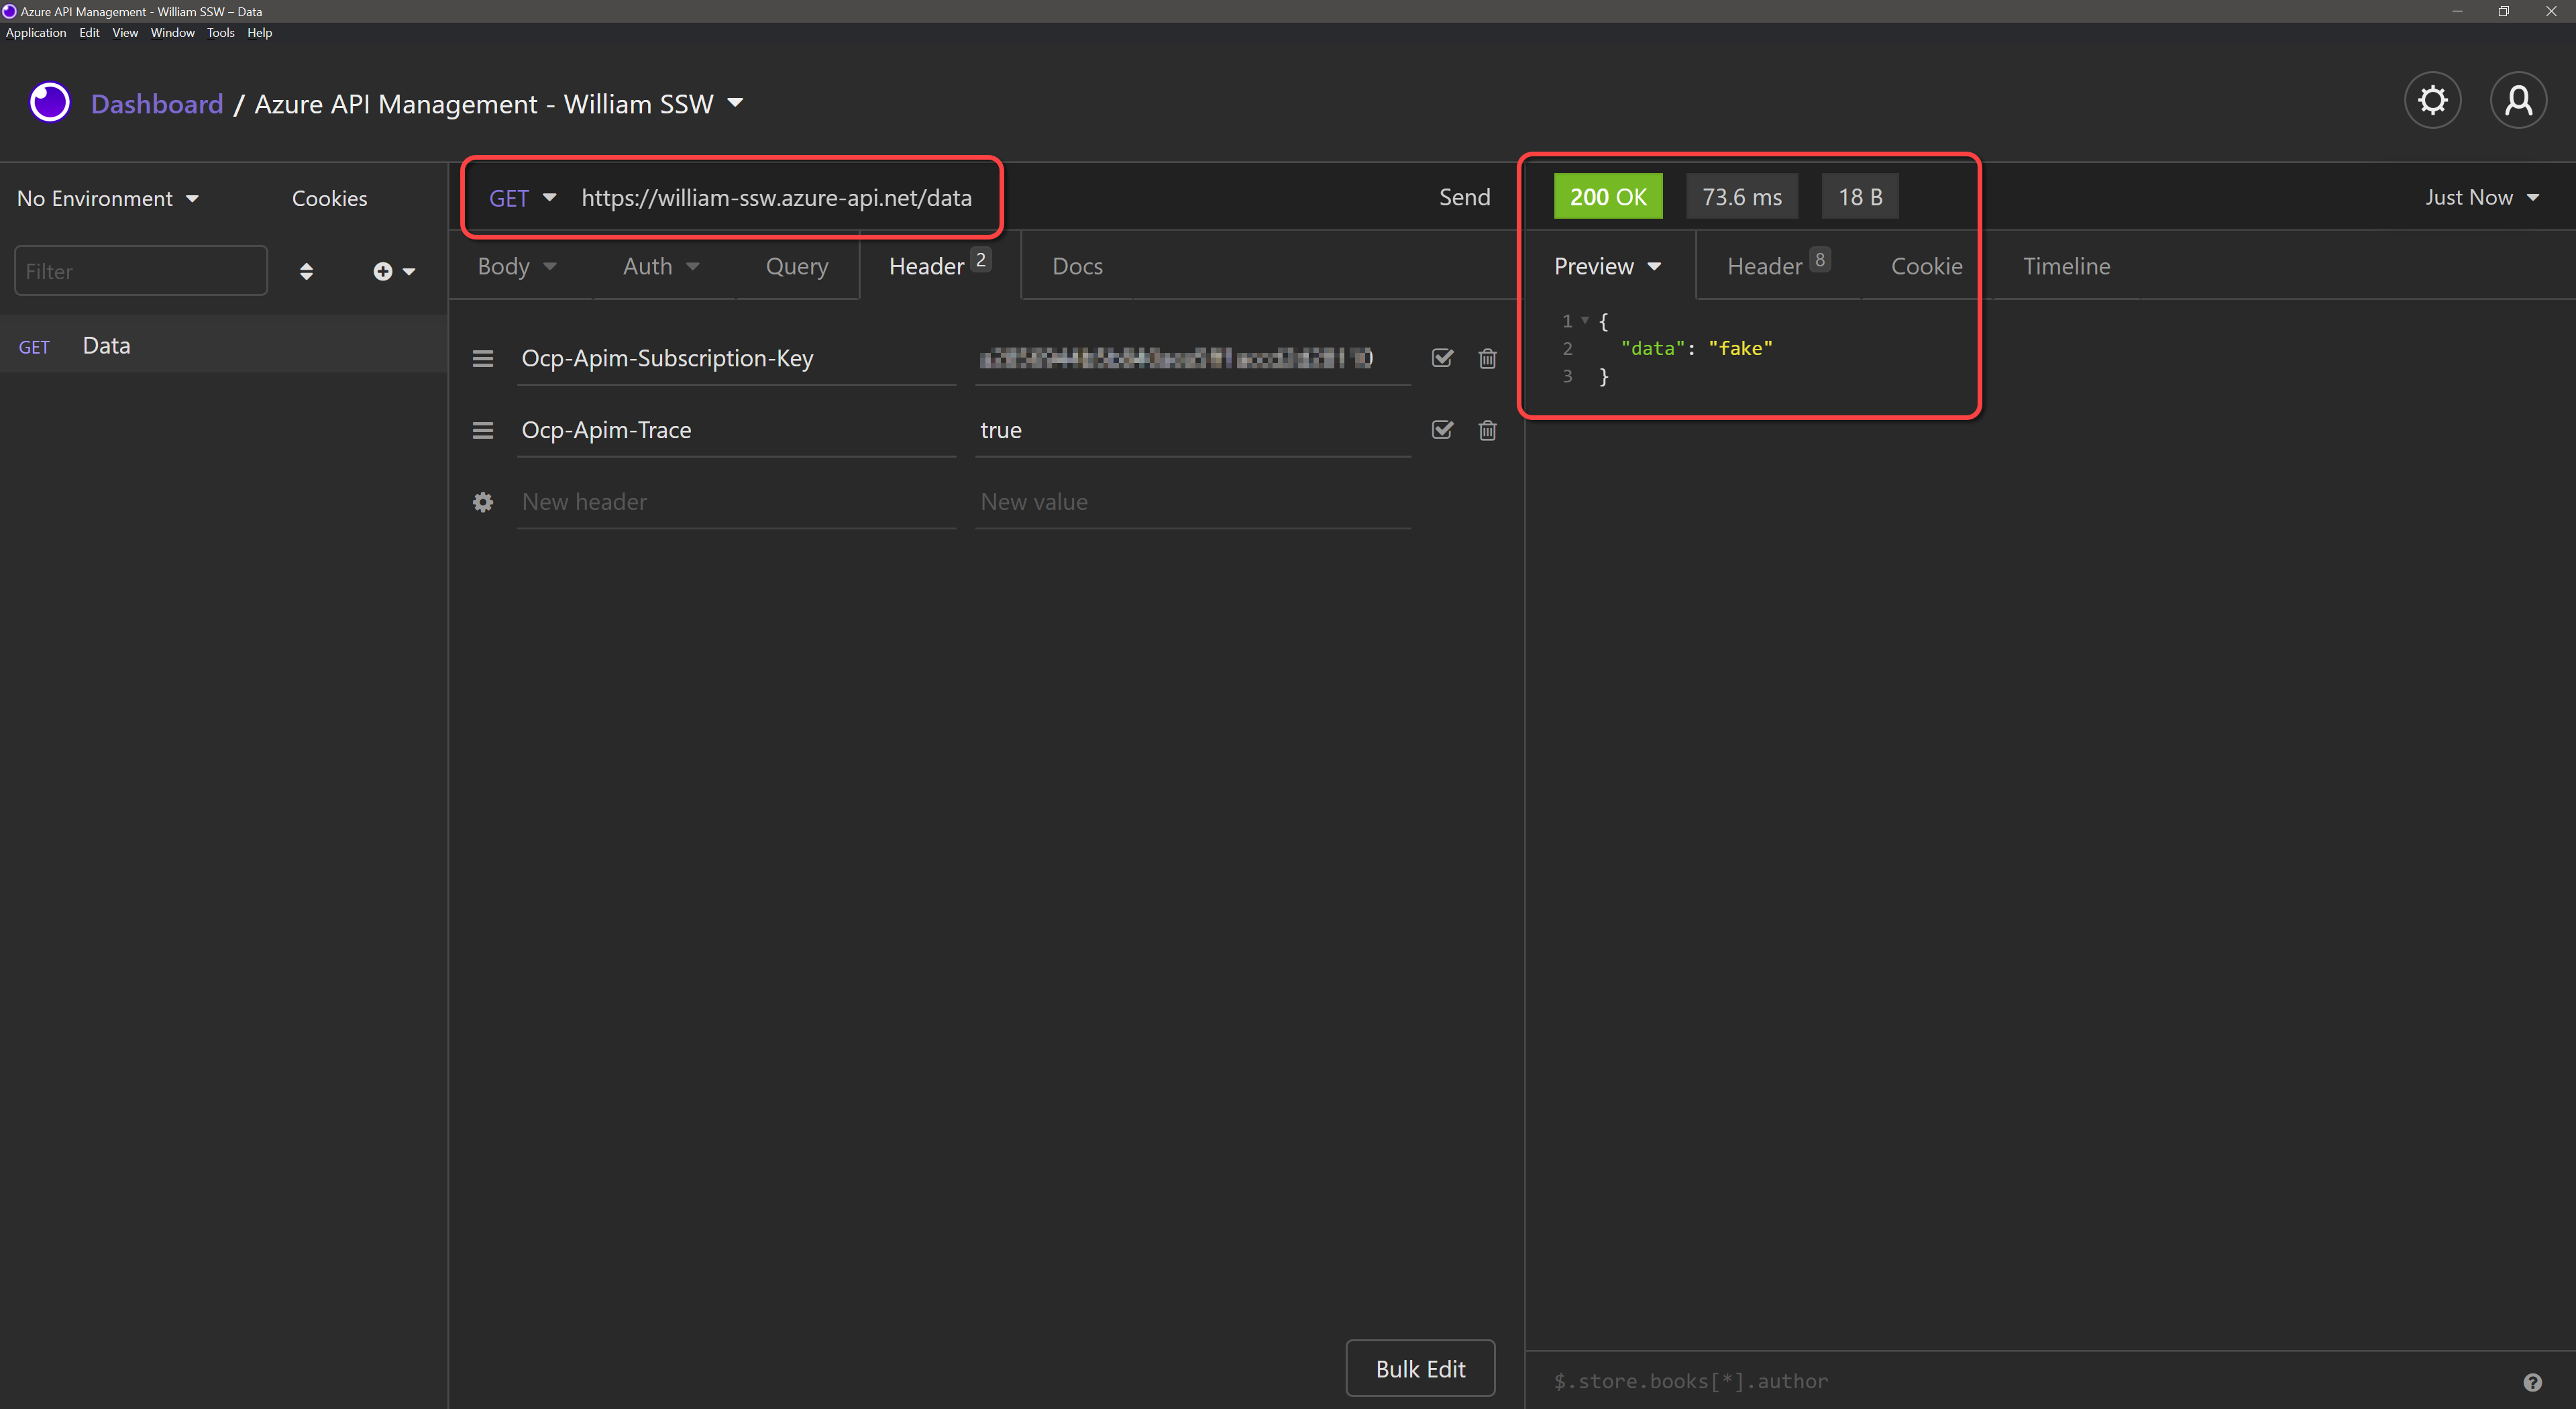
Figure: Calling our Data API from a REST Client
Conclusion
Mocking API responses is awesome! You are able to quickly add mocked responses for all your API endpoints without even having a real backend implementation, and your front-end application can make REAL API calls.