-
Creating a new dimension
: (We recommend that you have your Data Source created and ready to
go.)
To create a new dimension, right click the dimensions folder of
your Analysis Services project and select "Add new dimension" as
shown in the diagram below.
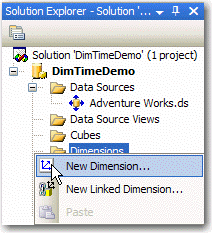
Figure:
New Dimension.
-
Selecting the Time By Day template
:
We are aware of at least 3 different ways to create the Time
Dimension Table, but this is by far the quickest and the easiest.
You can also opt to not use a template. This gives you access to
creating a Server-Time table which is not actually added to your
Database.
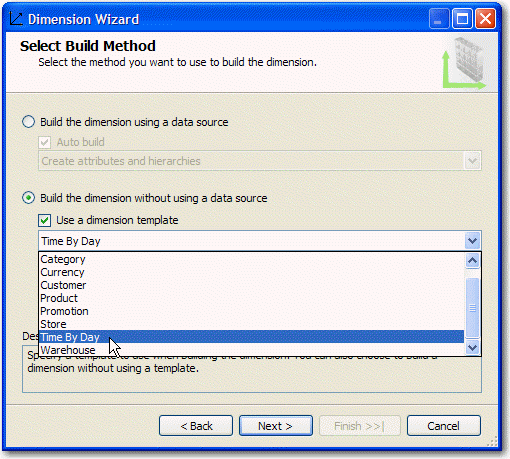
Figure:
Select the Time By Day template.
-
Definining Time Periods
:
Select the time periods that you want your Time Dimension table to
be populated between and don't be afraid to change the first day
of the week to Monday. Also, check any Time Periods that you want
to be able to use later on in your cube (think Reporting).
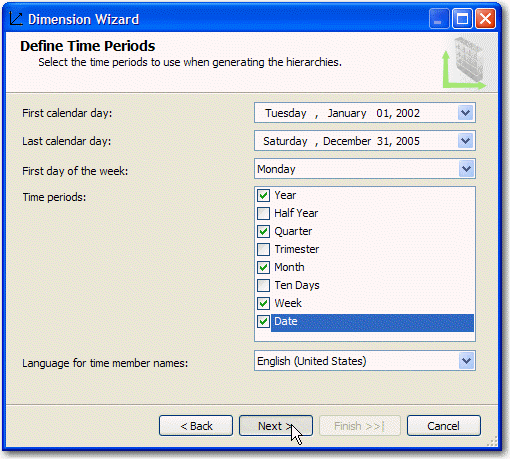
Figure:
Define Time Periods.
-
Selecting Calendars:
:
Select any calendars you may wish to use in your cube, IE. if you
want to analyze data by Year, then tick Fiscal calendar. If you do
select Fiscal calendar, make sure you change the Start Month to
July.
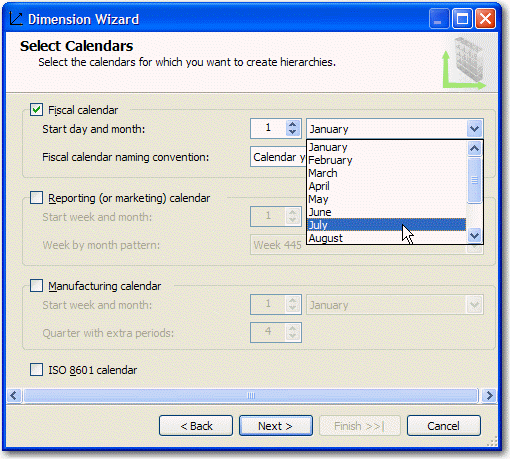
Figure:
Choosing your calendars.
-
Finishing Up the Dimension
This is where we name our dimension. As you can see, the wizard
automatically calls your dimension "Time", but be careful, because
this will be the name of your table when we add it to your
database. The preferred name for a Time Dimension table should be
"DimTime". Also, before you click finish, ensure that "Generate
schema now" is ticked so that we can get right into adding and
populating the Time Dimension table to the database.
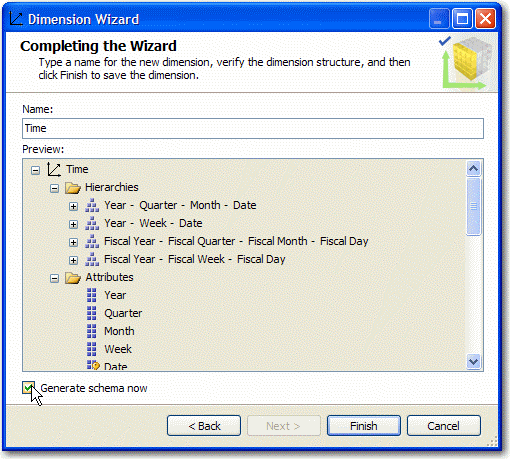
Figure:
Finishing Up the Dimension.
-
Specifying Target:
This is where we choose which Data Source to add our Time
Dimension table to. Select your pre-existing data source and
create a new Data Source View (DSV) or select your pre-existing
DSV and the wizard will add the Time Dim table to it at the end.
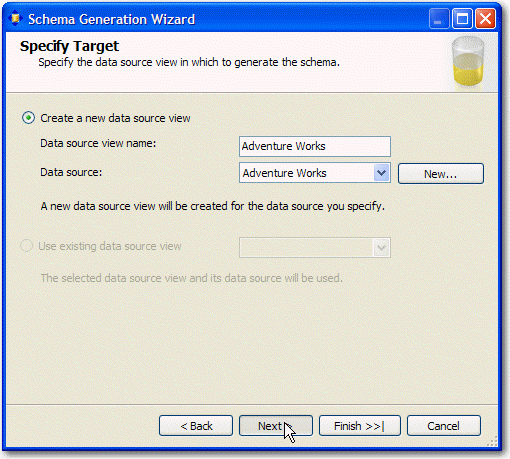
Figure:
Specify Target.
-
Selecting Schema Options:
Name your owning schema and select any options you wish for your
Time Dimension table. Keep in mind that the Owning Schema will
prefix your Table name in your database. In our example, the table
we are adding to the database will be called [DimTimeDemo].[Time].
Also, be aware that you can choose to populate the table, leave it
empty, or populate empty rows only. The last option could be
useful in updating your table if you exceed the dates set forth
when we created our Time dimension earlier.
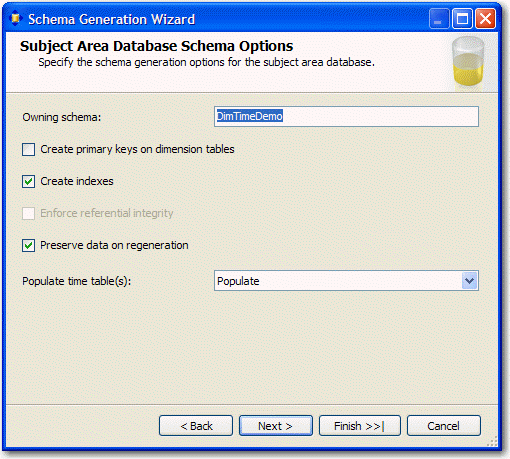
Figure:
Schema Options.
-
Specifying Naming Conventions:
On this screen we can select the naming conventions for our
columns. I think it is pretty straight forward. After we click
next, the wizard will have all the information needed to generate
and populate the Time Dimension table.
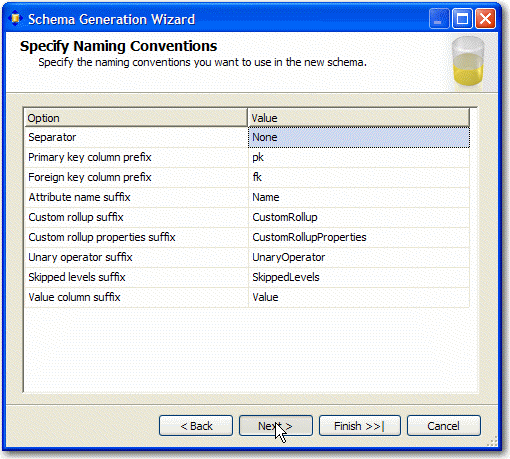
Figure:
Specify Naming Conventions.
-
Generating the Data:
Here we see the wizard generate the schema and populate the table
with the date data. If something is going to go wrong, this is the
place where it will happen; however, as you can see in the picture
below, the "Generation Completed Successfully."
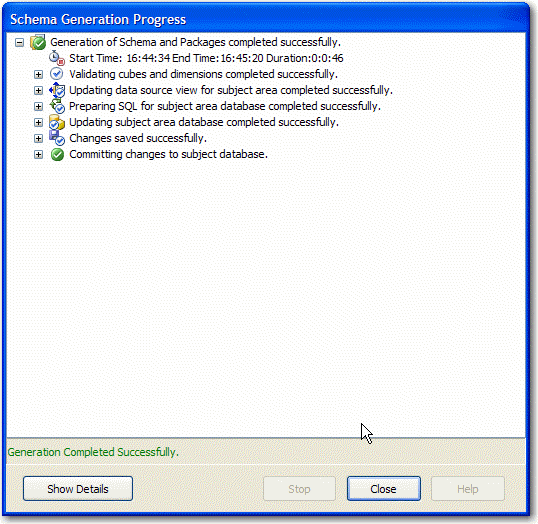
Figure:
Generating the Data
-
And we are good to go...
Well, this isn't really a step, but 10 sounds like a nice round
number, and I get to show off the data that we generated in the
picture below. Happy Time Dimension Generation!
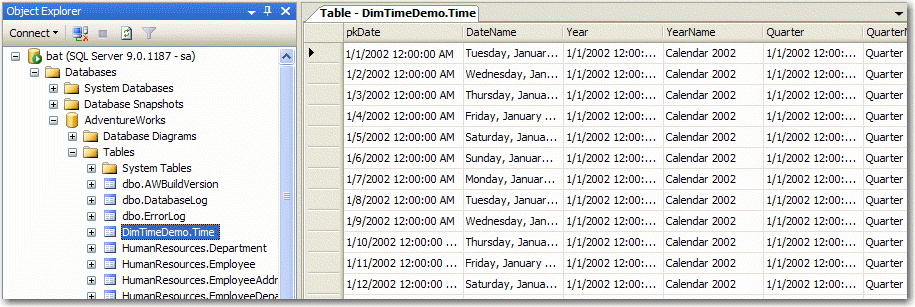
Figure:
The finished product.