Home
>
Archive
>
SSW Standards Internal
>
Computer Setup
>
SSW CRM Setup And Information
SSW CRM Setup And Information
This standard is provided to give you information related to your CRM
account and settings.
-
Uninstall existing CRM 4.0 Outlook client (if required)
Close Outlook if you have it open
-

-
Figure: Open Control Panel | Program and features | Uninstall
Crm 4.0 for Microsoft office Outlook
-
How to Install CRM 2011 for Outlook Client
- Close outlook if you have it open.
-
Install CRM client for Outlook from:
- file://fileserver/SetupFiles/SetupMS/SetupProgram/MSCRM2011Outlook/CRM2011-Client-ENU-i386.exe - FileServer (32 Bit Office)
OR
- file://fileserver/SetupFiles/SetupMS/SetupProgram/MSCRM2011Outlook/CRM2011-Client-ENU-amd64.exe" - FileServer (64 Bit Office)
-
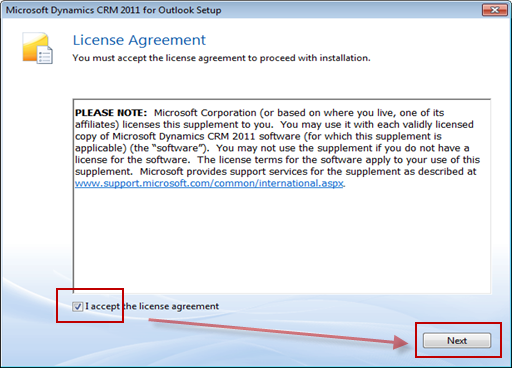
- Figure: Accept the Agreement and then click Next
-
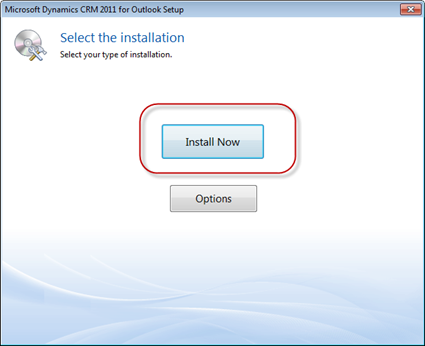
- Figure: Click on Install Now Button
-
-
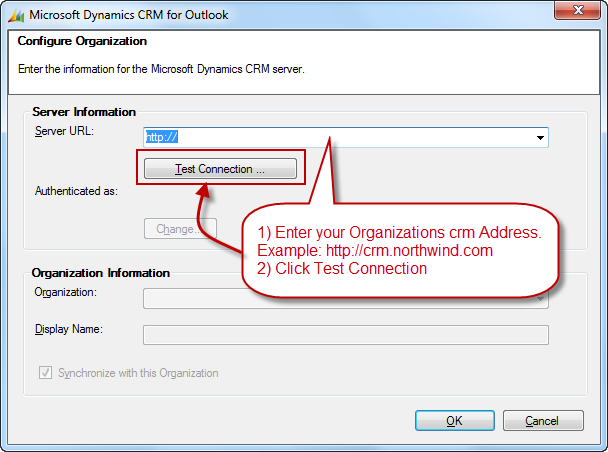
Figure: Replace the server url with:
https://ssw.crm.ssw.com.au
CRM should now be configured to work with Outlook.
Important: Once the Outlook CRM Plugin is installed, *make sure*
you update to the latest CRM Rollup client that is on Fileserver
(don't install latest from MS as SSW may not be on that version)
To install the latest CRM Rollup used by SSW goto:
\\fileserver\SetupFiles\SetupMS\SetupProgram\MSCRM2011Outlook\
and install the latest Rollup ie Rollup 15. If you have 32 Bit
Office install the file ending in
i386
, if you have 64 Bit Office install the file ending in
amd64
.
-
(If Required) Troubleshooting: After installation Outlook may
lose the Search Ribbonh2>
-

- Figure: Outlook 2010 Search ribbon
- Close Outlook 2010
- Click on Start Button | Run | Type in regedit
-
Navigate to
HKEY_CLASSES_ROOT\TypeLib\{2DF8D04C-5BFA-101B-BDE5-00AA0044DE52}
-
Right click on the 2.4 regkey and choose Export. Save this
export to your desktop for now so we have a backup.
-
Now once that is backed up right click on the 2.4 regkey and
choose delete.
- Launch Outlook
Your Outlook ribbon should now be back
-
- Figure: Restored Outlook 2010 Search ribbon
-
How to configure your Outlook CRM personal options
-
-
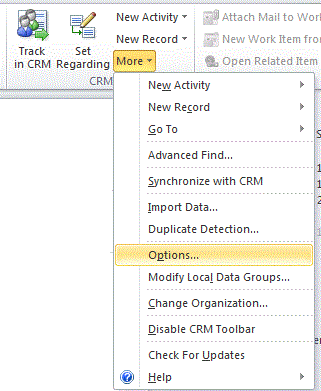
Figure: From Outlook Home Tabe, go to CRM | More | Options.
-
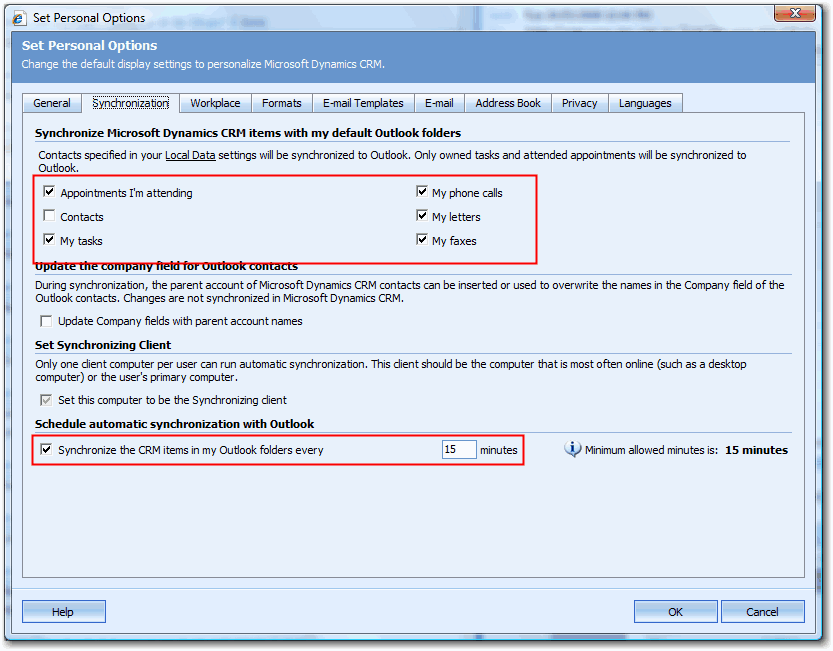
-
Figure: On “Synchronization?tab, ensure you have the
above checkboxes checked.
-
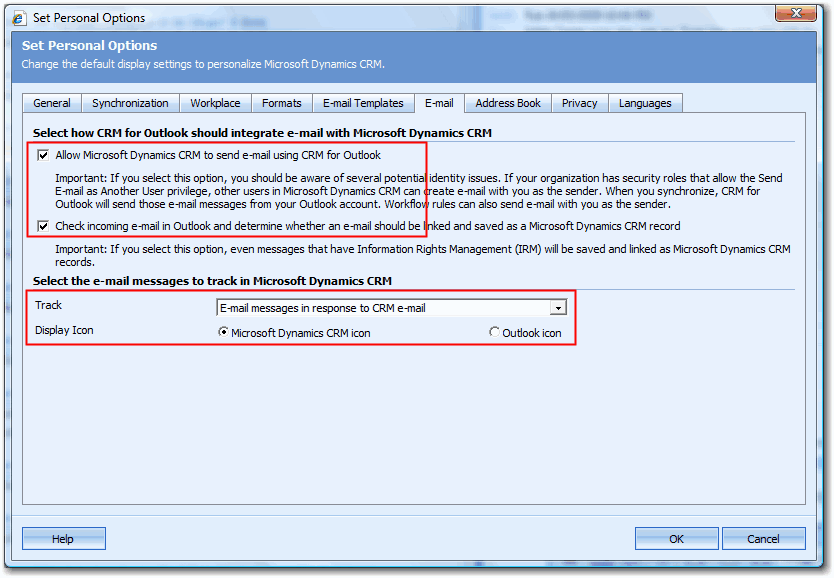
-
Figure: On “Email?tab, ensure you have the above
options.
-
This page has moved to
http://sugarlearning.com/Item/9410
How to record a sales opportunity
-
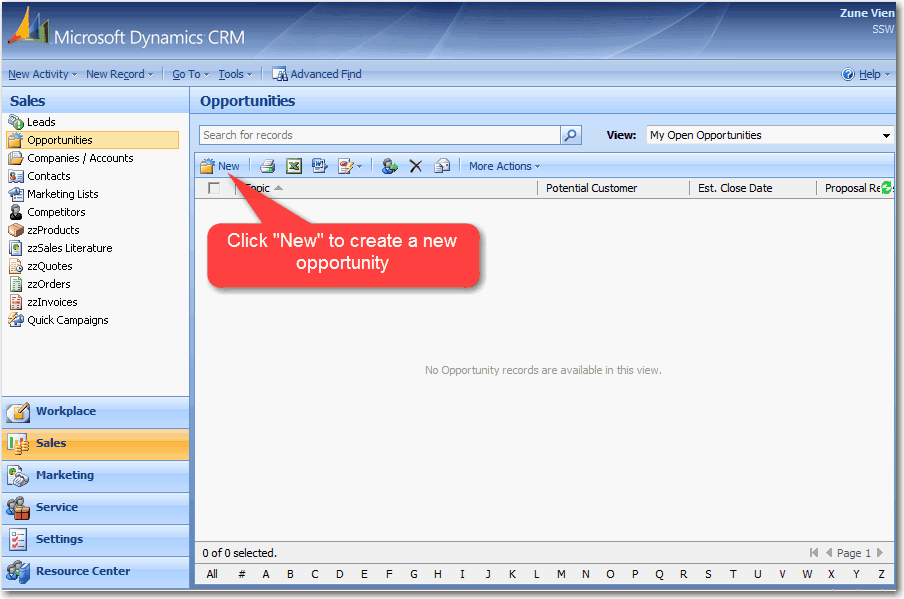
-
Figure: Go to Microsoft Dynamics CRM | Sales | Opportunities
| New.
-
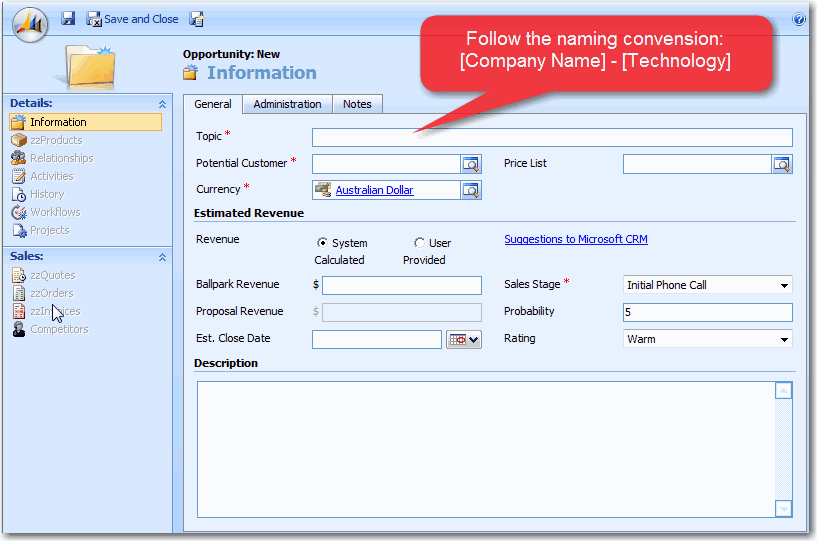
-
Figure: This allows better understanding of opprotunity when
look at opportunity list.
-

-
Figure: Setting potential customer of an opportunity to a
company instead of contact will avoid problem when the
contact moves to another company.
-
-
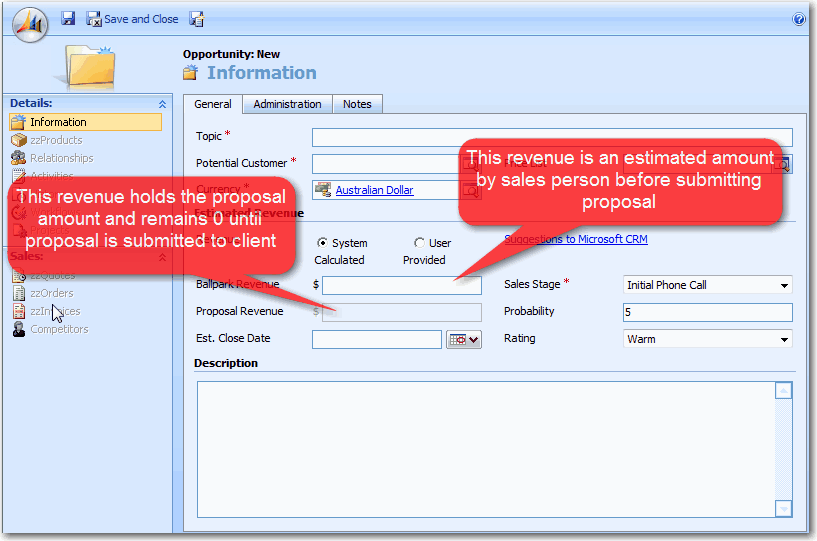
Figure: Recording revenue in the right field allows us to
give a better report on our sales pipeline.
-

-
Figure: This allows us reporting on our oppotunities base on
sales stage and work out what to do next.
After creating opportunities you will need:
- Keep Sales Stage up to date.
-
Close Opportunity whenever we win or lose the opportunity.
Closing opportunity is important because if the opportunity
is won, it will create a Project record in CRM. This allows
Project Manager to record montly projected income.
-
This page has moved to
http://sugarlearning.com/Item/9384
-
How to Track Contact, Email, Task, etc.. from Outlook in CRM
To track a contact, email, task, etc.. from Outlook in CRM, you
need to:
- Open the record in outlook
-
Hit "Track In CRM" button in Outlook toolbar
-
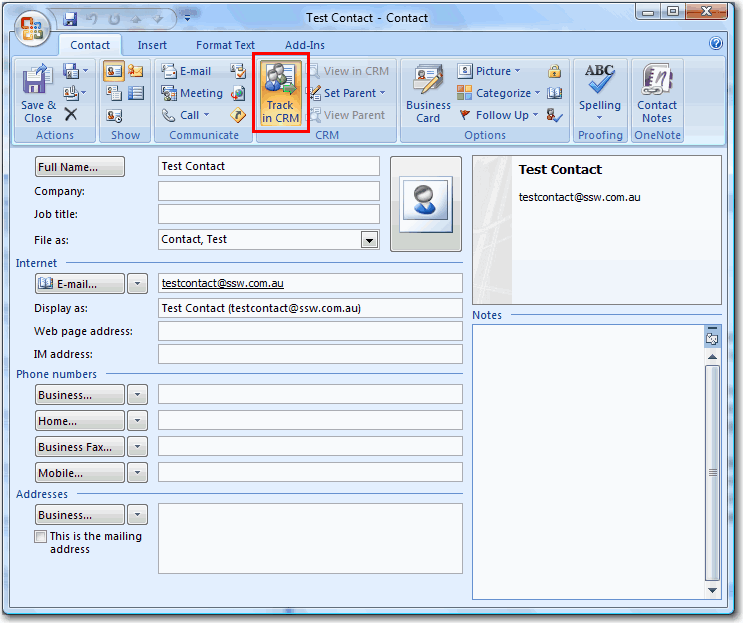
- Figure: Tracking an outlook contact in CRM
Only track activities as per rule
Sales - Do you know when to track activities in CRM?
to avoid CRM becoming a spam place of all activities.
When tracking a contact in CRM, company field in outlook does
not sync with CRM. You need to click on "Set Parent" and choose
approritate company in CRM:
-
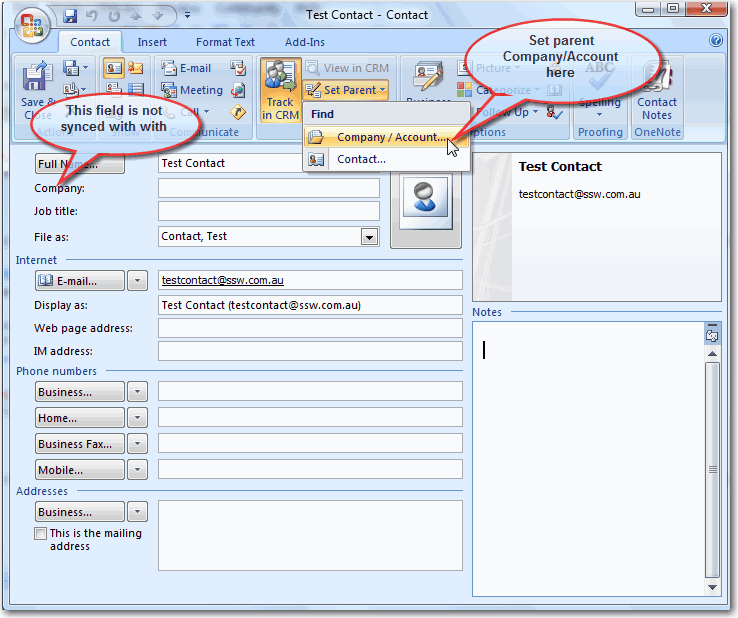
- Figure: Set Parent Company for Outlook Contact
Any contact without a company/account will automatacally go to
account name "Outlook contacts - Please set parent company" in
CRM.
-
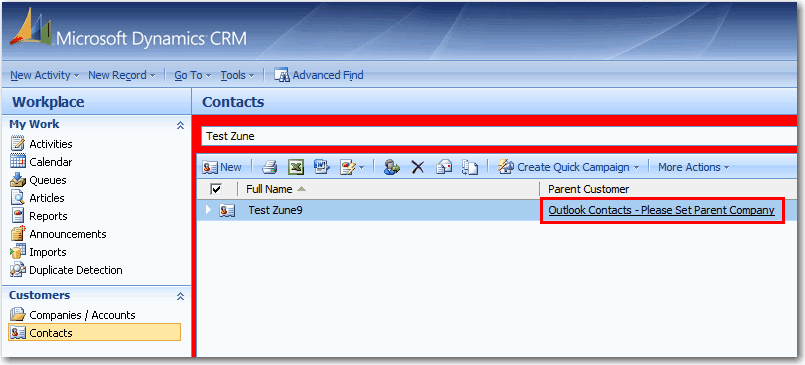
- Figure: Outlook Contact without Parent Company
-
How to send outstanding invoice reminder
-
Create a new email, fill in necessary fields and save it as a
draft email. You will use this email as your template.
-
CRM uses your subject line to save the record in correct
category in TimePRO. It's important that your subject must
start with one of the following:
- Outstanding Account with SSW - First Reminder
- Outstanding Account with SSW - Second Reminder
- Outstanding Account with SSW - Third Reminder
- Outstanding Account with SSW - Fourth Reminder
- Outstanding Account with SSW - Legal
-

- Figure: Example of outstanding invoice first reminder
-
Go to draft folder in your outlook and make a copy of the
email you just created. Each time you want to send an email,
you will need to make a copy so that you don't loose the
template.
-
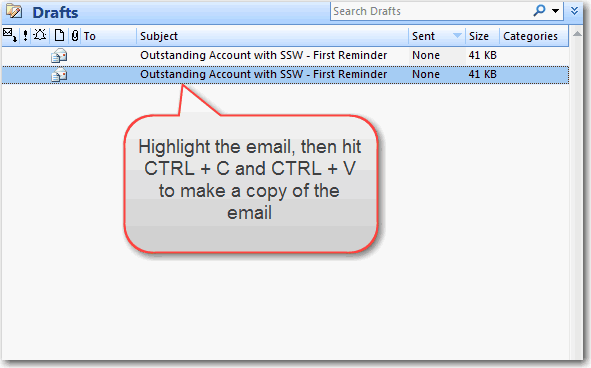
-
Figure: Highlight the email you want to copy, hit CTRL + C
then CTRL + V
-
Go to
TimePRO Online Oustanding Invoice
page
-
Click "Preview" button on the row of the client that you want
to send the email to. This will open up the oustanding invoice
details.
-
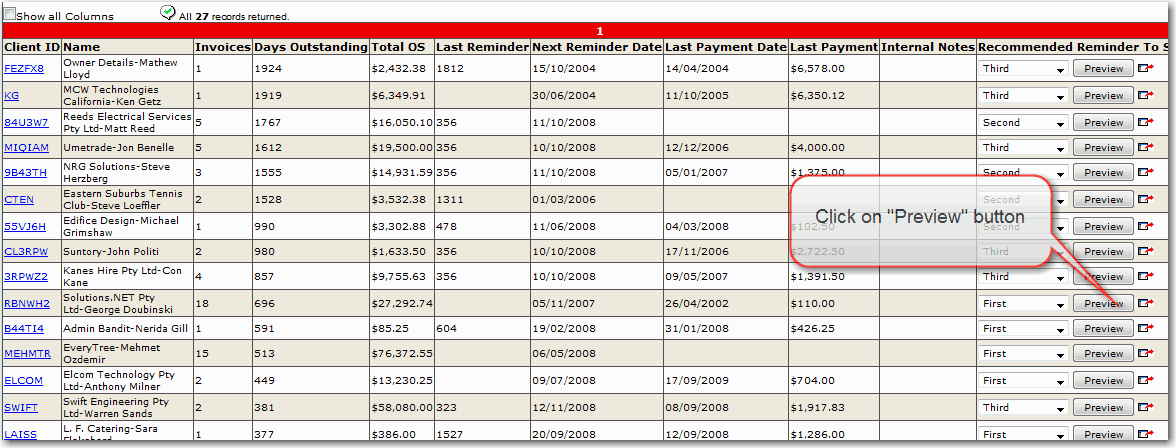
-
Figure: Click on preview button to open up the details
-
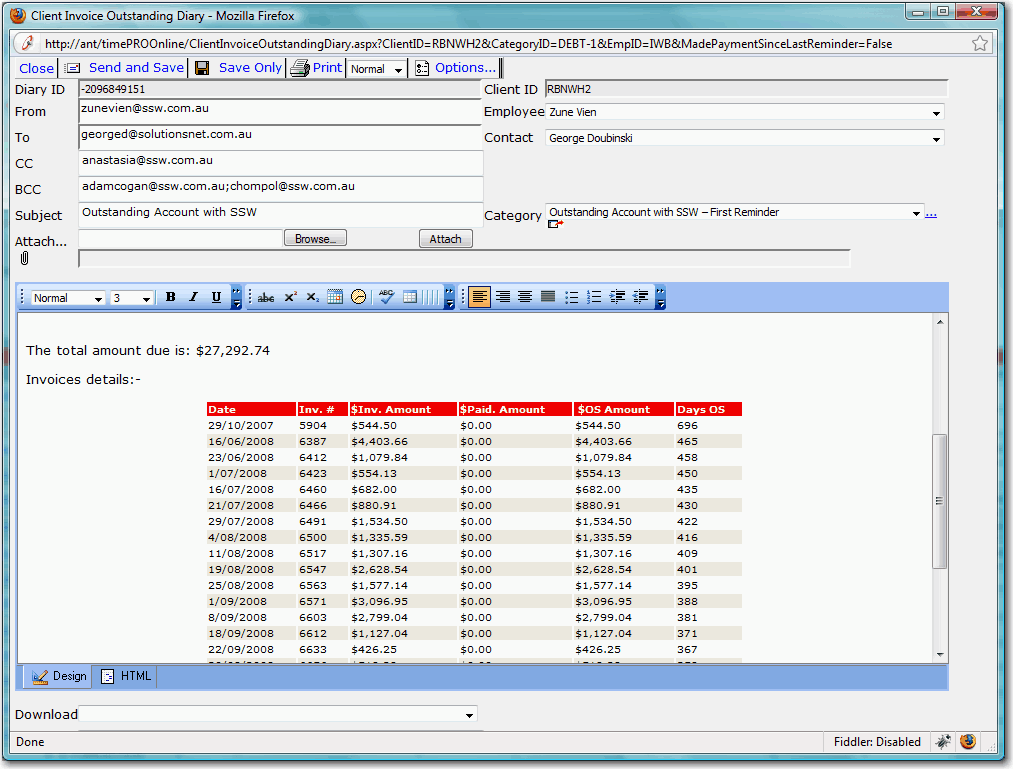
- Figure: Client oustanding invoice details
- Open up your copy of draft email in your outlook.
-
Copy the details such as the contact's email address, invoice
details, etc. from TimePRO online to your outlook draft email.
-
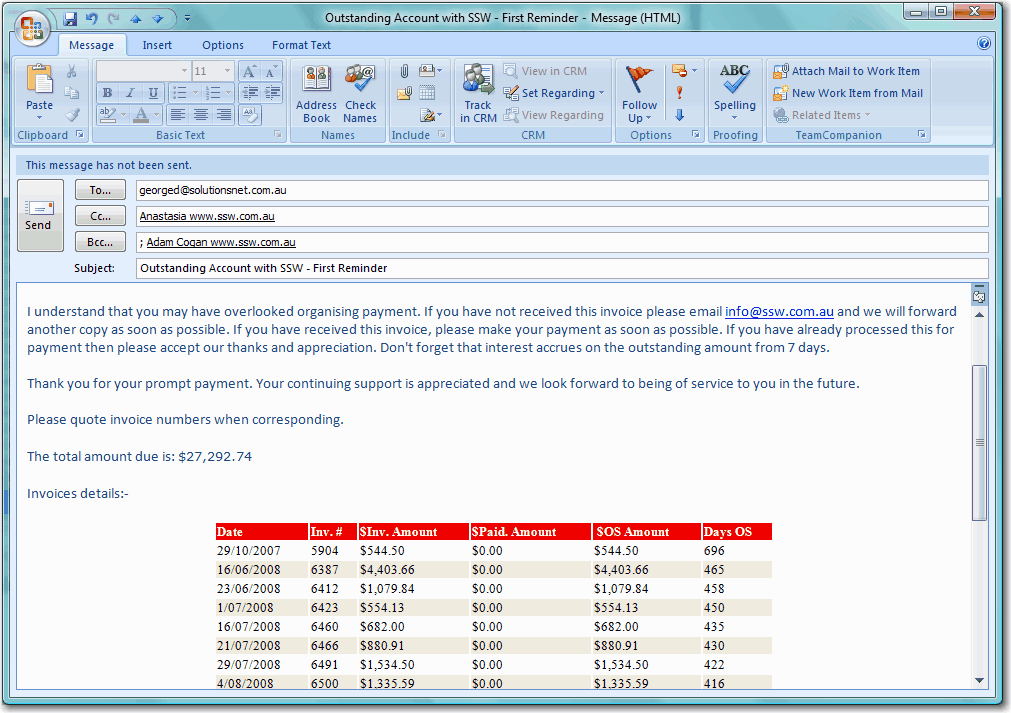
-
Figure: Sample outstanding invoice email with TimePRO
details
- From Outlook email, hit "Track In CRM" button.
-
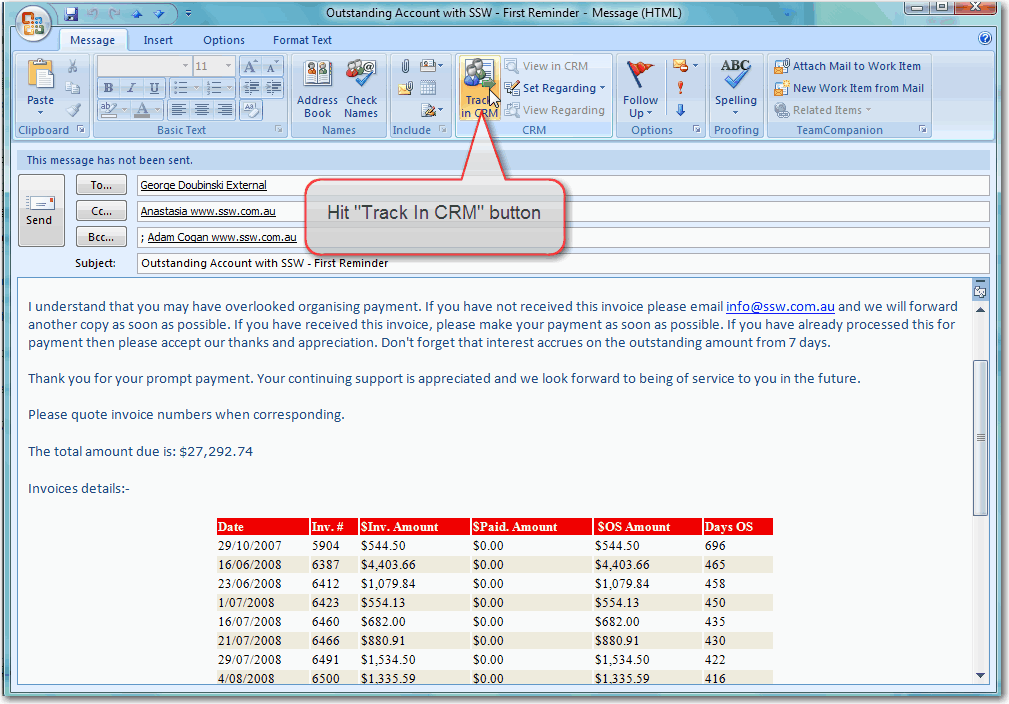
- Figure: Track Outstanding Invoice email in CRM
-
From Outlook email, hit "Set Regarding" button and select
"More".
-
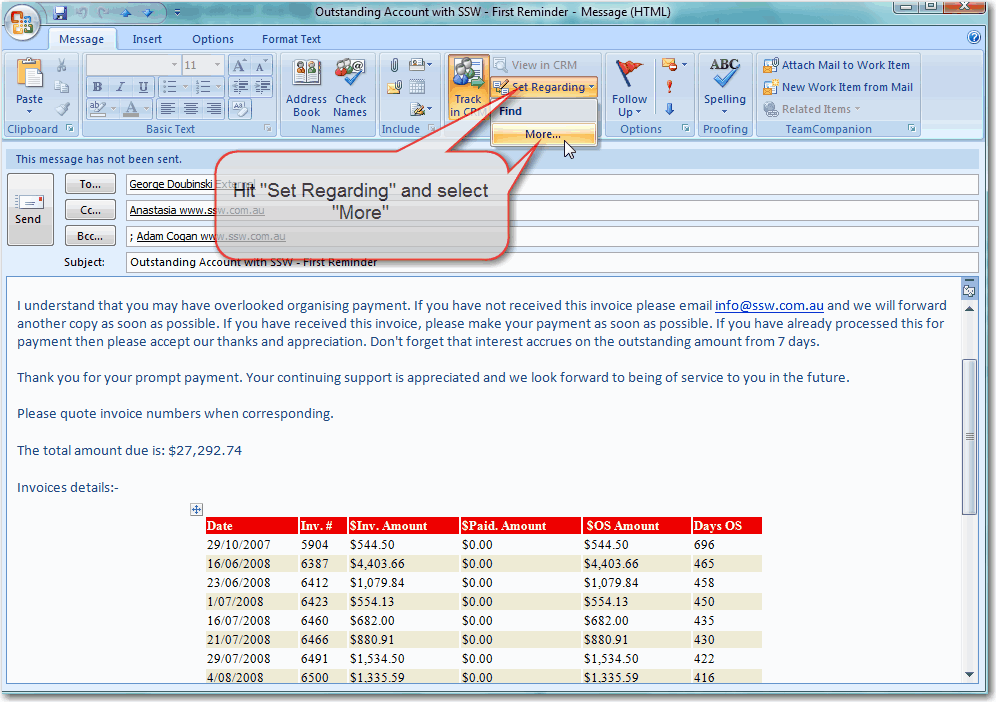
- Figure: Set regarding for outstanding invoice email
-
Search for the client account that you want to send invoice
email to, then click "Ok".
-
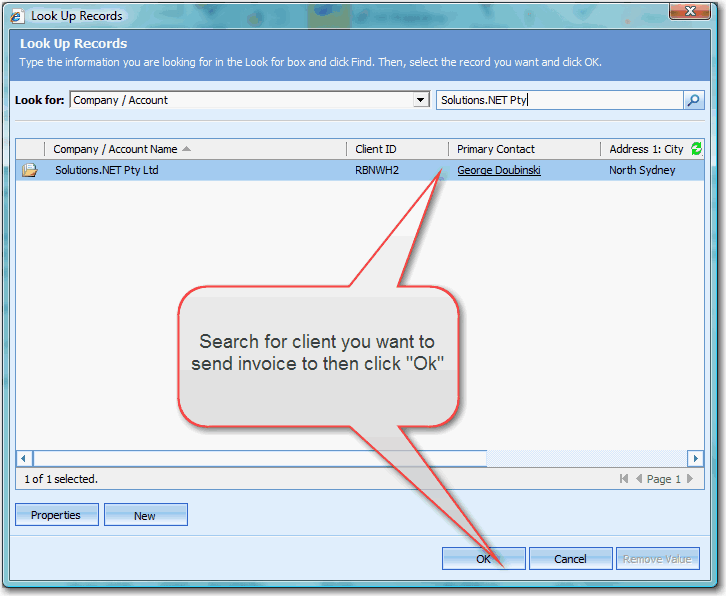
- Figure: Select the client to set regarding
- Send your outstanding invoice email from outlook.
Acknowledgements
Zune Vien