Do you safely develop and deploy Power BI report changes?
Loading last updated info...
The ideal development workflow is to clone the repository, make changes in Power BI Desktop, and follow the standard feature-branch and pull-request process.
However, when an administrator needs to make a small Power BI report change without waiting for a developer, a Git-connected Development workspace provides a simple editing experience.
Video: Make Safe Power BI Report Changes in Minutes with Git | Ben Neoh | SSW Rules (7 min)
What is a Power BI workspace?
A Power BI workspace is a shared location where users can view, edit, and manage reports, semantic models, and other Power BI items. Use the workspaces as follows:
- Development – Used by administrators to edit and test reports on a feature branch
- Staging – Connected to main and used to validate approved changes
- Production – Contains approved reports used by end users and is updated only through the deployment pipeline
How does a workspace work with Git?
A workspace connects to one Git repository, one branch, and one repository folder at a time. Changes made in the workspace are compared with its connected branch.
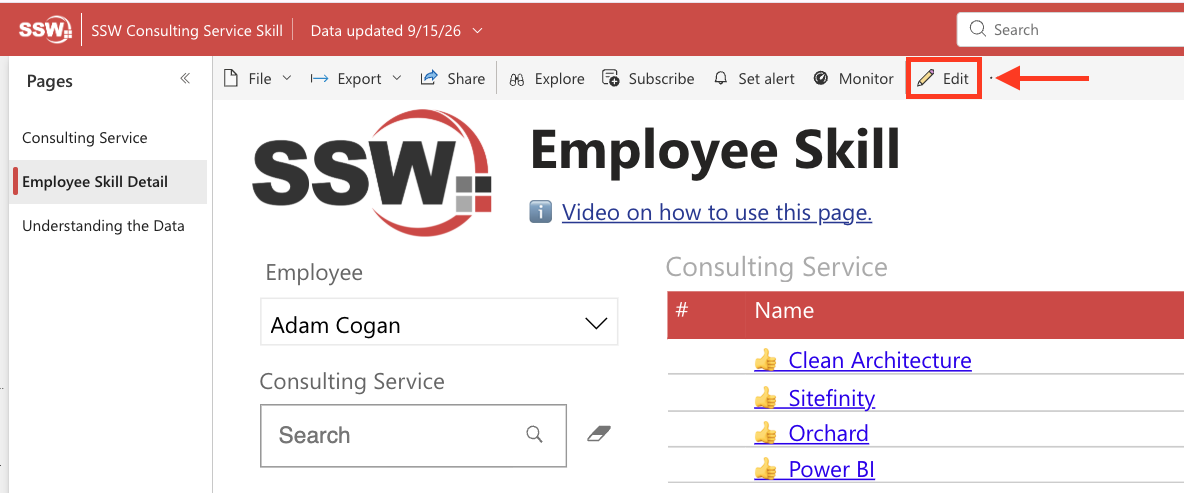
❌ Figure: Bad example - Editing the report directly with the Edit button leaves no Git history
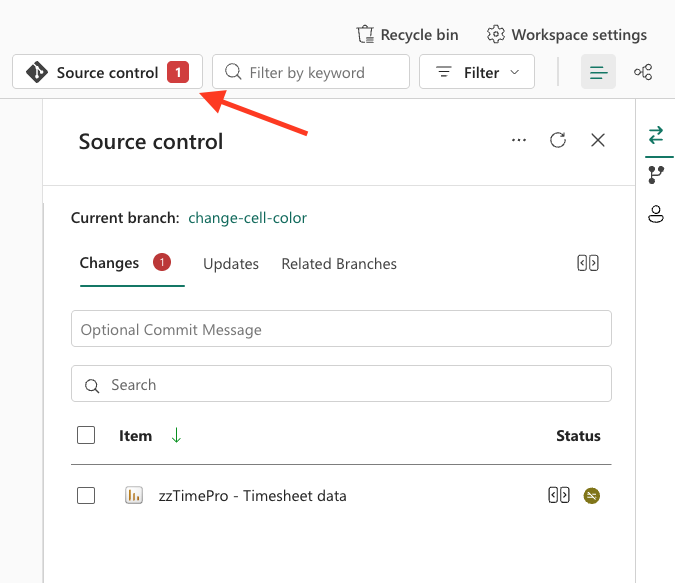
✅ Figure: Good example - Making the change in a branch through Source control keeps a full Git history
How to commit changes from workspace
1. Open the Development workspace
2. Open Source control | Branches | Switch branch | New Branch, and create a feature branch from the latest main branch. The workspace switches to the new branch
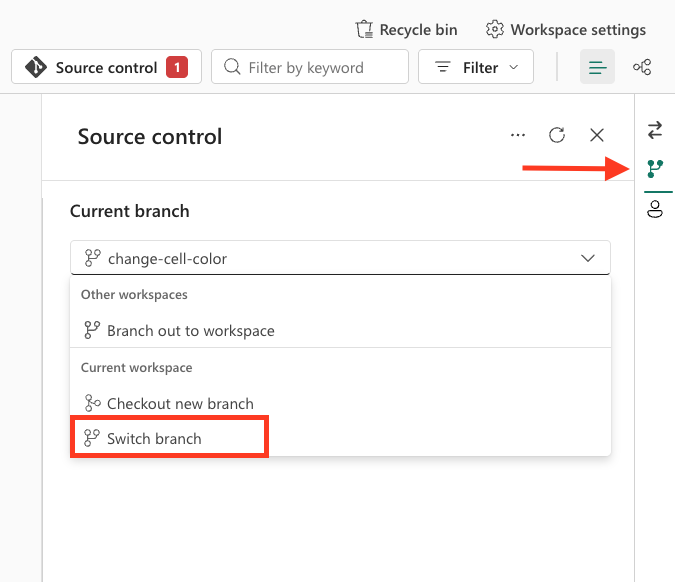
Figure: Source control | Branches | Switch branch
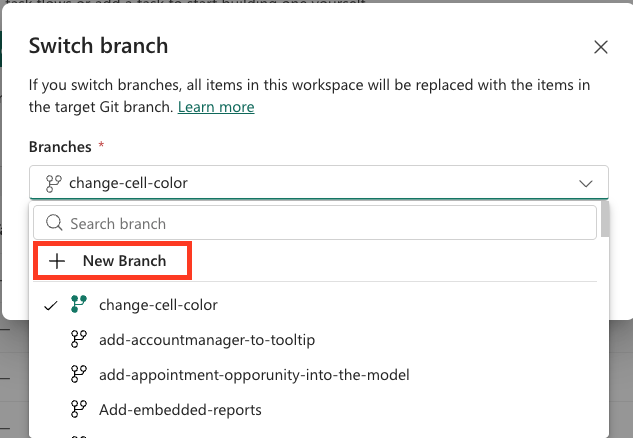
Figure: Switch branch | New Branch
3. Edit, save, and test the report
4. Open Source control and review the changed items on the Changes tab
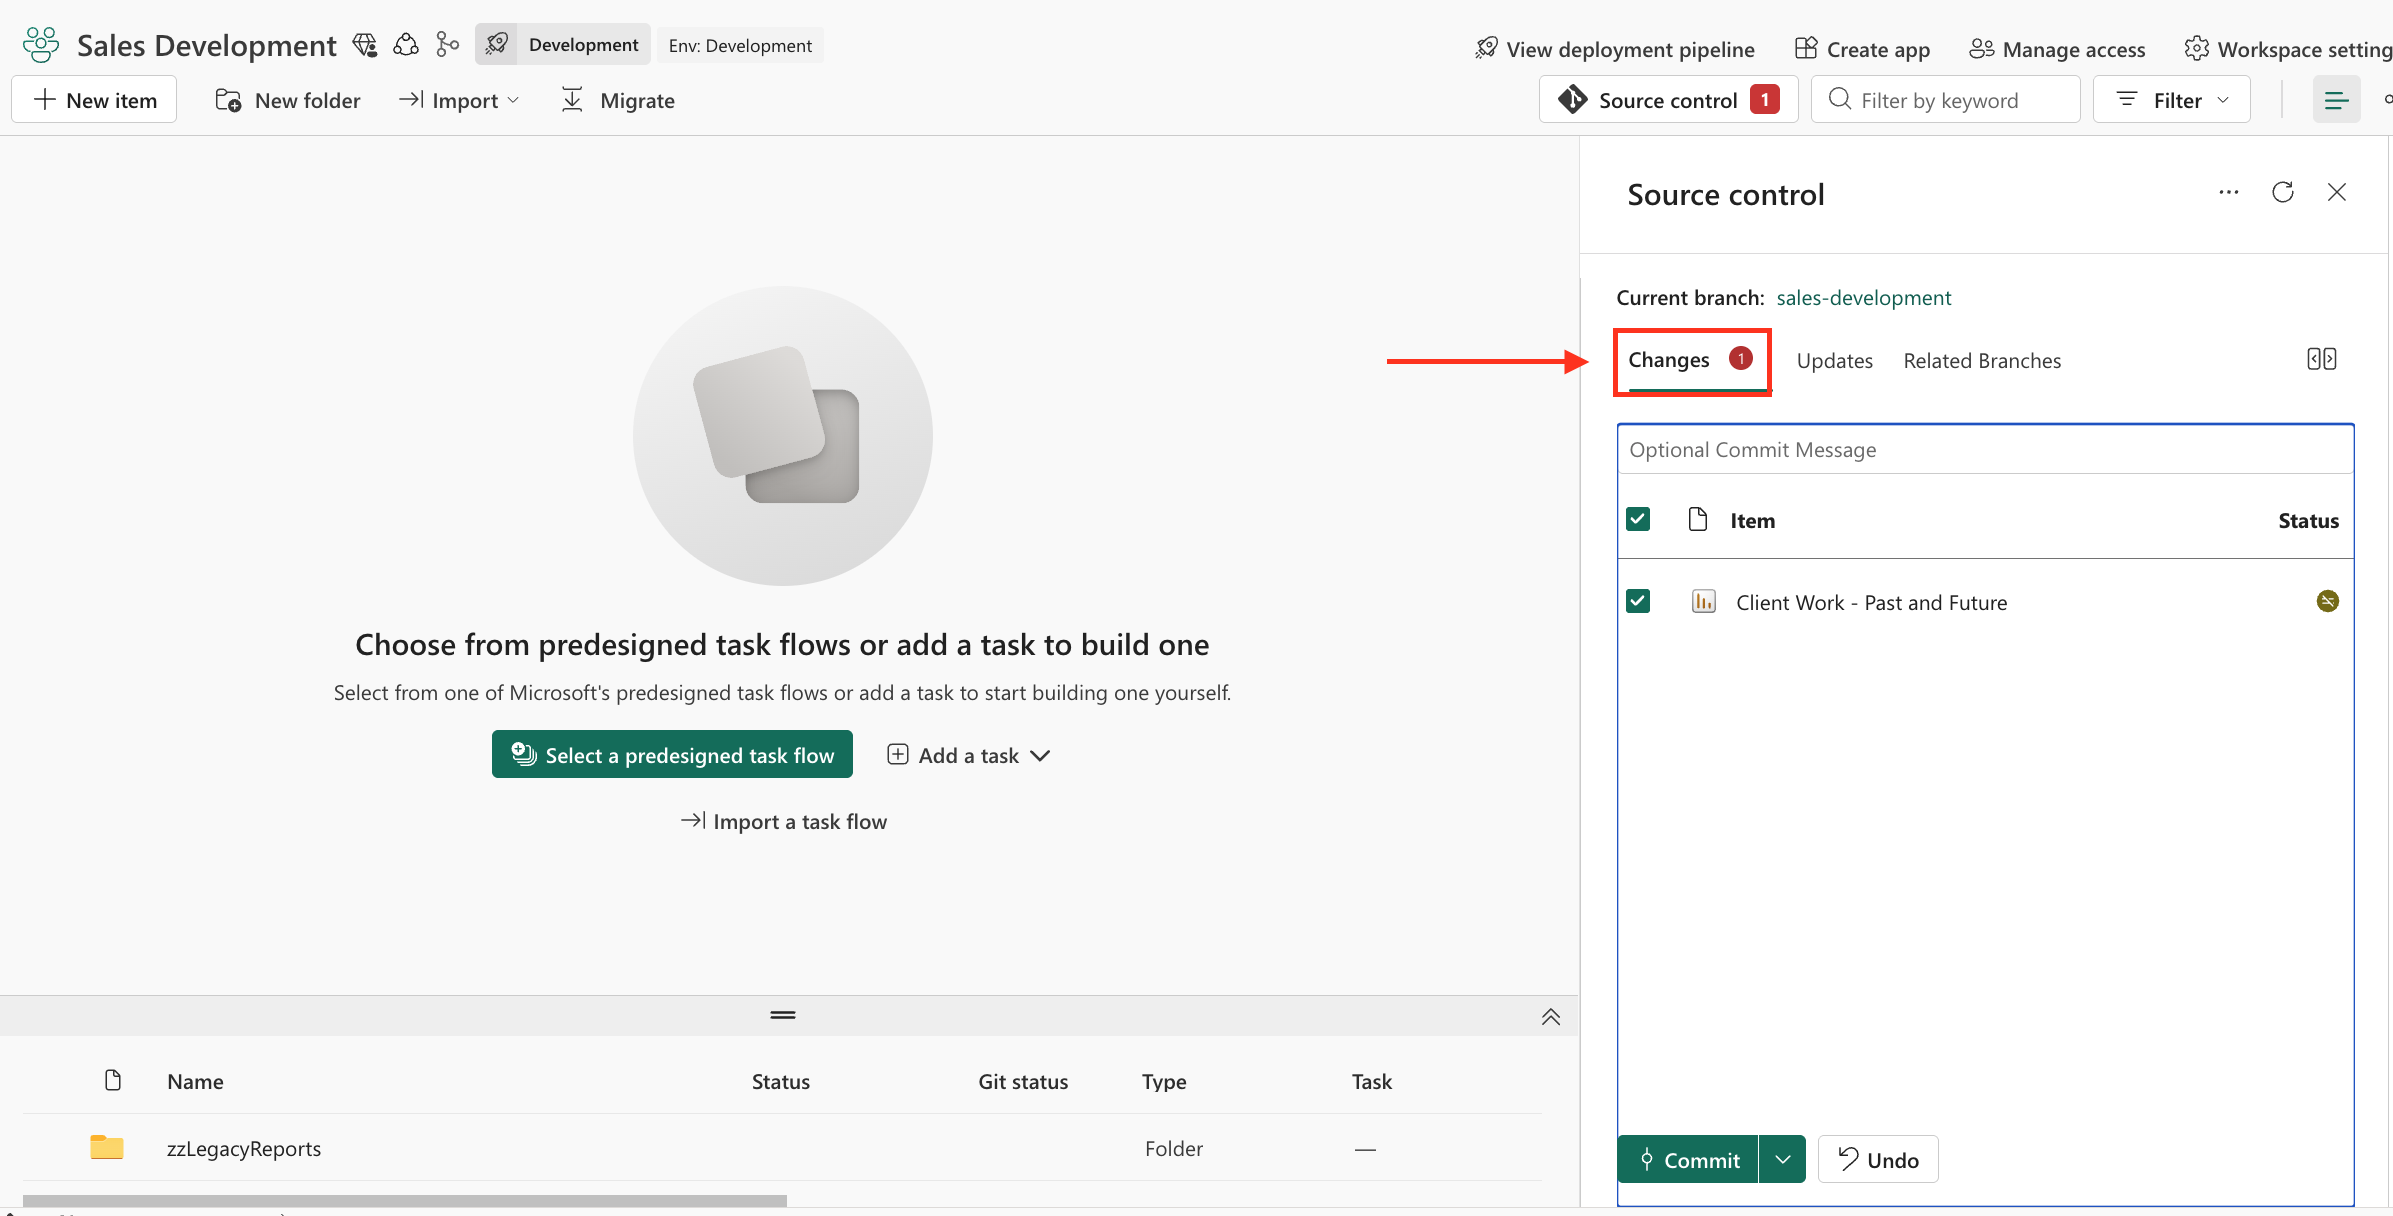
Figure: Changes ① - workspace edits that have not been committed to Git
5. Enter a clear commit message and commit the changes
6. Create a PR from the branch and ask for review
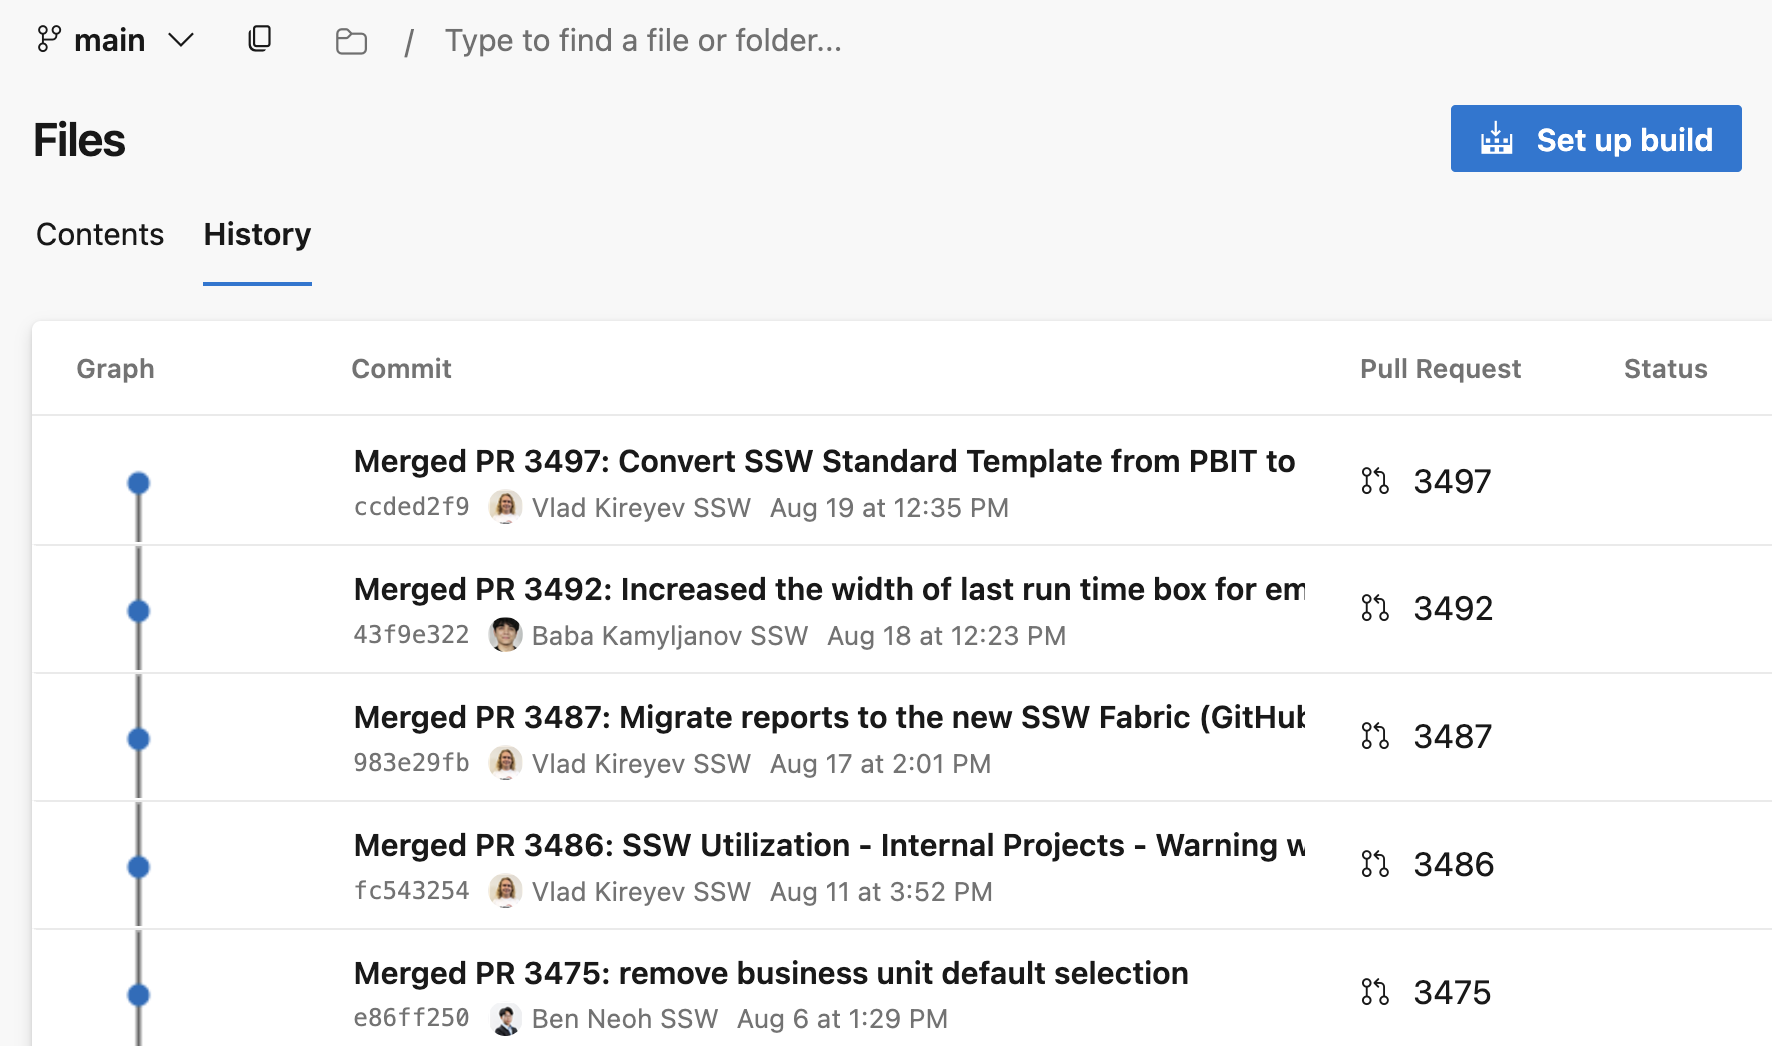
Figure: Git history for Power BI report
How are Power BI changes deployed?
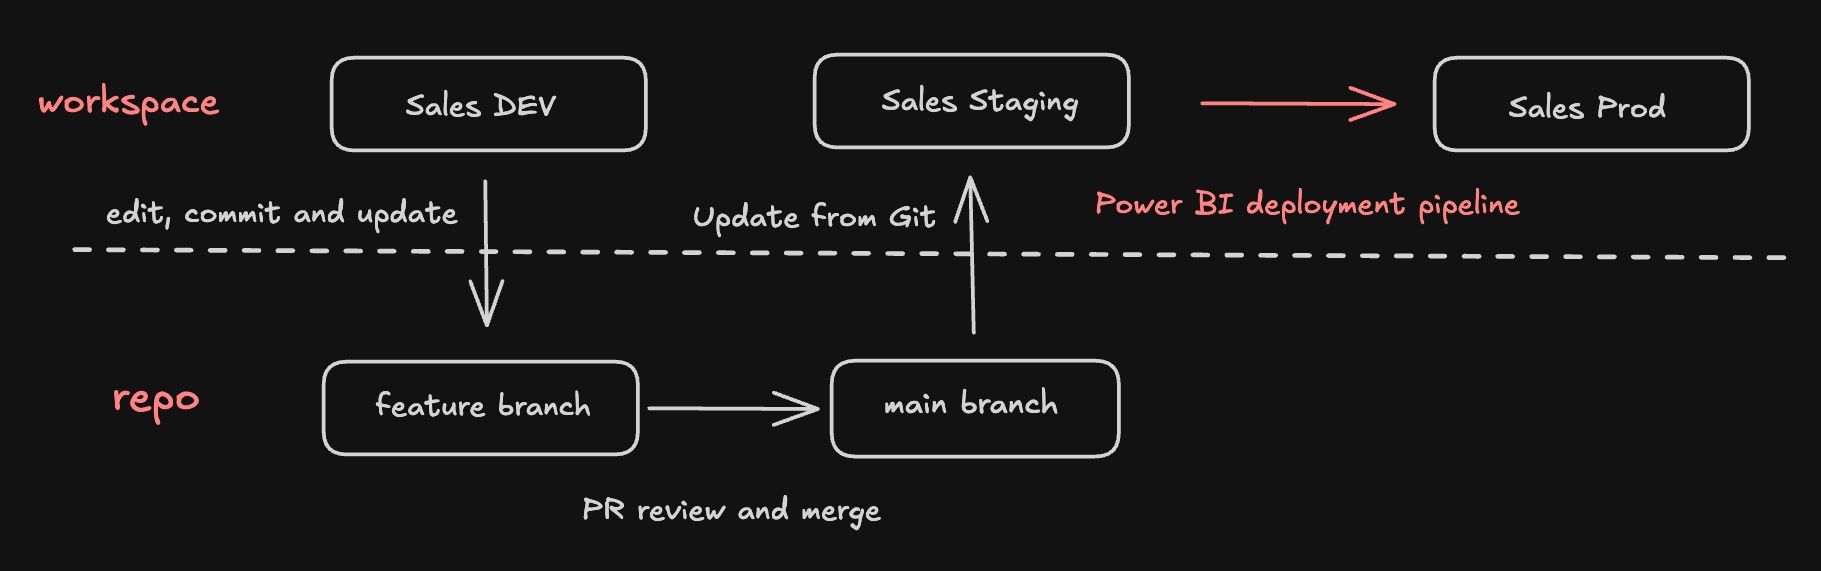
Figure: Power BI deployment strategy
1. Review and merge the approved pull request into main
2. Sync the Staging workspace with the latest changes from main
3. Test the updated reports in Staging
4. Open the Power BI deployment pipeline
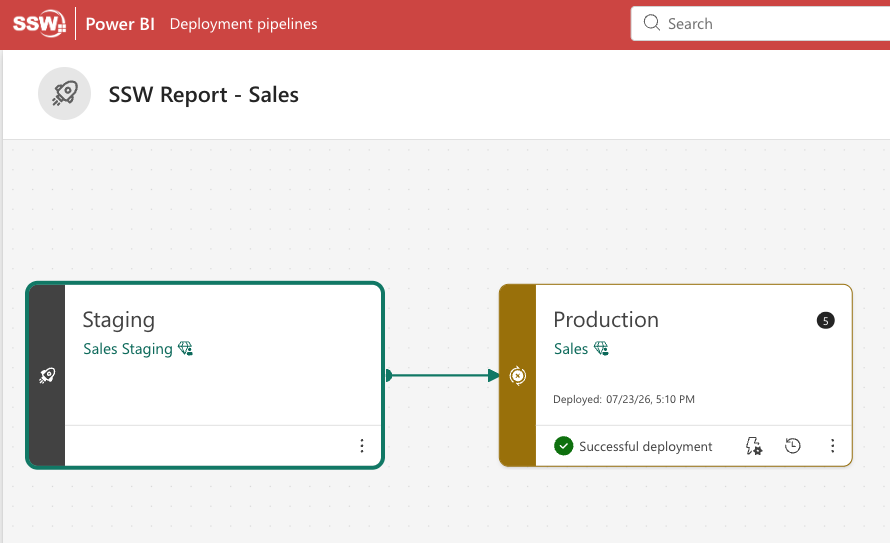
Figure: Power BI deployment pipeline example
5. Compare the Staging and Production workspaces
6. Deploy the approved changes to Production
🚀 Your changes are now live!
Solution adapted from Microsoft Fabric’s official CI/CD workflow documentation.