If you still need help, visit Application Lifecycle Management and book in a consultant.
When a website is continuously deployed, it should be easy to see exactly what code is running in production. Showing the latest deployed commit gives everyone a clear reference point when checking changes, reporting issues, or investigating bugs.
This makes it easier to confirm what is live, trace problems back to a specific change, and understand whether a fix has already been deployed.
For downloadable products, such as mobile apps and desktop apps, show a version number instead so users and support teams can identify which installed release they are using.
TFS and Windows Azure work wonderfully together. It only takes a minute to configure continuous deployment from Visual Studio Online (visualstudio.com) to a Windows Azure website or Cloud Service.
This is by far the most simple method to achieve continuous deployment of your websites to Azure. But, if your application is more complicated, or you need to run UI tests as part of your deployment, you should be using Octopus Deploy instead according to the Do you use the best deployment tool rule.
Often, deployment is either done manually or as part of the build process. But deployment is a completely different step in your lifecycle. It's important that deployment is automated, but done separately from the build process.
Octopus Deploy 2.6 introduced a new Lifecycles feature that makes Continuous Integration from TFS much easier. It's a must have for projects in TFS that use Octopus for deployment.
As well as allowing continuous integration, the Lifecycles feature adds some good governance around when a project can be deployed to each environment.
Publishing from Visual Studio is a convenient way to deploy a web application, but it relies on a single developer’s machine which can lead to problems. Deploying to production should be easily repeatable, and able to be performed from different machines.
Configure the ExecuteBatchTemplate Build Process Template.
Your source control repository should be the source of all truth. Everything, always, no-matter what should go into source control.
This includes any deployment scripts and Web Deploy parameter files if you need them.
(Before you configure continuous deployment) You need to ensure that the code that you have on the server compiles. A successful CI build without deployment lets you know the solution will compile.
You should create a Deployment Batch file and SetParameters file for each Environment.
TODO: MattW - View GitHub issue
If you use Azure websites and VisualStudio.com you can set up continuously deployment in 5 minutes.
In theory WebDeploy can create a site for you when you deploy. The issue with this is that many settings are assumed.
You should not Install Web Deploy from the Web Platform Installer, but instead download the installation from the IIS website (http://www.iis.net/downloads/microsoft/web-deploy).
The reason for this is that the Web Platform Installer does not install all of the components required for continuous deployment, but the downloaded package does.
Update your Build to use the ExecuteBatchTemplate Build Process Template.
Ideally, Builds are created once, and can then be deployed to any environment, at any point in time (Build Once, Deploy Many). We do this by including deployment batch files in the solution, and specifying them to be called in the Build Process Template.
You can use Visual Studio's Web Compiler extension to create a bundle.css and test if CSS was compiled successfully.
In the Face of Armageddon
When there's a major error during deployment or a catastrophic fault happens, what is your first instinct? Is it to hit that Roll Back button?
It feels like reverting back to the previous stable version is the safest and quickest way to restore functionality.
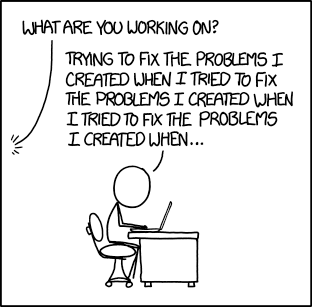
Figure: Fixing Problems