This product is no longer supported.
SSW Data Merge PRO! Tutorial
This tutorial demonstrates how to merge a purchased
client database into your corporate database.
When you install SSW Data Merge PRO!, two sample
databases are included. They are
\SampleData\MailingListPurchased2000.mdb and
\SampleData\NorthwindData2000.mdb. The
NorthwindData2000.mdb is exactly the same as
Northwind.mdb included in MS Office, while the
PurchasedMailingListPurchased2000.mdb database has 5
companies which are not existed in
NorthwindData2000.mdb.
The data structure of these two databases are different.
MailingListPurchased2000.mdb has a table named 'Client'
with ClientID, CoName, etc, columns. has a table
named 'Customers' with CustomerID, CompanyName, etc
columns. Our goal is to merge the 'Client' table into
'Customers' based on the duplicate criteria of 'CoName'
in MailingListPurchased2000.mdb is same as 'CompanyName'
in NorthwindData2000.mdb.
Let's begin.
STEP 1. Start SSW Data Merge PRO!
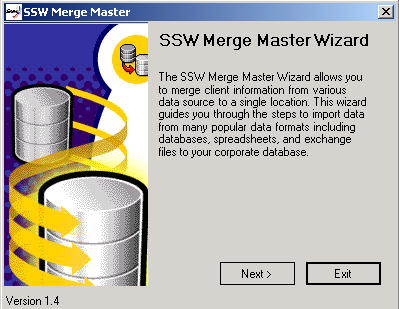
Click 'Next>'
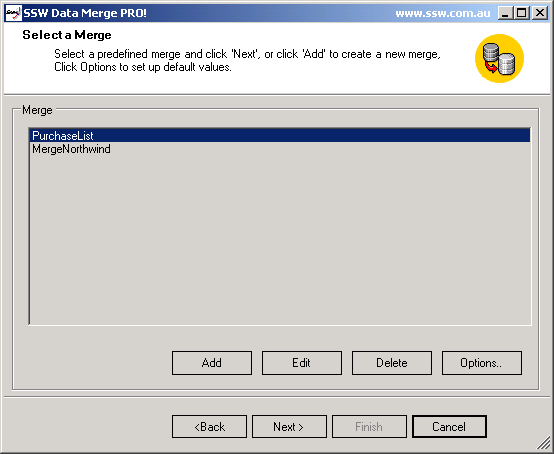
STEP 2. Select a merge.
You can Add, Edit or Delete a predefined merge Or set up
options.
Suppose you want to add a new Merge, click on 'Add'.
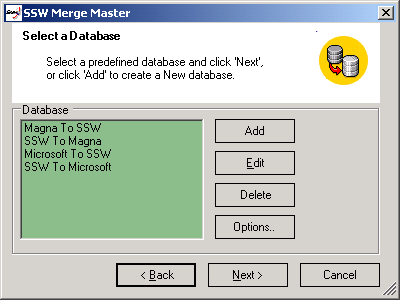
STEP 3. Add a merge.
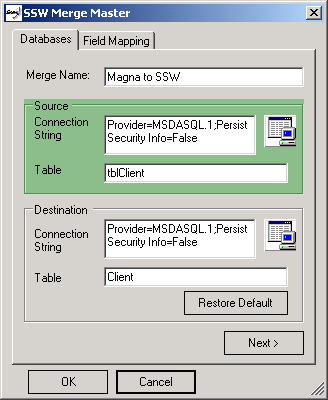
Step 3.1. Configure Merge Databases
A default destination detail is set. (to change the
default destination, click Options on 'Select a Merge'
Form)
You can use UDL wizard to construct a connection string
by click on the UDL icon.
Click Next>
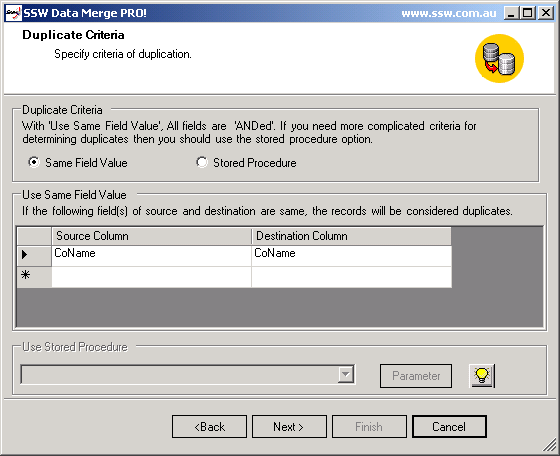
Step 3.2. Configure Duplicate Criteria
Choose the Criteria for duplicates. Here we choose
Company Name.
Click 'Next'
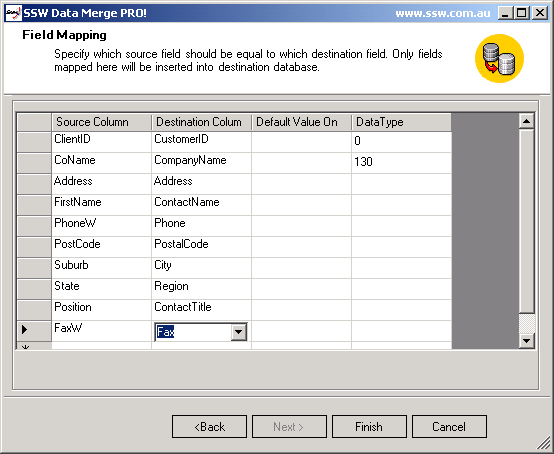
Step 3.3. Configure Field Mapping
Here you map all source field into destination field.
Click 'Show All' to list all the Source or Destination
fields. To delete a row, click on the row header and
press 'Delete' key.
Click 'Finish' to complete the merge setup.
Now, there is a new Merge Named 'PurchaseList' on the
merge list.
Click 'Next>' to start merge processing.
Step 4. Merge Result Processing
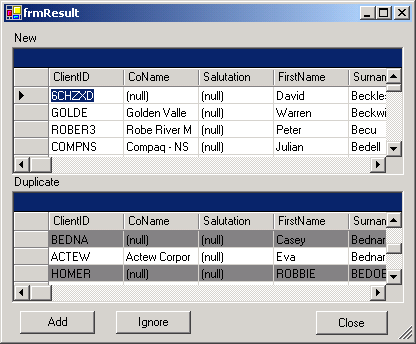
Here is the result of Merge Processing. The result
shows:
There are 34 records in total of the source database. 5
are possibly new (with 0 possible duplicate) and others
are possibly existing (with 1 or more duplicates).
After Click on 'Add' on the record with ClientID 'SSW',
that record's status changed from 'Unprocessed' to
'Added'.
To turn off the confirmation message box, uncheck the
'Show Confirmation' checkbox.
To change different views (UnProcessed, Added, NotAdded,
Skipped), choose a different item in 'Current Filter'.
You can also change the number of records per process.
The larger the number, the slower the process. The
default is 20 records per process.
If you want to see details of the possible duplicates or
make some change before adding the record to
destination, use the 'Advanced Add'.
Step 5. Advanced Add
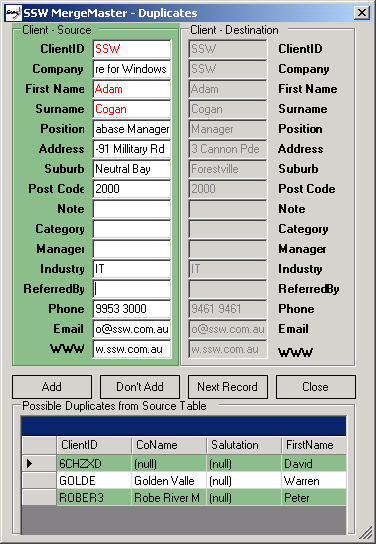
Here you can see the source and destination record side
by side. You can make change on the source record before
you add into destination. You can even make change on
the destination record if you find some error on your
corporate database!
These two forms are synchronized so you can navigate and
view records withought open and close forms all the
time.
If you experience any technical problem when using SSW
Merge PRO! Please send us
bug reports
and
feedback
so that we can evolve SSW Merge PRO! into a product that
matches your requirements.