-
Using SQL Deploy in Directory Mode
What problem does SQL Deploy Directory Mode solve?
Directory mode helps to solve the problem of
managing and applying updates to the Database. It
uses a history table to keep track of the updates
that have been applied. This allows the DBAs and
Developers to put their updates into a single
folder and let SQL Deploy worry about versioning
the changes.
There is also a dll that is provided that
allows you to integrate with SQL Deploy and check if
there is a new version.
Directory mode is designed to allow Developers to
incorporate SQL Deploy into their applications to
deliver Database updates quickly and easily at the
clients site.
The SQL DBA or Developer saves all of the database
updates to a single folder. SQL Deploy monitors this
folder and checks for SQL scripts that have not been
applied to the Database. It keeps track of the
changes it has applied to the Database by updating a
history table.
When a new version of the Database is required,
simply
-
email the SQL scripts and the SQL Deploy Project
(sdproj) file to the client.
-
Instruct them to place these files into the
directory that SQL Deploy is monitoring. When the
application detects the new SQL scripts the user
will be notified that changes need to be made to
the Database and a dialog similar to the following
will be displayed.
The SQL Deploy DLL will display this dialog when it
detects a SQL script that has not been applied to
the database. The checking process is normally run
when the application that is using SQL Deploy is
started.
-
- Figure: Warning - there is a new version
When the user clicks on the
Yes
button, SQL Deploy will be launched with the SQL
Deploy Project (sdproj) file as a parameter. The
user has only to click the
Next
button for each screen in the SQL Deploy wizard to
apply the database updates. You could also start the
console version of SQL Deploy with will upgrade the
database with no user intervention.
You can start SQL Deploy with command line arguments
to specify the initial values displayed in the
wizard screens.
SSW.SQLDeploy.exe [/XMLFile:settings.sdproj] [/TimeOut:value] [/UserMode:true|false]
                    [/ReconcileScriptsMode:true|false] [/FolderPath:folderpath] [/ConnectionString:connectionstring]
                    [/SelectedFile:filepath] [/UseTransactions:true|false] [/UpdateVersionTable:true|false]
OR
SSW.SQLDeploy.exe /XMLFile:settings.sdproj
| Parameter |
Description |
/XMLFile:sqldeployproject.sdproj
|
The Full path and filename of the SQL Deploy
Project (sdproj) file that contains the
settings to use. It is not necessary to
specify other parameters if a XMLFile is
specified. For example:
/XMLFile:"C:\Program Files\SSW SQL
Deploy\Settings.sdproj"
|
/TimeOut:value
|
The connection Time out value to use when
connecting to the SQL Server. For example:
/TimeOut:5
|
/UserMode:true|false
|
Indicates to run in Directory mode or Single
File mode.
true
specifies to run in Directory mode, the
/FolderPath
parameter must be specified.
false
specifies to run in Single File mode, the
/SelectedFile
parameter must be specified. For example:
/UserMode:true
|
/ReconcileScriptsMode:true|false
|
Indicates whether to run in Compare(Reconcile)
Scripts mode.
|
/FolderPath:folderpath
|
The path to the folder that contains the SQL
script files. (not for Single File mode) For
example:
/FolderPath:"C:\Program Files\SSW SQL
Deploy\SampleData\"
|
/ConnectionString:connectionString
|
The connection string that specifies the
Database to make the updates to. For example:
/ConnectionString:Provider=SQLOLEDB.1;Password=;Persist
Security Info=True;User ID=sa;Initial
Catalog=SSWSQLDeployNorthwindSample;Data
Source=(local)
|
/SelectedFile:filepath
|
The full path and filename of the SQL script
file that SQL Deploy should run. This option
is only used with Single File mode.
|
/UpdateVersionTable:true|false
|
Indicates whether an entry will be added to
the
_zsDataVersion
table with the SQL script name and the date
and time the script was run. Using this option
is recommended.
|
-
Overview of Single File mode
What problem does Single File mode solve?
Single file mode is a great way to deliver ad-hoc
updates to the Database. Instead of stepping an
end-user through the process of running Query
Analyzer or OSQL they can simply run SQL Deploy.
SQL Deploy provides a friendly wizard-style
interface and will report error messages in a way
that people can understand.
In Single file mode SQL Deploy will run a single SQL
script against the Database. It is a simple method
for ad-hoc database updates.
When a new SQL script is emailed to a user by the
Developers, the SQL Deploy Project (sdproj) file
must be included. The SQL scripts and SQL Deploy
Project (sdproj) file are to saved to the users
local disk drive as directed by the Developer.
-
- Figure: The two files sent by the Developer
Open SSW SQL Deploy, and select the SQL Deploy
Project (sdproj) file. This file contains all the
settings required to run the SQL script.
-
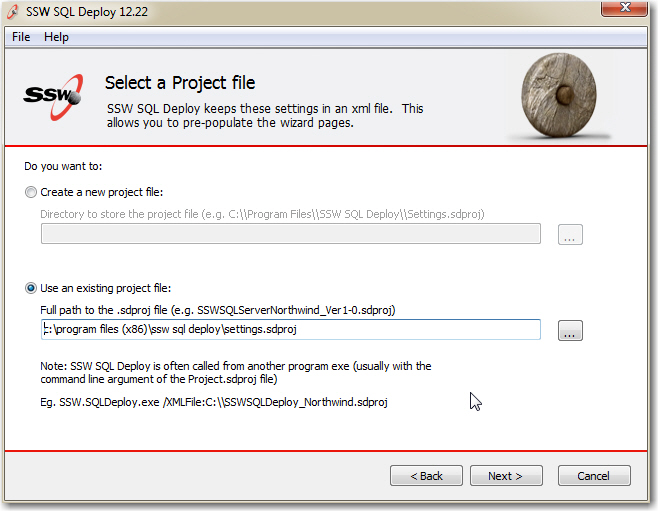
-
Figure: Select the SQL Deploy Project (sdproj)
file sent by the Developer
We are only running a single SQL file so select the
Single File mode.
-
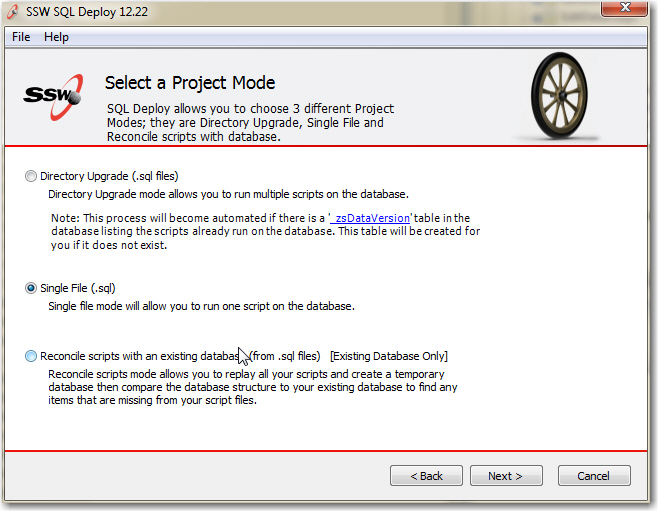
- Figure: Select the Single File mode
Select the SQL script file
Select the SQL script file that was sent by the
Developer.
-
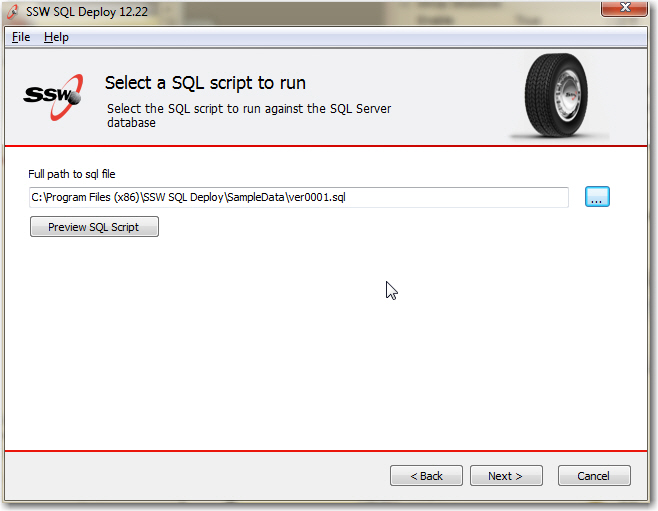
- Figure: Select the SQL script file to run
Create a new Database or use an existing Database
Choose whether to create a new Database or modify an
existing Database.
NOTE: If you are creating a new Database, the SQL
script MUST contain a
CREATE
                            DATABASE
statement. SQL Deploy will use the
CREATE DATABASE
statement to find the name of the Database. If you are
not sure of how to do this, look at the 'ver100.sql'
file in the samples folder.
-
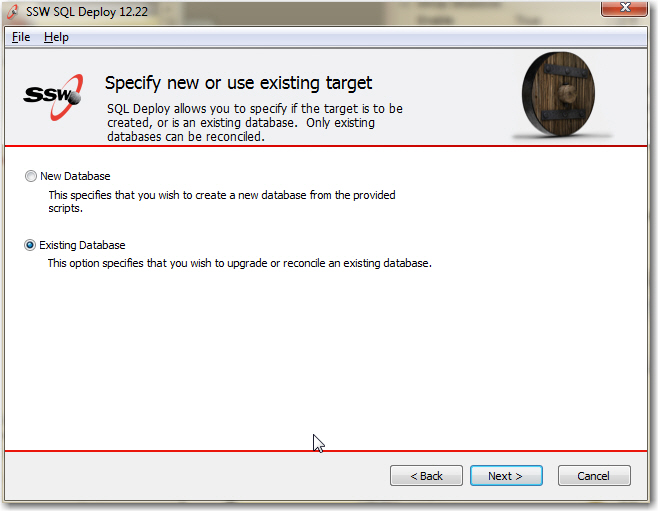
- Figure: Choose New or Existing Database
Specify the SQL Server connection string
If you are creating a new Database specify the
Server and security settings.
If you are updating an existing Database, click on
the button to the right of the connection string to
build the connection string using the standard
Microsoft UDL wizard.
-
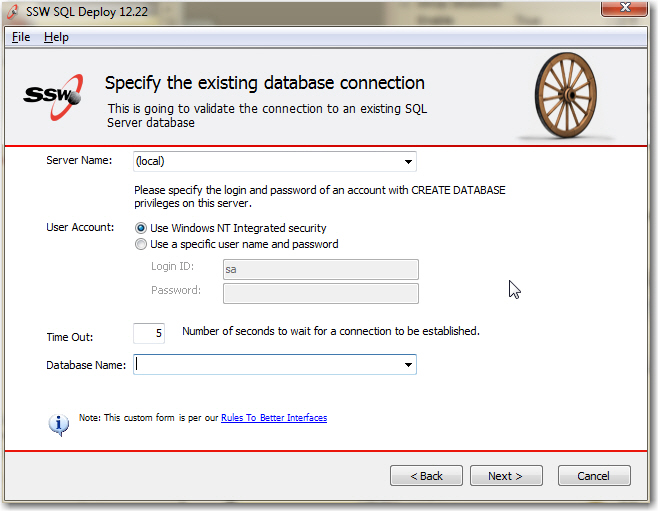
-
Figure: Connection string to an existing Database
Start the upgrade process
Confirm any information then click on Finish to
start the upgrade process.
-
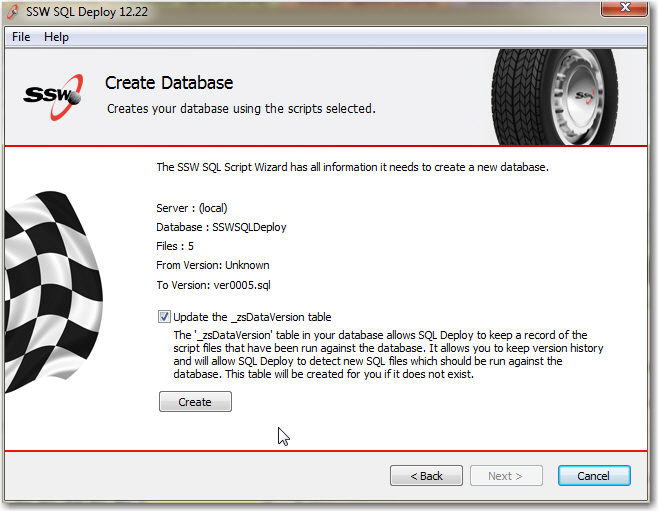
- Figure: Confirmation finish dialog
-
Overview of Compare scripts mode
What problem does SQL Deploy Compare Scripts mode
solve?
Developers or DBA's can sometimes forget to save
the changes they make to the Database as an SQL
script.
Compare Scripts mode ensures that all of the
changes made to a Database between versions are
scripted for deployment.
The compare scripts mode allows you to check that
the saved SQL scripts contain all of the changes to
your Database. It checks that you have not left
anything out before you upgrade a clients Database.
This feature is not available with the console
application.
In this mode SQL Deploy creates a temporary Database
then compares the temporary Database structure to
your existing Database. Any differences in the SQL
scripts are then displayed.
To do this you should run SQL Deploy in the Compare
Scripts With Database Mode.
SQL Deploy will run all the scripts and create a
temporary Database, it will then script out the
Database and display any differences in the schemas
of the Databases.
-
-
Figure: Report generated after a compare.
Demonstrating missing data from the script.