-
Do you ensure you have a computer with the recommended
specifications before upgrading to Windows 7?
Windows 7 is about 27% faster than Windows Vista. It is essential
for PCs, which are being upgraded to Windows 7, to meet the
minimum recommended specifications. You can install
Windows 7 Upgrade Advisor Beta
to check if your system is ready to install Windows 7.
-

- Figure: Results from Windows 7 Upgrade Advisor Beta
-
Do you know whether to upgrade or reformat?
When you're installing a new OS on your PC it's always a dilemma
as to whether to go the whole hog and reformat your hard drive
or take the upgrade path into the new system. Upgrading is nice
because there is no need to install all your programs again. The
problem is all the old junk stays around.
At SSW always go for a fresh start. We've already found a number
of programs will not work in Windows 7. Besides, a nice, clean
C: drive to go with your new, nice, clean operating system is
always a big plus. Just be sure to follow your organization's
backup standards carefully!
Note: For individuals looking to upgrade to Windows Windows 7,
the upgrade process is exactly the same as that for Windows
Vista.
Note: If you intend to follow an
automated deployment
then you will be forced to reformat.
-
Do you know the best way to deploy Windows 7 across your
organization?
With Windows XP we commonly see situations where a system
rebuild takes a day or more. With Windows 7 we have got that
down to 45 minutes.
Windows 7 has deployment tools which you can download, which
make it significantly easier for organizations ranging from
small to large sizes to migrate to Windows 7.
Here are you deployment choices:
-
Individuals - Standard Installation using Windows 7 CD (not
recommended as you then need to install all your programs)
-
Small Organizations (less than 100 computers) - Business
Desktop Deployment 2007 (not recommended)
-
Small Organizations (less than 100 computers) - Windows
Automated Installation Kit (recommended)

-
Large Organizations (100 computers or more) - Windows
Deployment Services (WDS)
At SSW, we use option 3, which means that you need the new
deployment tool which utilizes Image Based Setups (IBS). When
you use IBS you install all the programs you you create a large
.WIM file. Once the custom image is created you deployed
individually to each PC as detailed below:
Note, for option 4, you use the same IBS method described for
creation of your image. Windows Deployment Services is the
equivalent of Remote Installation Services on Windows Server
2003. For this deployment process, a dedicated server is
required.
In order to use IBS you will need to:
-
Step 1: Create a CD with the tools needed to deploy the Image
-
Step 2: Creating a custom image of a Windows 7 Installation
- Step 3: Get your new PC and Deploy this custom image
Step 1: Create a CD with the tools needed to deploy the Image
-

-
Figure: This is for Windows 7 image developer to follow
every time he creates a new version of Windows 7 image.
PS: You may skip Step 1 because the CD labeled WIN PE and Image
X is kept in n the SSW Sydney boardroom.
Note: Use the CD labelled WIN PE and Image X x64 bit for
building Windows 7 x64-bit image.
-
Install
Windows Automated Installation Kit
-
Open Command Prompt and change from the current location to
the PETools directory.
Type
CD C:\Program Files\Windows AIK\Tools\PETools
-
Copy the PE Tools into a directory on your C: drive.
Type
Copype.cmd [arch] [destination]
Where arch is the arhitecture of the computer on which Windows
7 is being deployed, either x86, amd64 or ia64 and destination
is the path to the local directory, for example, type:
Copype.cmd x86 C:\WinPE_x86
-
Copy ImageX into the same folder.
Type
copy "C:\Program Files\Windows AIK\Tools\x86\imagex.exe"
C:\WinPE_x86\iso
-
Using Notepad, create a configuration file with the following
text and save it as
wimscript.ini
.
[Exclusion List]
ntfs.log
hiberfil.sys
pagefile.sys
"System Volume Information"
RECYCLER
Windows\CSC
[CompressionExclusionList]
*.mp3
*.zip
*.cab
\WINDOWS\inf\*.pnf
Save the configuration file to the same location as the
ImageX:
C:\WinPE_x86\iso
-
Create an image file (.iso) of the folder you just created.
Type
cd C:\Program Files\Windows AIK\Tools\PETools
Oscdimg -n -bc:\winpe_x86\etfsboot.com c:\winpe_x86\iso
c:\winpe_x86\winpe_x86.iso
-
Burn
tthe image onto a blank CD ROM.
Step 2: Creating a custom image of a Windows 7 Installation
Warning:
If you're using a VPC or VMWare then it is best to create a
"Clone" before you generialize so that you can revert back to
it after the image has been created.
Now that we have all the tools on a CD, we now need Windows 7
and all the programs.
- Using a master computer, install Windows 7.
- Install all your applications.
-
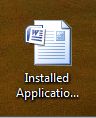
-
Figure: Inside your image, make sure you keep track of all
the installed applications (along with whom added them,
and when). We keep a word document on the desktop.
-
It will be much easier for user to know the version of the
Windows 7 Image installed in their machines if you put the
versioning information in a text file, for example:
C:\_Windows7ImageVersion.txt.
NOTE: When you build the image you need to update
C:\_Windows7ImageVersion.txt.
-
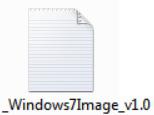
-
Figure: Windows 7 Image Versioning File Image Versioning
File
-
Prepare the computer for imaging by running the Sysprep tools
and cleaning up User settings.
In Command Prompt, type
C:\Windows\System32\Sysprep\Sysprep.exe /oobe /generalize
/shutdown
-
Caution: Do not forget to execute the above command before
capturing the image. Not performing the above step may
cause Boot Failure error message when you try to boot the
installed image on your PC.
-
Note:
You can only generalize your installation 3 times. After
that you'll received an error when trying to generalize the
installation.
-
Boot up
from the Windows PE CD that you created previously.
-
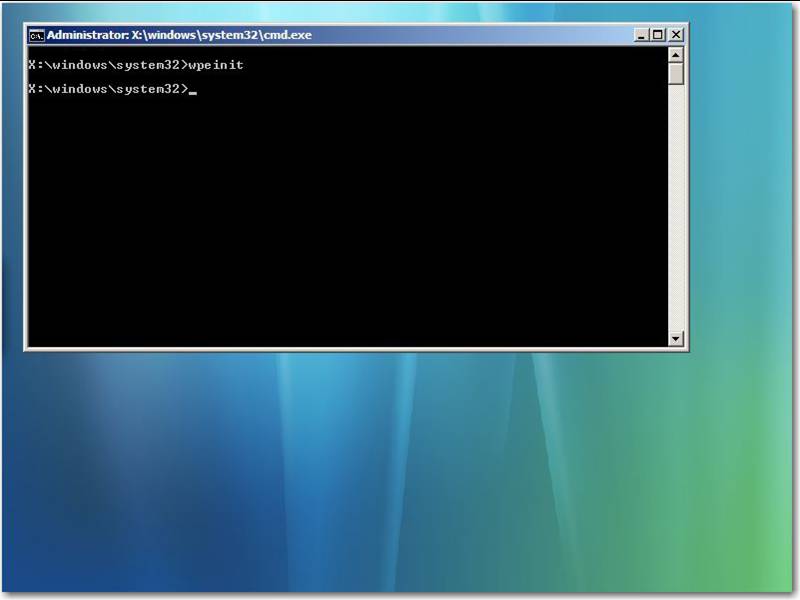
-
Figure: This is what it looks like the first time you boot
off the CD C it is the Windows Pre-Installation
Environment 2.0 - now you capture the image
-
In the command prompt, capture the image.
Type
D:\ImageX.exe /capture C: C:\MyImage.wim "My Windows 7
Install" /verify
(Where MyImage.wim is the image name, you can give any
name you wish).
-
Option A (Not Recommended)
:
Copy the image to a network location. (
Note:
This will not work in VMWare as the network drivers aren't
supported without VMWare Tools, instead boot up the Windows 7
install and copy the image to the network drive from within
Windows 7)
Type:
net use \\[network share]
Where network_share is the location to which the Image will be
saved on the network.
Type your
username
and
password
Type
copy C:\MyImage.wim \\[network_share]
Now the image is on the network and all the guys can get their
Windows 7 image from here
Warning: It may take 8 to 10 hours to copy the file to
network location. Instead try copying the file to any
external drive.
-
Option B (Recommended):
Note: If you are building the image on a virtual machine,
then
Step 3: Get your new PC and deploy this custom image
-

- Figure: This is for Windows 7 image user to follow.
-
On the PC, to which the Image is to be deployed,
back up
all your data.
-
Boot up
using the Windows PE CD you created previously.
-
Format
the hard drive and create partitions by typing these commands
in order:
diskpart
select disk 0
clean
create partition primary size=<size of hard disk>
(For example 'create partition primary size=20000' where 20000
equals 20 GB.
select partition 1
active
format (format quick)
exit
-
Option A (Not Recommended):
Copy the image from the network share onto the local hard
drive.
Type
net use \\<network share>
Type your
username
and
password
Type
copy \\<network share> C:
Warning: It may take 8 to 10 hours to copy the file to
network location. Instead try copying the file to any
external drive.
Option B (Recommended):
If you have followed the recommended steps to copy the .wim
file to external hard drive, then type the following command
to apply the image to your local hard drive:
Apply the image to the C: drive.
Type
D:\ImageX.exe /apply X:\Myimage.wim 1 C:
(Where X = External hard drive).
-
Reboot
once the above process is complete.
-
Follow the on-screen instructions to complete the
installation.
-
Run
Windows Update
to get all necessary drivers and software updates.
You are now ready to work ( it has taken about 45 mins)
-
Do you run all your incompatible applications in a Virtual PC?
When upgrading to Windows 7, you will find that many of your
important applications may not install or give errors.
To ensure a smooth migration process, your image will include a
shortcut on the desktop to a Virtual PC so you can continue with
all of these incompatible applications.
- Figure: Run incompatible applications in Virtual PC
Tip: VPCs are a bit slow, so you will want your VPC to be as
fast as possible so please see
Rules to Better Virtual PC's
for an extensive guide to creating an efficient development
environment.
-
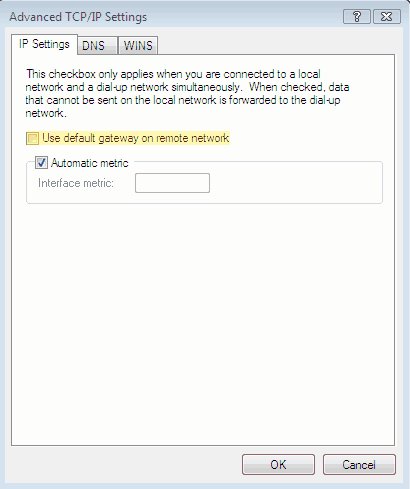
Do you use default gateway on remote network?
VPN is a wonderful tool for users to remotely control the other
PCs via network. If we control the PC located in Sydney and use
default gateway on remote network, some of the bandwidth in
Sydney will be occupied by us. In order to avoid that, we need
to configure the VPN as following:
-
-
Figure: Uncheck "Use default gateway on remote network".
Furthermore, the Microsoft Firewall Client for ISA Server, which
connects with the remote server, will be disabled as well.
After that we can detect our settings by accessing
http://www.dnsstuff.com/tools/aboutyou.ch
. The result will show Your IP, Your country and Proxy Server
etc.
-
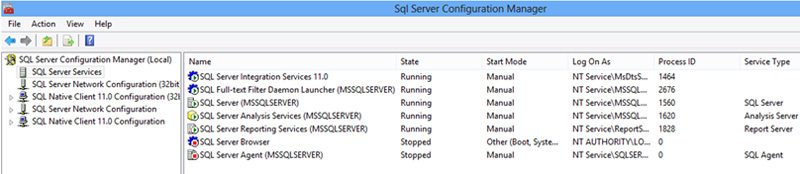
Do you make sure all non essential services are set to manual
The windows 7 image will work fast, even on slow PCs. So only
have a service running if people use it the majority of the time
-
-
Figure: See the ‘Start Mode’ are all set to
Manual.
-
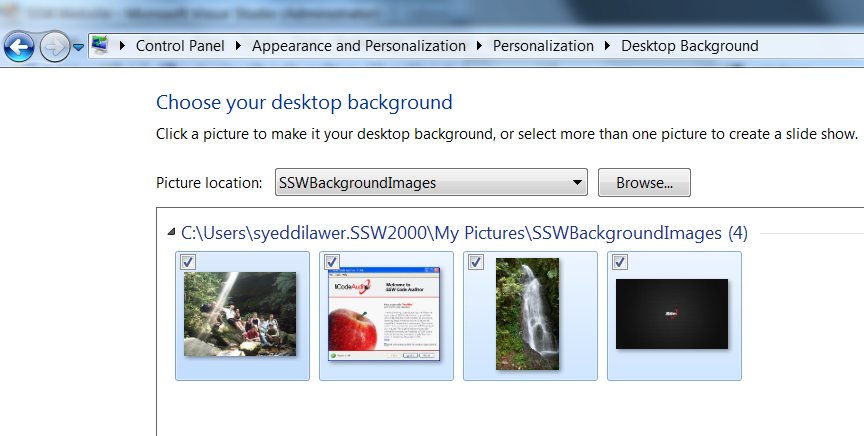
Do you use custom images for your Windows 7 background rotator?
Having the same background is boring. Enliven your PC by having
a rotating series of background images (using the Windows 7
background rotator). For example at SSW we include images of the
guys having fun, SSW products and past SSW projects.
Follow the instructions mentioned below to change your desktop
background:
- Select the images for your background rotator
- Save them at %userprofile%\Pictures
-
Click Control Panel | “Appearance and
Personalization” | Under ‘personalization’
option | Click “Change Background Image”
-
Browse to %userprofile%\Pictures (For e.g.,
C:\syeddilawer\pictures\SSWBackgroundImages) | click Ok.
-
If all images are not selected, then click ‘Select
All’ option to select the images.
-
Under ‘Picture position’ option, select
‘Fill’ | Under ‘Change picture entry’
option, select any time limit you like.
- Click 'Save changes'
-
-
Figure: See the ‘SSW background images’ are used
for Windows 7 background rotator.
-
Do you check out built-in samples for Reporting Services?
Microsoft SQL Server 2005 and 2008 comes with great sample
reports. However they are not installed by default, for more
information please see
Rules to SQL Reporting Services
.
Also see our knowledge base article:
How do I install SQL Server 2005 with the Adventure Works
Samples?
-
Do you have a recommended file structure for storing data?
Using a standard file a structure for storing user data on
laptops makes locating important information fast and performing
automated backup operations easy.
Our developers always have:
                D:\DataExchange  - For storing the MS Outlook .OST file. This folder is deliberately separate so it is not backed up. (the Exchange server itself is backed up regularly)


                D:\DataFirstnameLastname - For storing all user data. This folder is automatically backed up.


                            \ProjectsTemp


                            \ProjectsVSS


                            \ProjectsTFS


                            \Personal


                D:\temp
-
Do you use the "Boot to VHD" feature of Windows 7?
Windows 7 introduced a nice feature called "Boot to VHD". This
feature allows you to natively boot into a VPC image. This has a
couple of advantages:
- Usage of Aero styles
- Bare metal performance
- 64 bit support
-
Do you start from scratch when creating a "boot to VHD" image?
When you consider to use the boot to VHD feature, try to install
a new VPC image from scratch. All your hardware is direct
accessed and not anymore virtualized when you boot into the VHD
image, only the HD is virtualized.
So it is better to start installing a new VPC image from scratch
so that all your drivers are up to date and use the full power
of your machine.
See our rules
Do you use an operational base when creating VPC images?