SSW Exchange Reporter provides the tools and reports you
need to efficiently analyze your organization's email
usage. Reports range from who is sending the most emails
to clients to who has the largest mailbox.
-
Prerequisites
-
Architecturally, SSW Exchange Reporter works like
SQL Server, it runs as a service and has a nice user
interface to start and stop the service. The
Extraction Manager is where you can start and stop
Extraction Windows Service and setup everything.
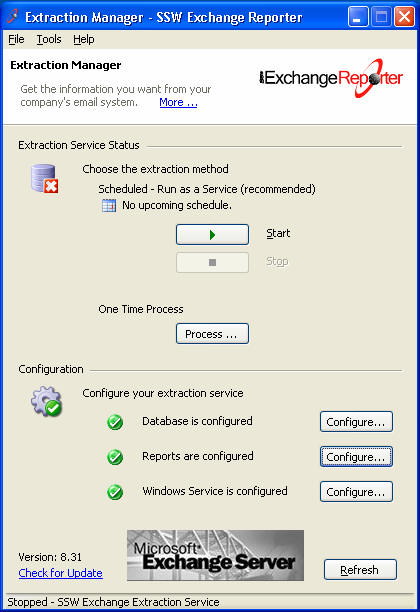
Figure: Start and stop the service and diagnose
the status of each component
-
Exchange Reporter requires that each exchange server
has its own SQL database, ideally in the same local
network to reduce the need for sending data remotely
and speed up the extraction.
To deploy a database, you need to click on
"Tools->Options" and open the "Reporting
Database" tab:
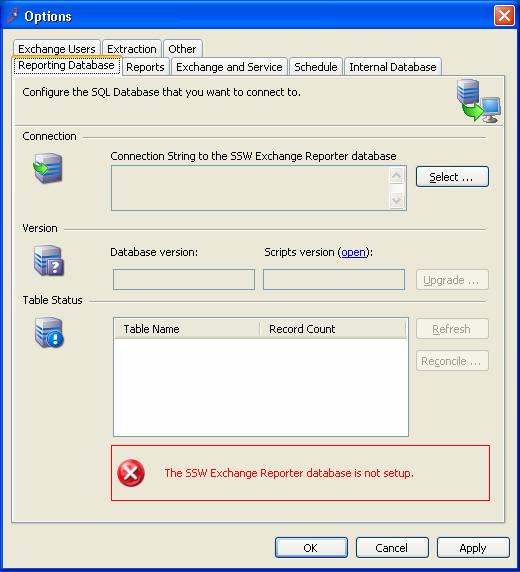
Figure: Click 'Select ... ' to deploy a new
database
Figure: Click "Create" to start the deployment
process
Before you create or connect to your database, you
need to make sure your account has enough privileges
to access your database server and be able to create
and drop database. Normally, a 'Database Creator'
will be enough.
To create a new database:
-
Uncheck the 'Insert Sample Data' checkbox to
enable edit on 'Database Name' textbox,
-
Change the 'Database Name' (DO NOT use the default
'SSWExchangeReporterSample', this will cause
Exchange Reporter to treat your database as a
sample database and will not function correctly),
-
Type in the username and password if you are using
SQL server authentication, otherwise leave it as
'Windows NT Integrated Security',
- Click 'Create'.
Exchange Reporter will deploy your database to the
server you selected. When this is complete, close
'Database setup' form to return to the 'Reporting
Database' tab.
Figure: Creating database to the selected server
To select an existing database,
Figure: Select an existing database
The 'Reporting Database' tab looks like this when
the database has been deployed successfully.
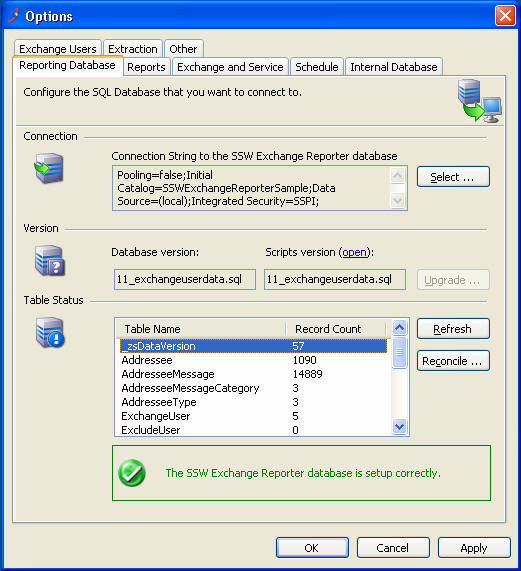
Figure: You will get a "tick" if your database was
correctly set up
-
To publish the reports, open the reports tab:
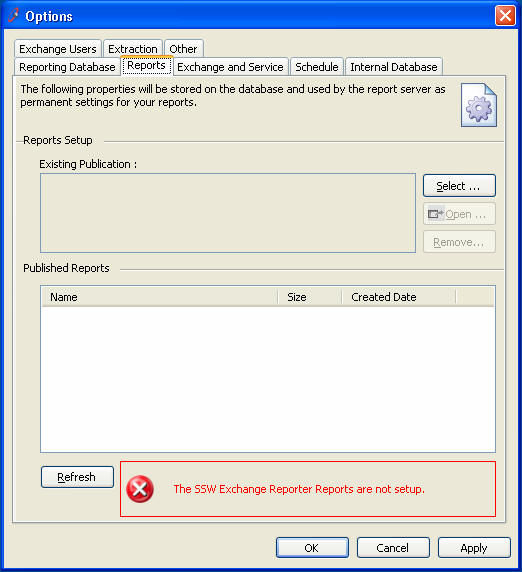
Figure: Click "Select..." to configure your report
publication
Figure: Click "Create" to publish a new set of
reports
The default Reporting Server is pointed to your
local computer, you configure this by click on
'Configure ...' button below the 'Report Server and
Report Manager' section to specify a different
server and the credential you want to use to connect
with the server.
Figure: Configure Report Server and Report Manager
url and authentication mode then click on
'Validate' to make sure they are correct
To publish a new set of reports:
-
Configure the 'Report Server' to the URL of your
report server address. Exchange Reporter uses
SQL 2000 Server Reporting Services
web services to publish reports. This web service
provides the necessary interface for
Exchange Reporter to setup credentials, create the
report folder and upload rdl files. You need
to make sure your account has necessary privileges
to access this web service. The default web
service URL is :
http://YourReportServer/ReportServer/ReportService.asmx
.
-
Change the 'Report Directory Name' to the name you
want (We recommend you remove the 'Sample' as this
will confuse your users).
- Click on 'Create' button.
-
Exchange Reporter will publish reports to your
report server. Once the report publishes
successfully, a new browser window opens and will
show you the new reports.
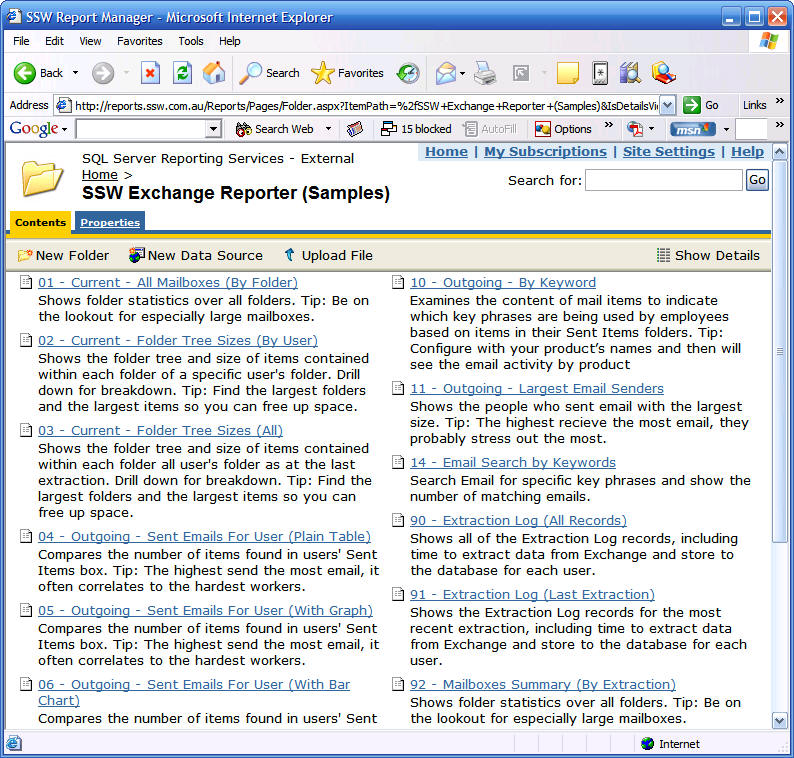
Figure: Your newly published reports now appear in
the
report browser
View sample reports
-
SSW Extraction Windows Service allows you run
extraction as a service, which gives you the
flexibility to schedule the extraction process to
run outside of your business hours. To install and
setup this service, open 'Options->Exchange and
Service' tab.
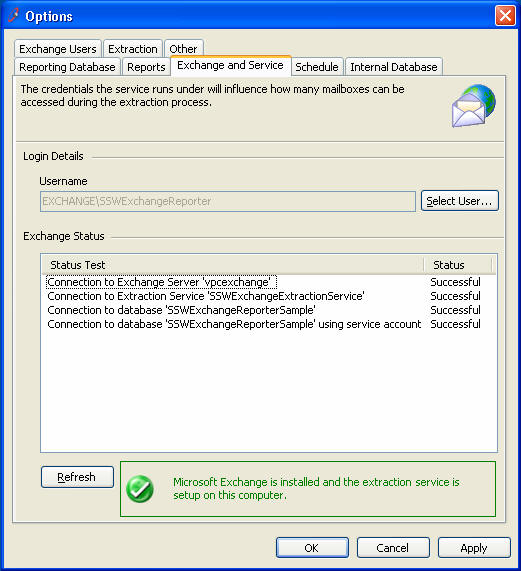
Figure: Click 'Select User ...' to install the
Extraction Service and configure the account that
will be used to run it
To install Extraction Windows Service, click 'Select
User ...' to open 'Service User Selection' form:
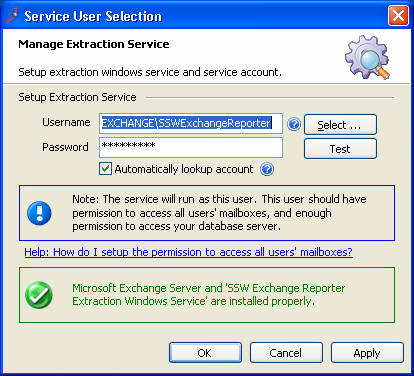
Figure: 'Service User Selection' form,
enter/select your service account and click on
'OK' to install the Extraction Service
In the form above, click "Select" to choose the
service account you want to use for running the
Extraction Service. This account must have read
permission on all of your mailboxes.
Note (Common Issues):
-
SSW Exchange Reporter allows you to select the
mailboxes to collect data, you can only select the
mailboxes you want to report on and skip all other
mailboxes. To select the mailboxes, go to the
'Options-> Exchange Users' tab.
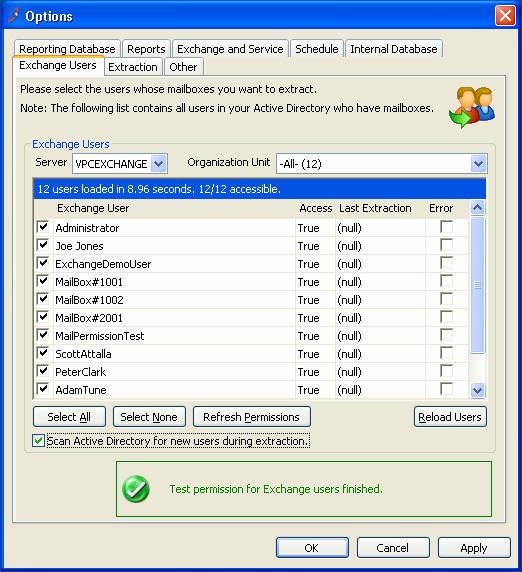
Figure: Select the mailboxes which you want
to extract data from
If you have followed the instructions above, the
'Access' column in the list may show 'False'. This
is because the permission settings you just created
for your service account may take at least 15
minutes to take effect. If this is the case, you
will need to wait a while then come back to this
form. This behaviour has been described in this
Microsoft KB
http://support.microsoft.com/Default.aspx?scid=kb;en-us;262054
Use the drop down list on the top to select the
Organization Unit or select the users individually.
After you select all the mailboxes you want to
extract, click 'Apply' to save your settings.
If you want to rebuild this list, click 'Reload
Users'. This tells Exchange Reporter to contact your
Active Directory, and load your user list into the
database again. Normally, this list will be loaded
from database instead of Active Directory to make
the process a lot faster.
Note:
-
The 'Error' column indicates the mailboxes that
could not be extracted in last extraction
-
'Scan Active Directory for new users during
extraction' allows Exchange Reporter to update
this list automatically according to your Active
Directory changes. However, if you have multiple
servers, you should disable this option to avoid
errors.
-
SSW Exchange Reporter can only extract mailboxes
that are located on the local exchange store. This
is why the 'Server' drop down has been disabled,
and only the users on your local exchange store
are selected by default.
-
Exchange Extraction service can run at background
and process the extraction according schedule. To
configure a schedule, select the 'Schedule' tab:
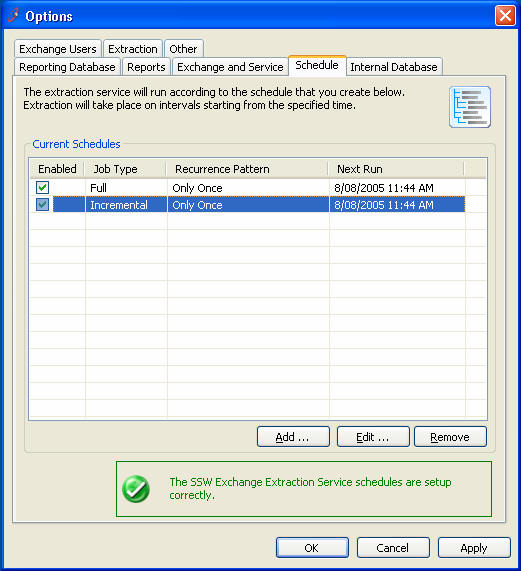
Figure: You can configure a schedule to run the
Extraction Service
To create a new schedule, click 'Add...' and
open the 'Schedule Properties' dialog:
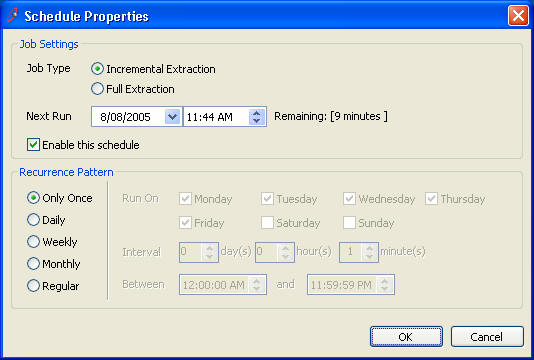
Figure: Create a new schedule
Note: At least one schedule is required to run the
Extraction service.
-
Extraction Options tab allows you to control the
extraction process and the data collected from your
Exchange Store.
Figure: Set options for the extraction process and
data collection
Note:
-
Enable Message Body Extraction: message body
extraction may be very time consuming because some
of the emails may have very long content. If you
don't want to report on individual message, you
may uncheck this option to make the extraction
faster.
-
Mail Folders: you can collect data from every mail
folder or specify the folders you want to collect
data from.
-
Public Folders: if you have a public folder in
your exchange server, enable this option to
collect data from your public folder and messages.
-
Minimum date to use during extraction: normally,
extraction will run on all messages in your
exchange store, if you just want the message after
a specific date, you can choose the date here, and
the extraction will skip any messages that are
older than that.
-
If you have followed all the instructions above, go
back to 'Extraction Manager' main window, the
'Start' 'Stop' and 'Process' buttons will be
enabled. Now, you are ready to run extraction to
collect data.
Figure: Click 'Process' to collect data manually
-
To run Extraction Windows Service, you can either
click on the 'Start' button on 'Extraction Manager'
main form or start it from your service manager. If
the service starts successfully, you will have the
following entry in your 'Application Event Log'.

Figure: If the Extraction Service started
correctly, you will have an entry you in your
Application Event Log
-
Figure: Set options for audio feedback and email
-
Email Domain is your default email domain name.
Exchange Reporter uses this information to
classify email addresses as internal or external
in some of the reports.
Example: if you have an email address like
FirstnameSurname@s*w.com.au, then enter
'ssw.com.au' as your email domain.