This product is no longer supported.

Connect Office XP and your database with SSW Time
PRO! Smart Tags
Office XP offers Smart Tag functionality. Smart Tags
recognise text in your Word/Excel or Outlook (with
Word as your editor) and then offer a range of
possible actions and commands. With SSW Time PRO!
Smart Tags you can access your corporate database from
Microsoft Office, and send letters, faxes or emails
based on existing templates.
This user guide is designed at helping you getting
started and also provide a few quick tutorials on how
to use Time PRO! Smart Tags.
|
SSW Time PRO! Smart Tags
1.
Prerequisites
2.
Getting Started
3.
Check installation
4.
Configuring Time PRO! Smart Tags
5.
Inserting Templates
6.
Inserting Contact Data
7.
Inserting Templates with Contact Data (Mail
Merge)
|
Prerequisites
Getting Started
First you will need to install Time PRO! Smart Tags.
Before you do this, make sure that all office
applications are closed.
Once you have installed the application, open up
Microsoft Word and the Time PRO! Smart Tags screen will
be displayed.
Check Installation
Open Word – Tools - Autocorrect.
Click on the 'Smart Tags' tab. If it is not there, then
the instance of Word many not have been closed. Restart
your PC.
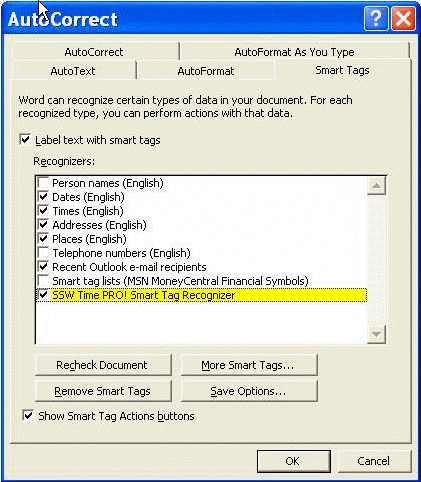
|
|
Figure: Make sure the Smart Tag recogniser is
"On"
|
Configuring Time PRO! Smart Tags
Now that we have installed Time PRO! Smart Tags, it is
time to configure the application. Type 'SSWDiary' in
Microsoft Word and hover the mouse over the word and
select the 'Options...' menu item.
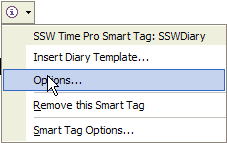
Figure: Configure the application
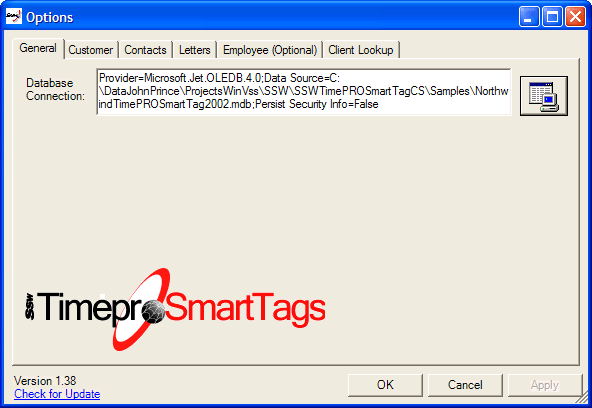
Figure: Click the UDL button and specify the
connection to your database
At this point, most of the fields on the Customer,
Contacts and Letters will be filled in if you are using
the sample database or if your database structure is
similar to Northwind. Otherwise you will need to specify
which field in your tables gets mapped to each field
used by Time PRO! Smart Tags.
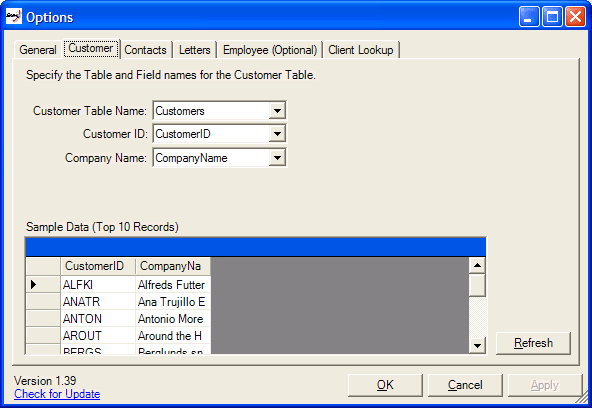
Figure: specify which field in your tables gets mapped
to each field (this should be done automatically)
Here we have configured the Customer table to be
'Customers'. The Customer ID field has been mapped to
'CustomerID' and the Company Name field has been mapped
to 'CompanyName'. Now proceed to go through each Tab and
make sure you have specified the tables and fields.
On the Employee tab, you can select a Employee name
(Recommended as this Employee name will be used with the
Templates).
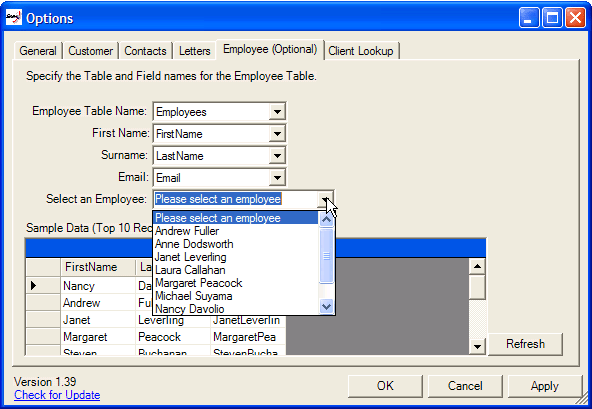
Figure: On the Employee tab, you can select a Employee
name (Recommended)
Once you have configured everything click on the OK
button to store the settings.
Inserting Templates
Type 'SSWDiary' and hover over the Smart Tag (purple
dotted line).

Figure: Select the 'Insert Diary Template...' option.
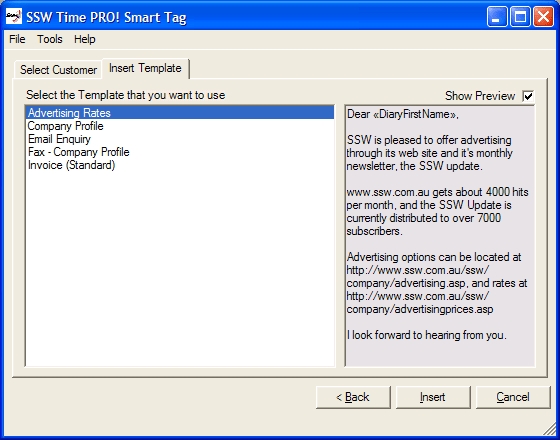
Figure: Select the template you want to insert
Click the 'Insert' button. If you had selected the
Company Profile template in the sample database you
would get the following letter inserted into your Word
document.
|
Dear «FirstName»
Good talking to you. SSW specialises in
delivering efficient, cost effective solutions
for your database or Internet requirements. Our
ability to integrate these functions together
will help «CoName»
streamline operations, while making the most of
opportunities presented by the ''on-line''
world.
Please find SSW's Company Profile at
http://www.ssw.com.au/ssw/Company/AboutUs.aspx
If you would like to discuss any aspect of our
services, please do not hesitate to contact me.
Many thanks
<
>
«EmpEmail»
|
Congratulations! Now you know an easy way to get to your
standard letters.
Inserting Contact Data
Inserting a template is pretty good, but the true power
of SSW Time PRO! Smart Tags is its ability to recognize
contacts from your database by specifying either:
- Customer ID
- Company Name
-
Contact Name (either First Name, Surname or both)
So in this tutorial we are going to retrieve customer
information on the Customer ID BOLID.
Type '<BOLID>'.
Note: you will need to enclose 'BOLID' in '<>' for
Time PRO! Smart Tags to recognize the word.
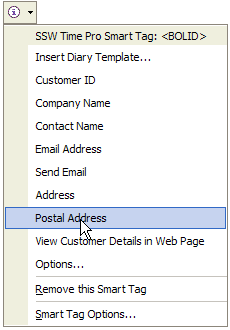
Figure: Hover over the Smart Tag (purple dotted line)
and select the 'Postal Address' option
And you will get this:
C/ Araquil, 67
Madrid
28023
Spain
Let's try something else.
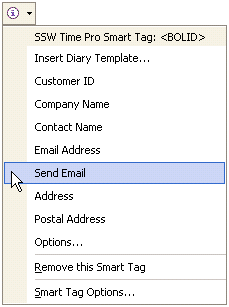
Figure: Select the 'Send Email' option.
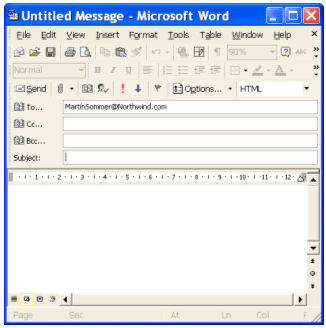
Figure: Your email Client will open with the Contact's
email address in the 'TO' property.
Congratulations! Now you know an easy way to get to any
information about a client.
Inserting Templates with Contact Data (Mail Merge)
Now we are going to show a combination of the first two
tutorials.
Type '<BOLID>' and hover over the smart tag (the
purple dotted line).
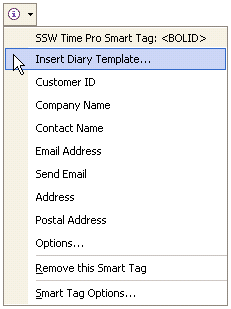
Figure: Select the 'Insert Diary Template...' option
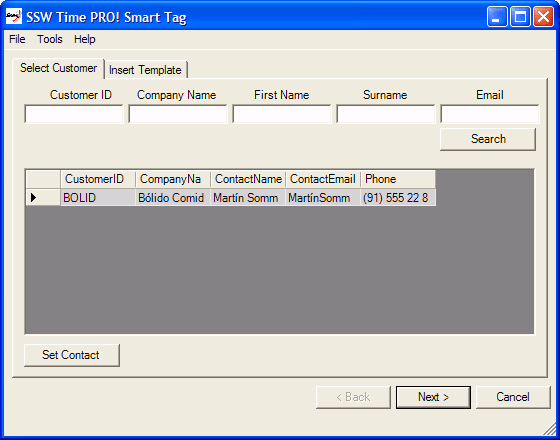
Figure: This will display the Select Customer screen
with the only contact for Customer ID 'BOLID' selected
Click Next to continue.
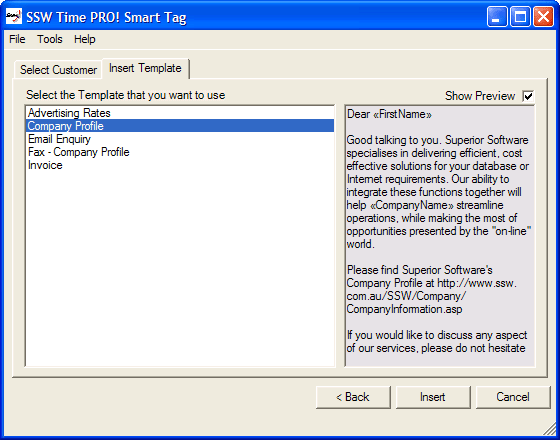
Figure: Select the Company Profile template then click
Insert to insert the text
|
Dear MartÃn Sommer
Good talking to you. SSW specialises in
delivering efficient, cost effective solutions
for your database or Internet requirements. Our
ability to integrate these functions together
will help Bolido Comidas preparadas streamline
operations, while making the most of
opportunities presented by the ''on-line''
world.
Please find SSW's Company Profile at
http://www.ssw.com.au/ssw/Company/AboutUs.aspx
If you would like to discuss any aspect of our
services, please do not hesitate to contact me.
Many thanks
Nancy Davolio
NancyDavolio@Northw*nd.com (Note: Please change
"*" in "w*n" to a "i")
|
Congratulations, now you know an easy way to enter your
standard letters, complete with mail merge data.